Mailtrap DMARC, DKIM, SPF and Domain Authentication
Check your domain for DMARC, DKIM, SPF and MX records. Get a free report.
Guide to Mailtrap DMARC, DKIM, SPF DNS Records and Sender Domain Authentication
The leading cause of your emails ending up in customers' spam folders is the lack of sender verification. Verifying the email domain requires you to generate DNS records from a trustworthy email marketing service like Mailtrap. Then you can add these records to your domain provider to authenticate the domain.
Authenticating sender domains may sound like a technical task but not when DMARCDKIM.com is here to guide you. Follow this step-by-step guide to verify the sending email domain with Mailtrap.
Configure DNS Records in Mailtrap:
-
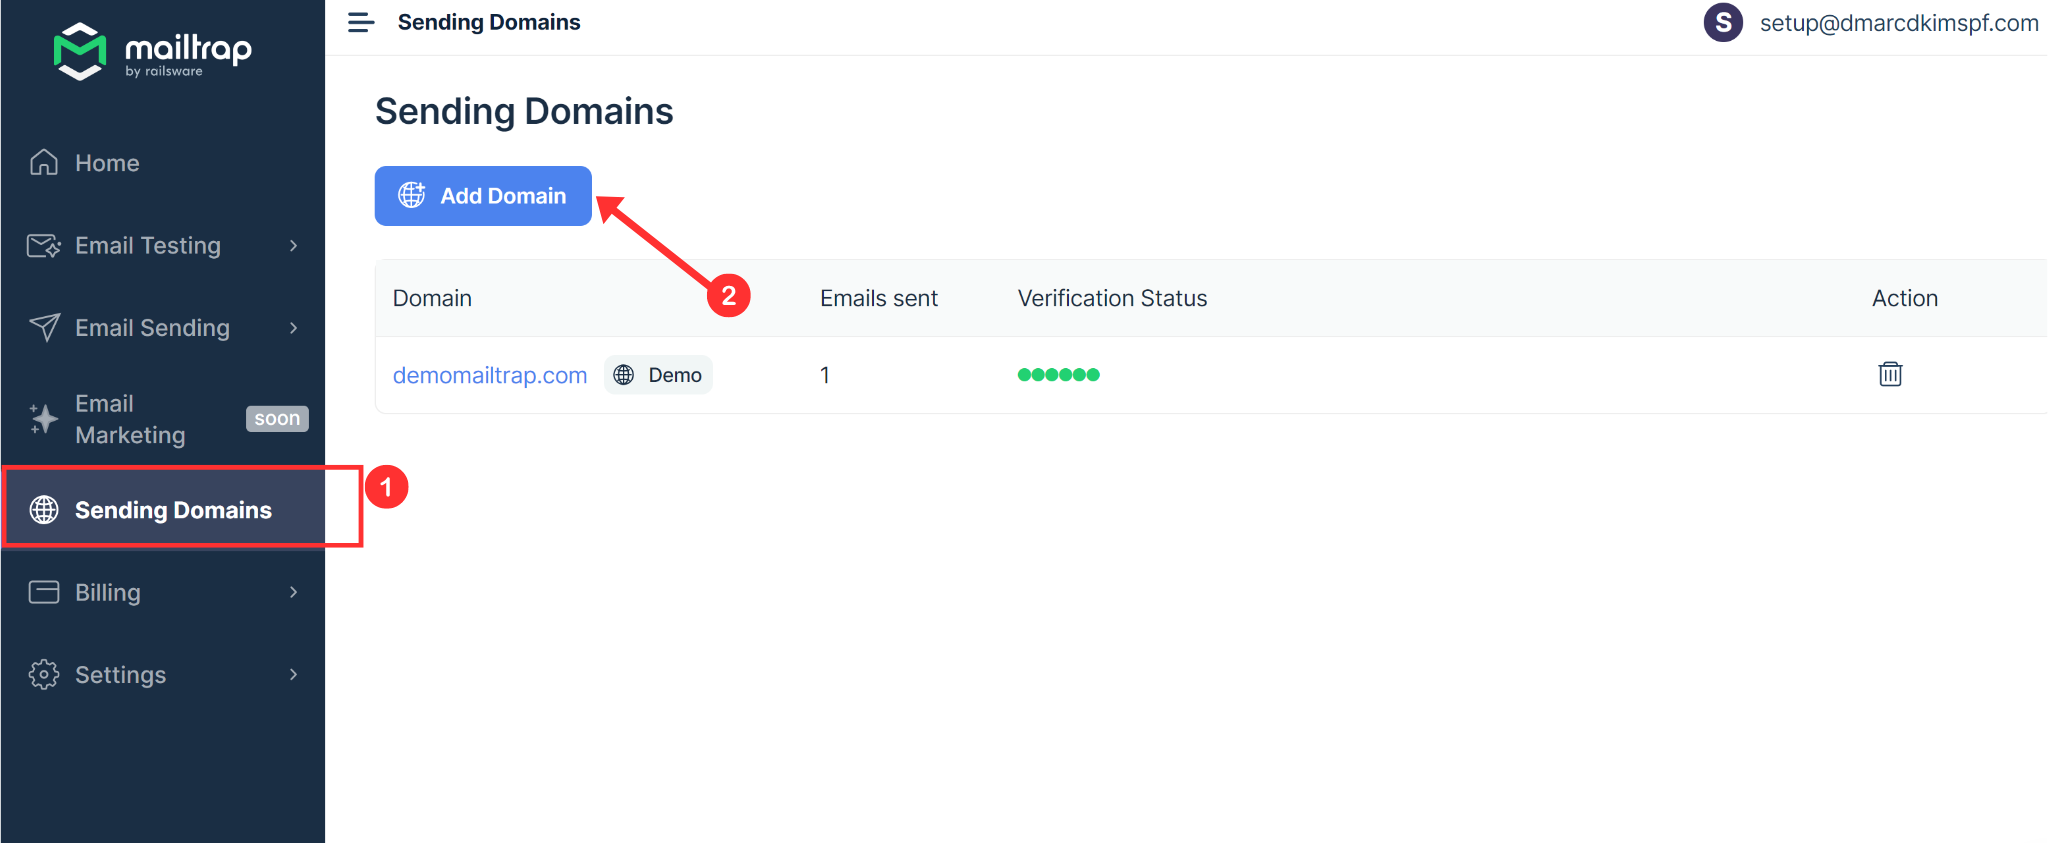
On the Mailtrap dashboard, go to Sending Domains and click Add Domain.
-
Write down your domain name, and click Add.
-
Next, you'll see Domain verification, SPF, DKIM, DMARC, and Tracking Domain records on your screen.
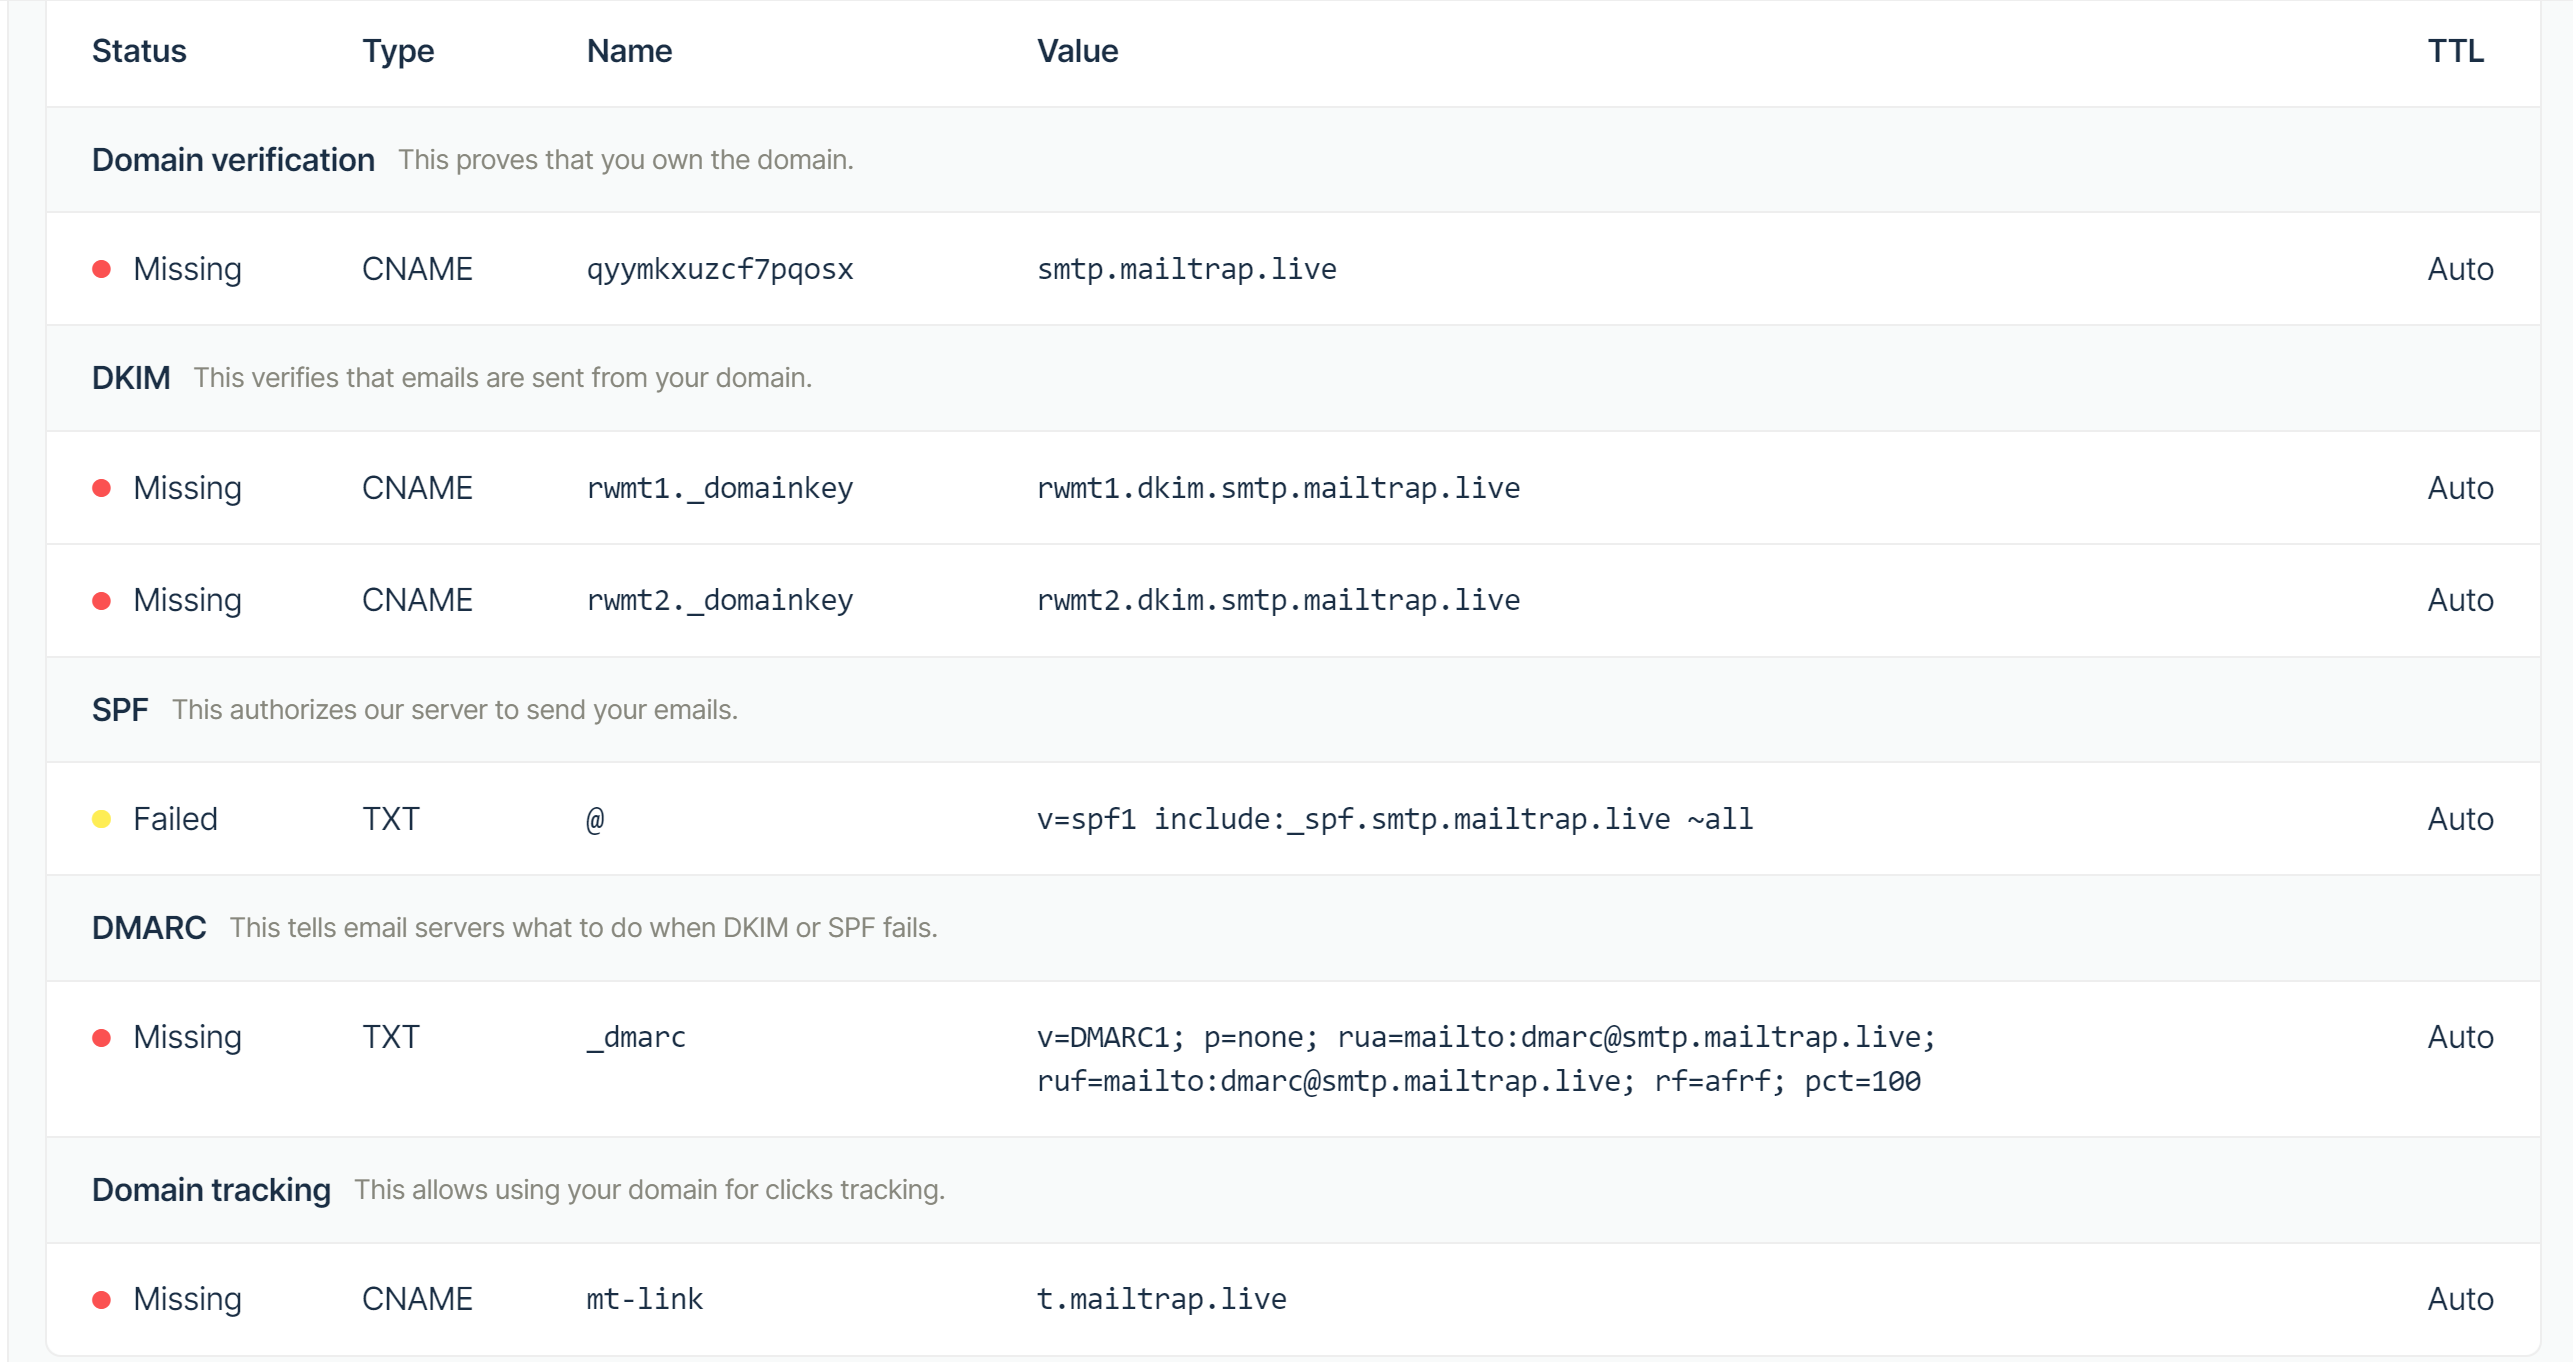
Add all these records to your DNS provider one by one. We are using Cloudflare for this tutorial but you can add these records to any DNS provider you use.
Open DNS Dashboard:
-
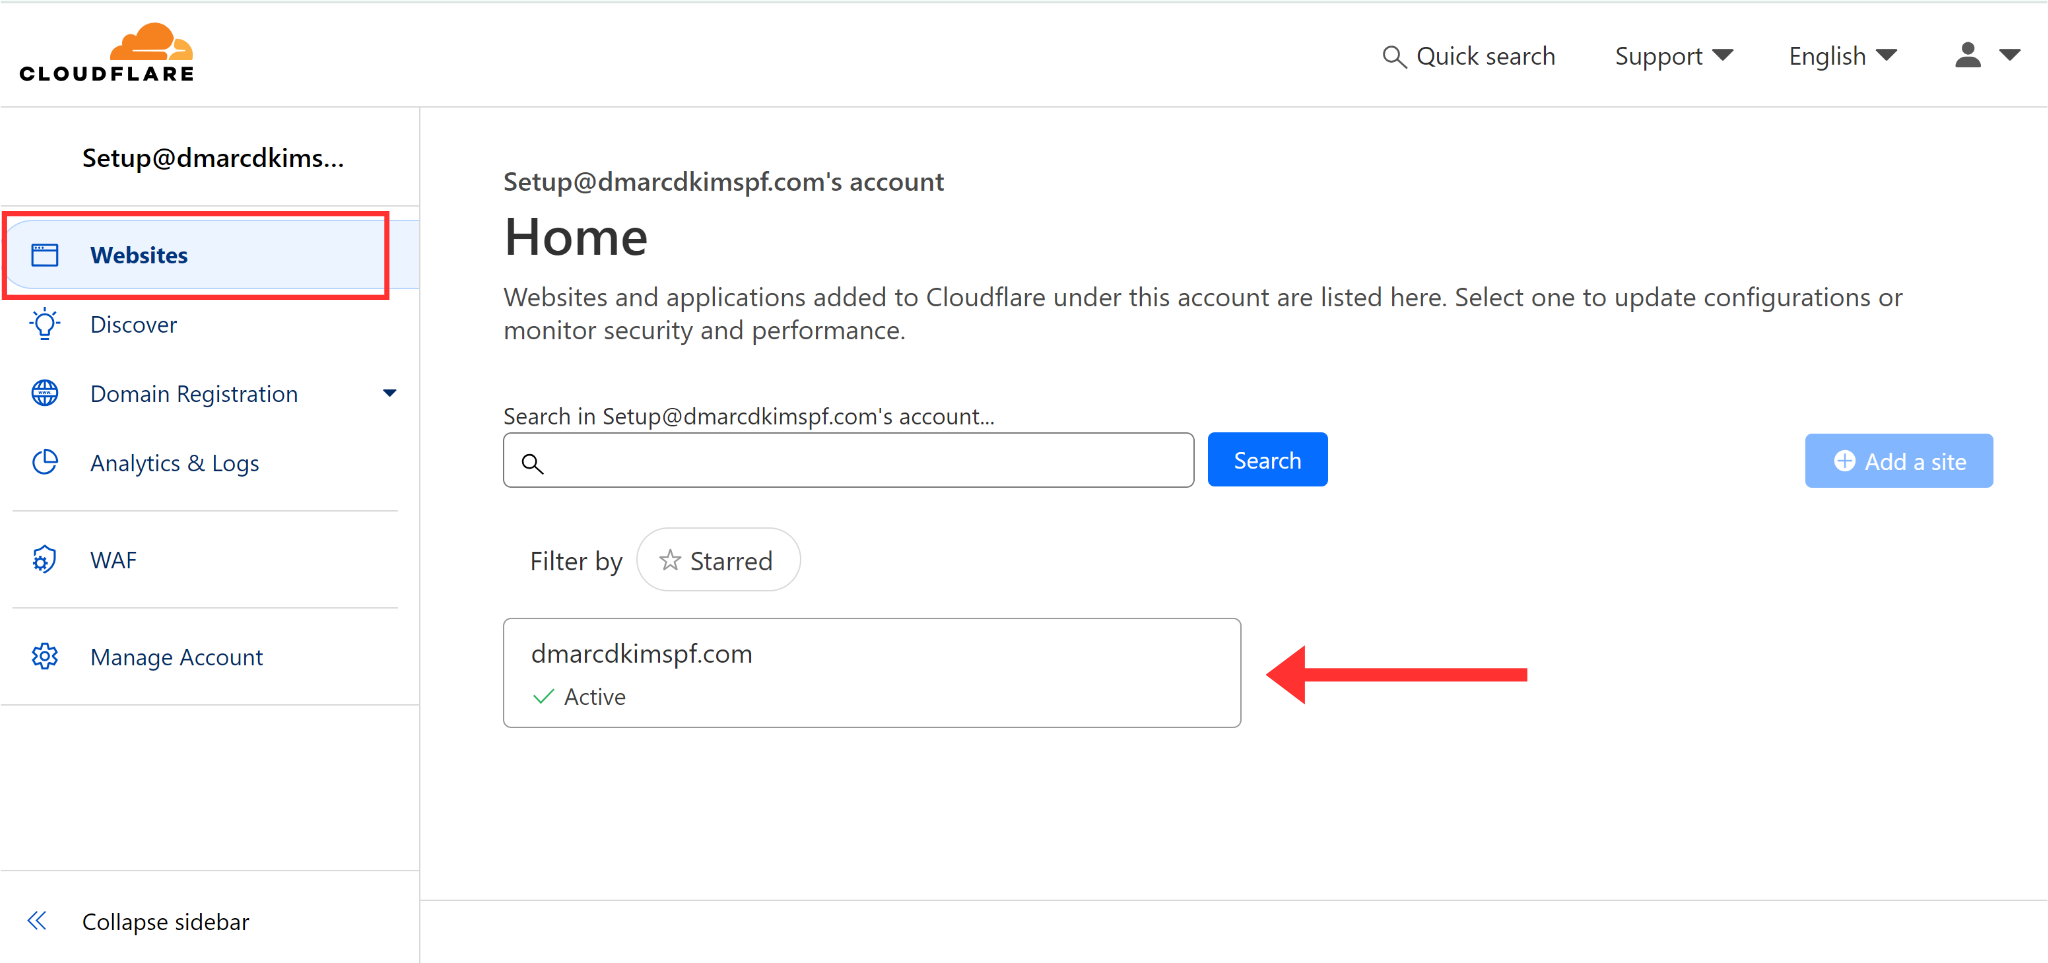
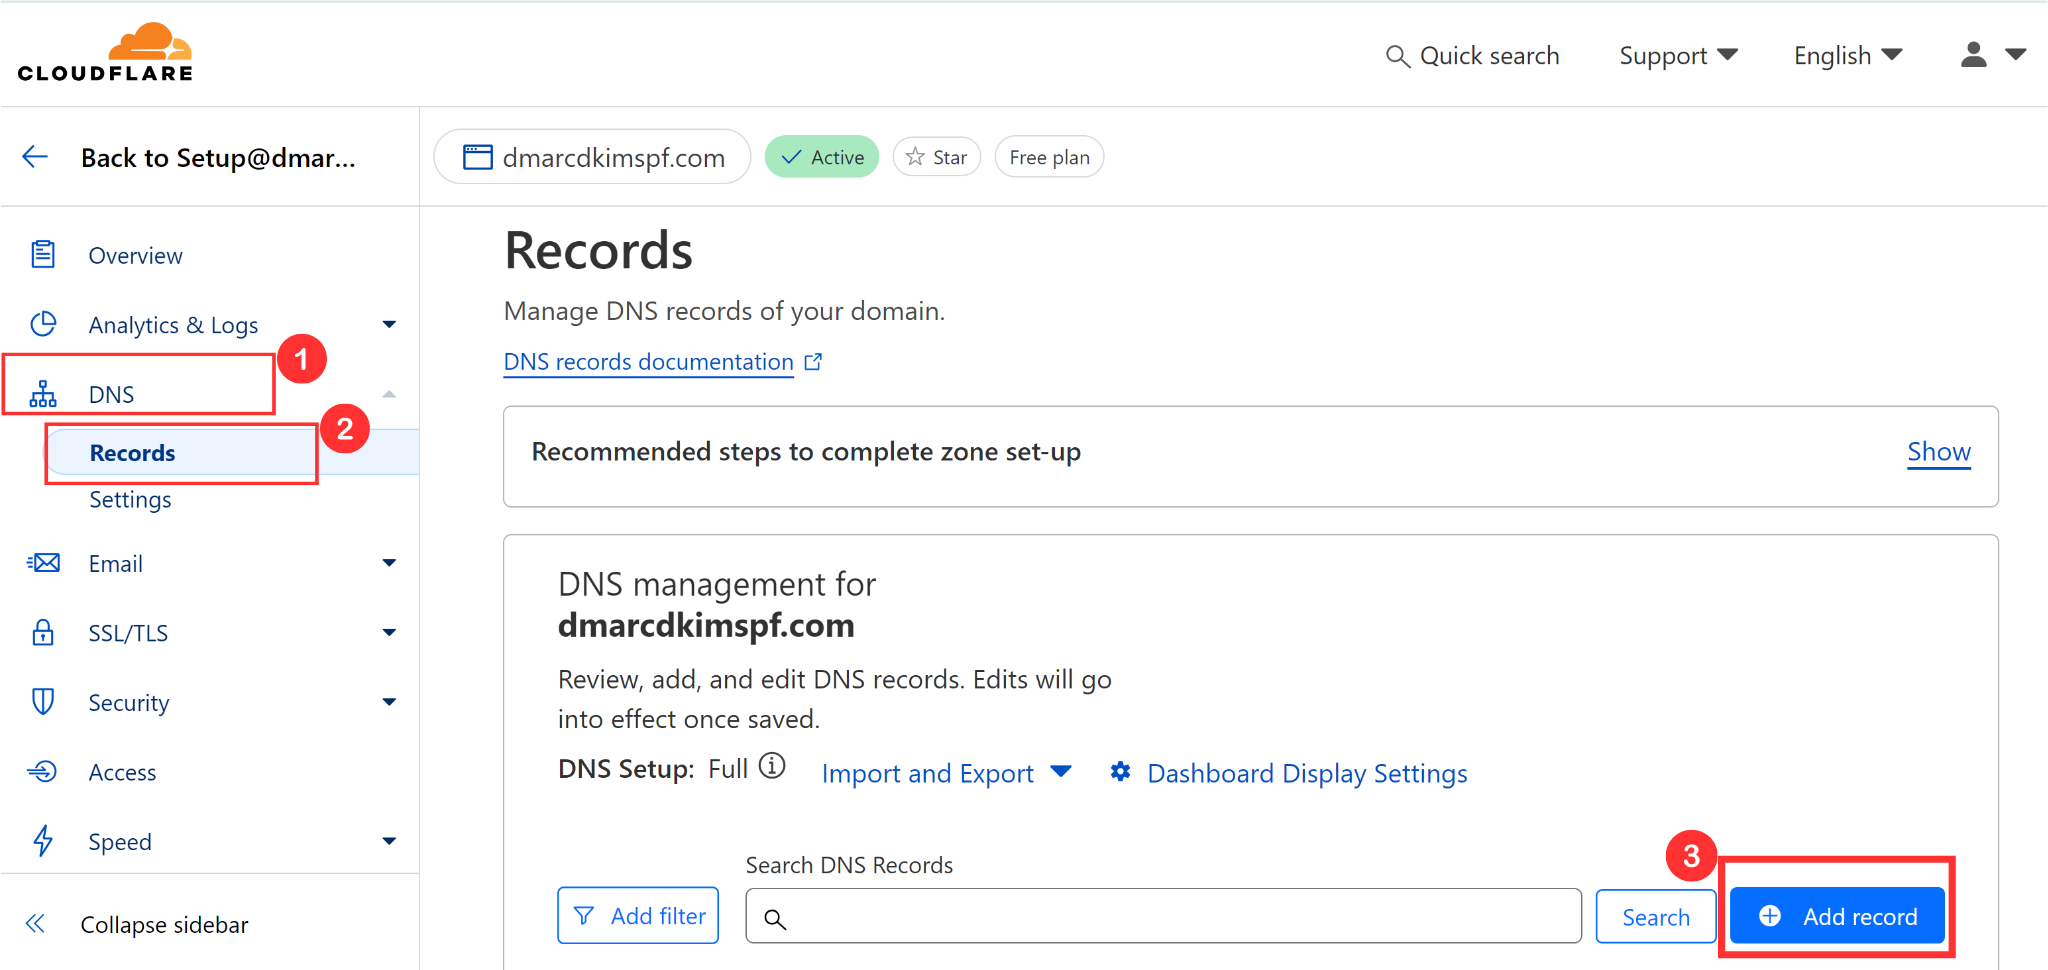
Login to your DNS provider (Cloudflare) and click your Website name.
-
Open the DNS tab and go to Records. Here, click Add Record to add new records.
Add Mailtrap SPF Record:
You can add only one SPF record to your DNS dashboard. Having multiple SPFs can cause conflicts, resulting in one of them to stop working.
If you have an existing SPF record in your DNS dashboard, merge it with the Mailtrap SPF record. You can do this by utilizing the SPF Merge Tool.
Open the SPF Merge Tool, write your domain name, and click Submit.
-
The tool detects and merges the existing SPF record with the Mailtrap SPF record.
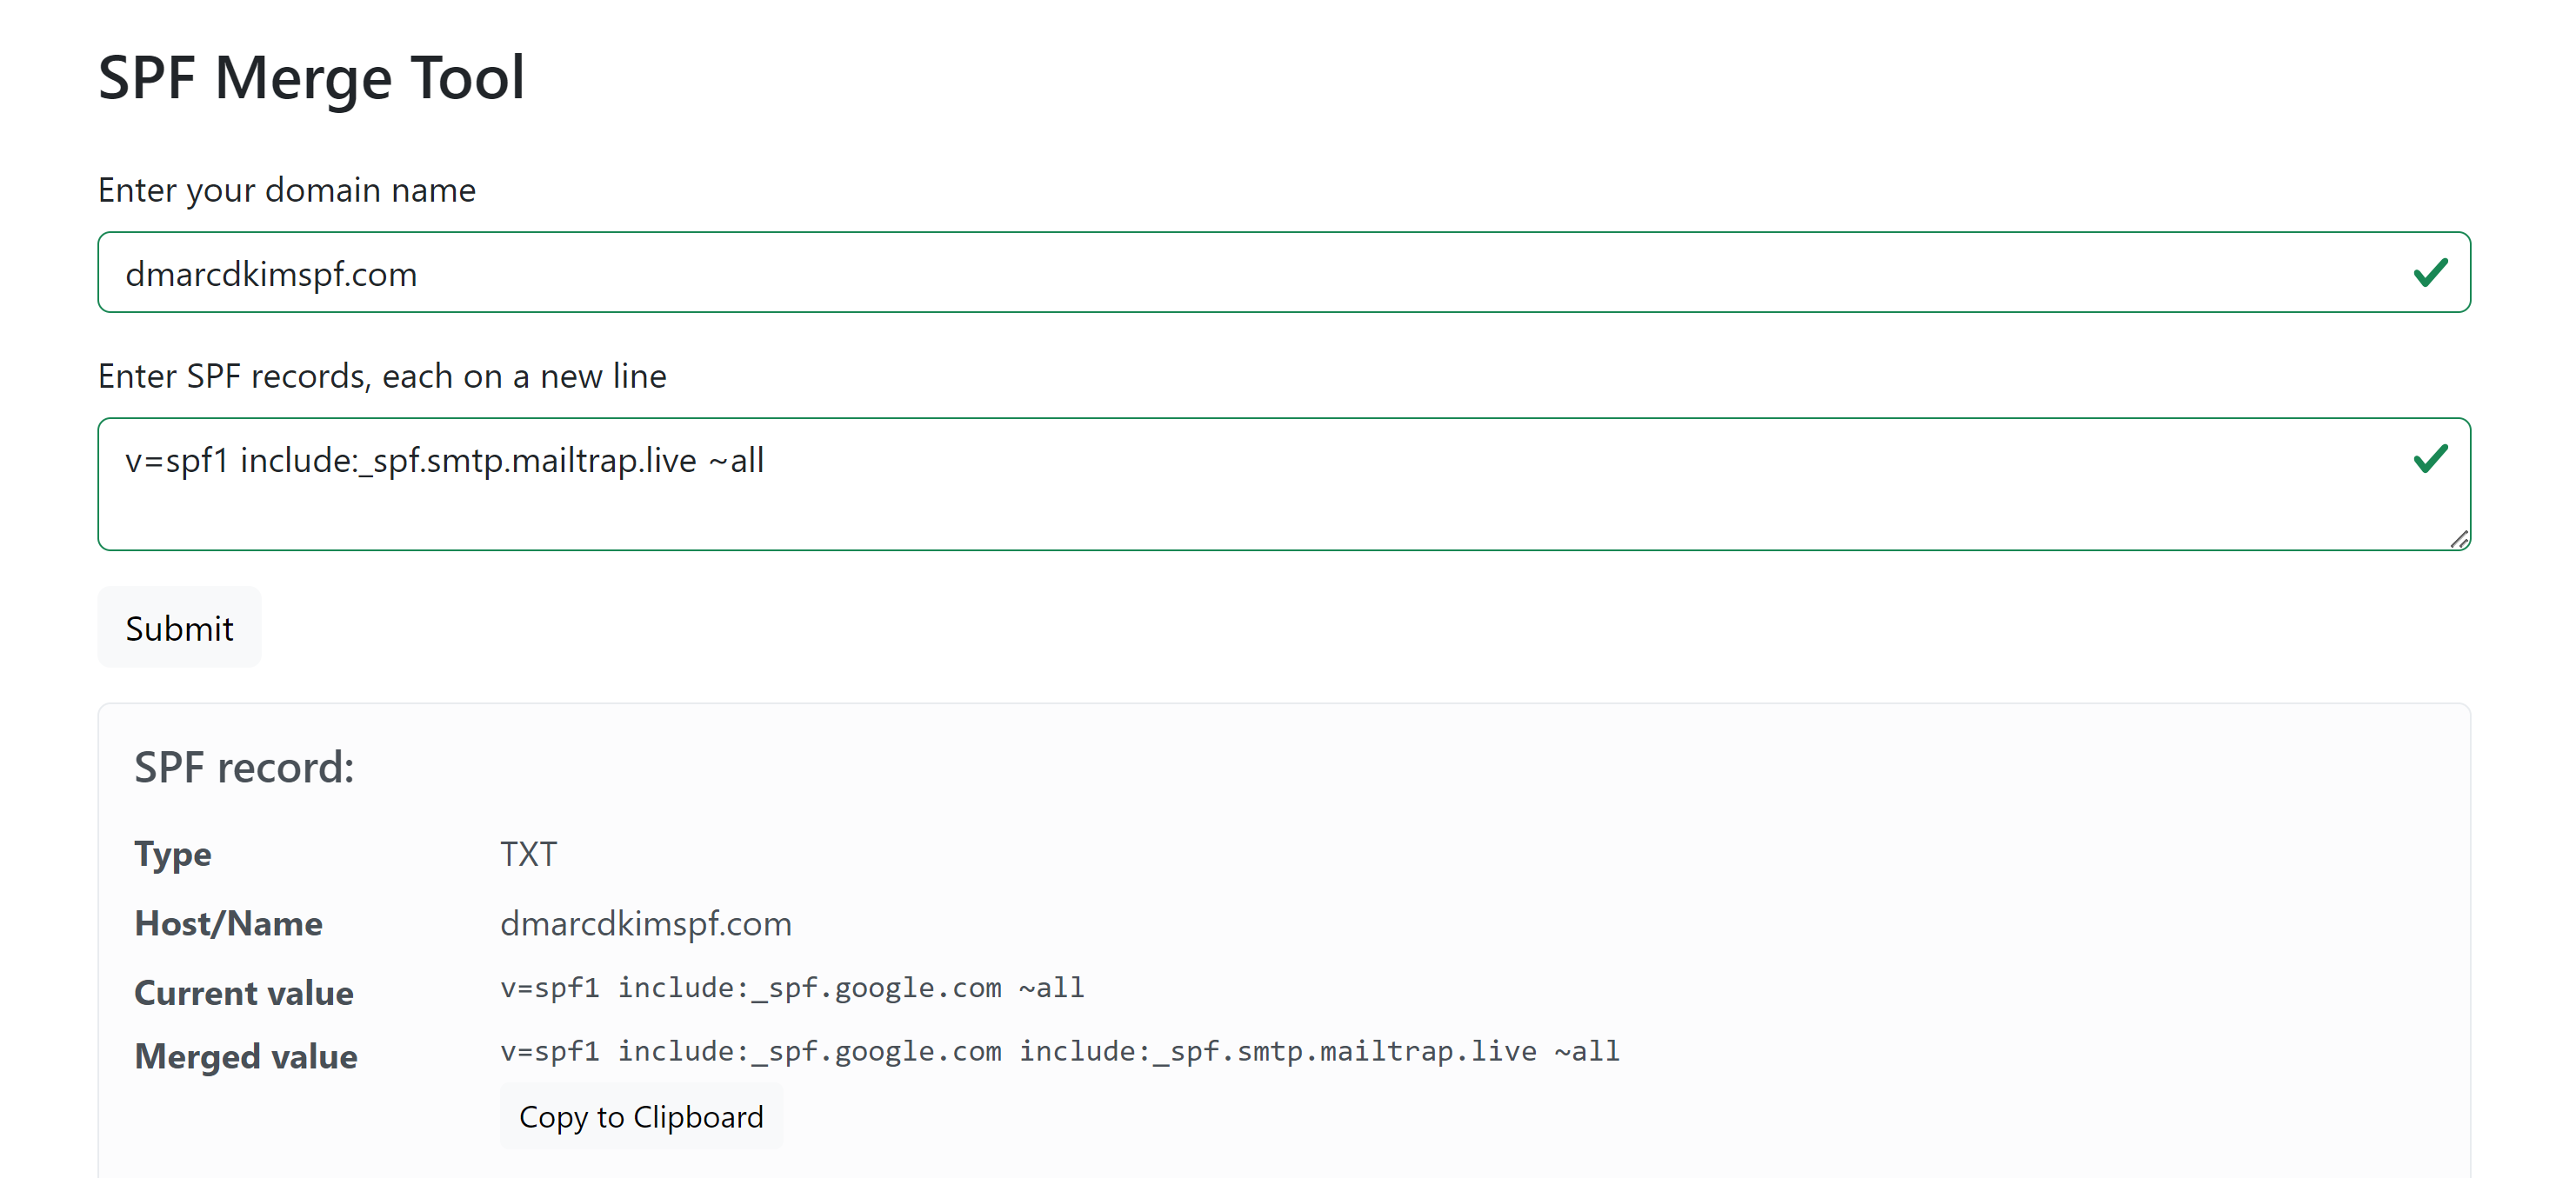
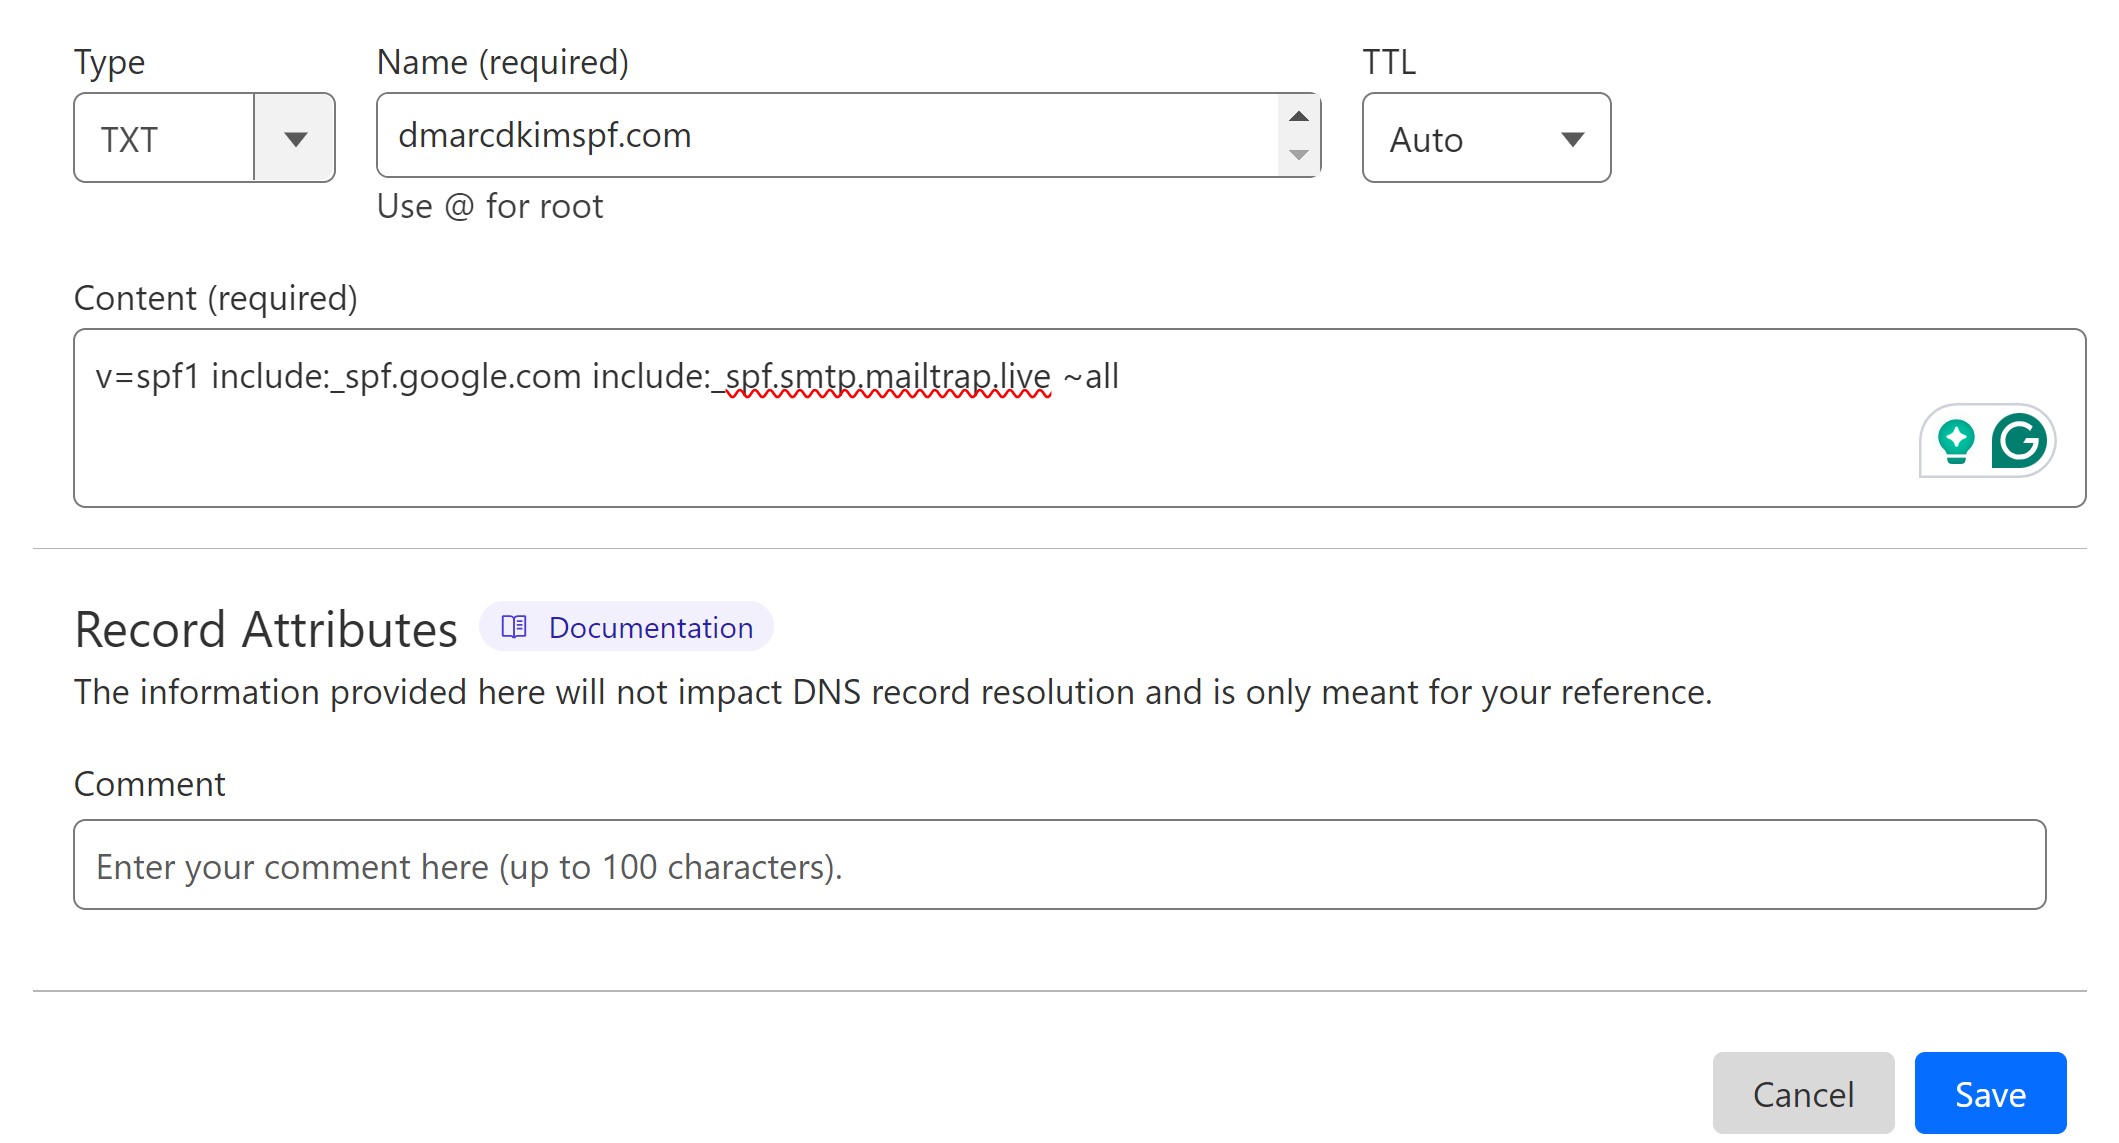
Copy the record name and the merged value, and add them to your DNS provider.
-
Select type TXT and click Save to add the record.
Add Mailtrap DKIM, Domain Verification, and Tracking Records:
DKIM (DomainKeys Identified Mail) adds a digital signature to the emails, ensuring their authenticity to mailbox providers like Google and Yahoo.
Domain Verification record proves you are the owner of this sending domain.
Mailtrap Tracking Record authorizes your domain to keep track of email clicks, opens, and unsubscribers.
In the DNS dashboard, select the type "CNAME."
Copy the record name and add it to the Name field in the DNS provider.
Copy the record value and paste it into the Target field in your DNS dashboard.
-
Finally, click Save to add the record.
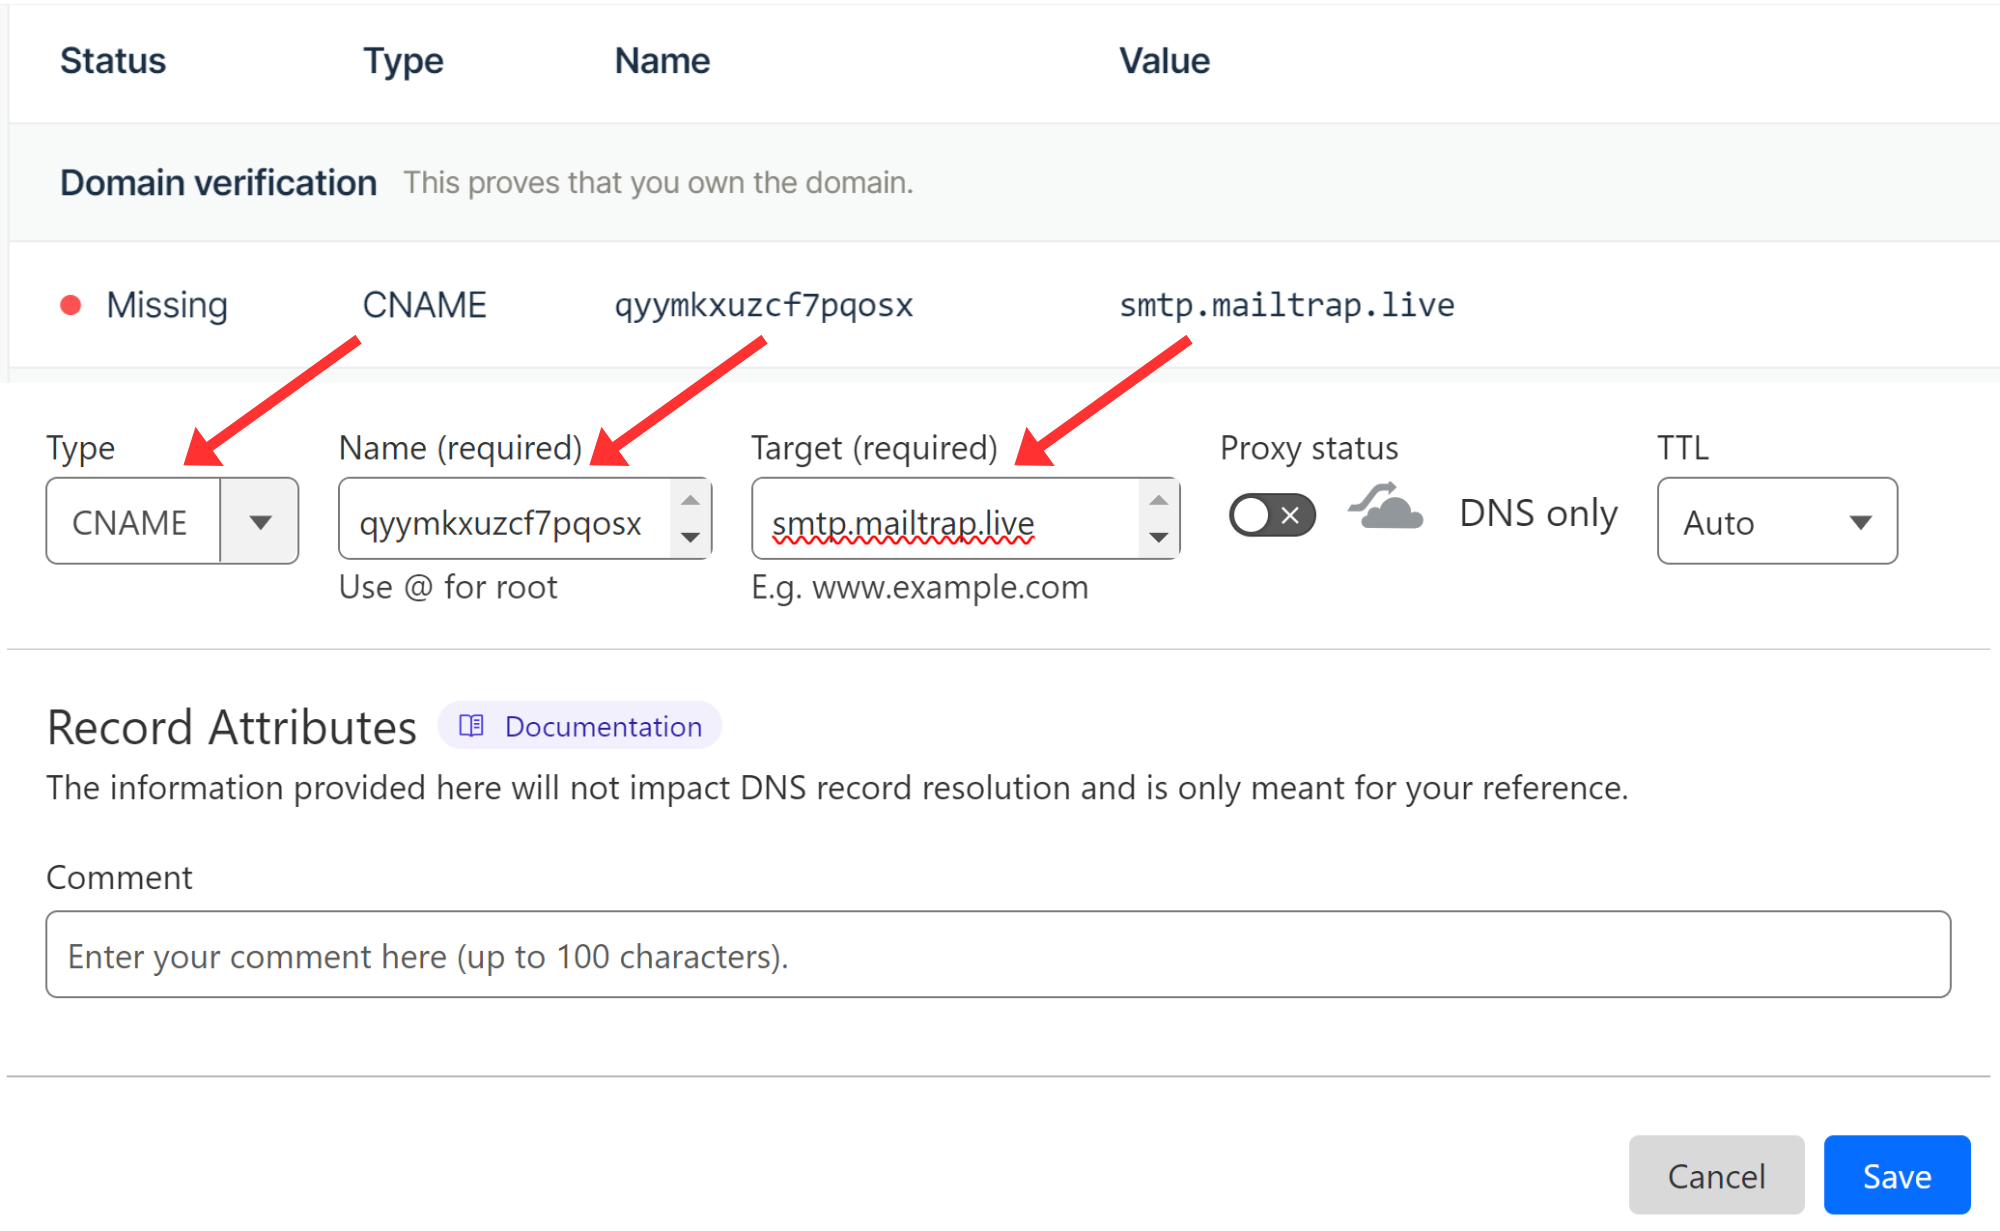
Repeat the same process for each of the records mentioned above.
Add Mailtrap DMARC Record:
With the help of DMARC records, the domain owners can have more control over their emails. This value also decides what happens to the unauthorized and invalid senders.
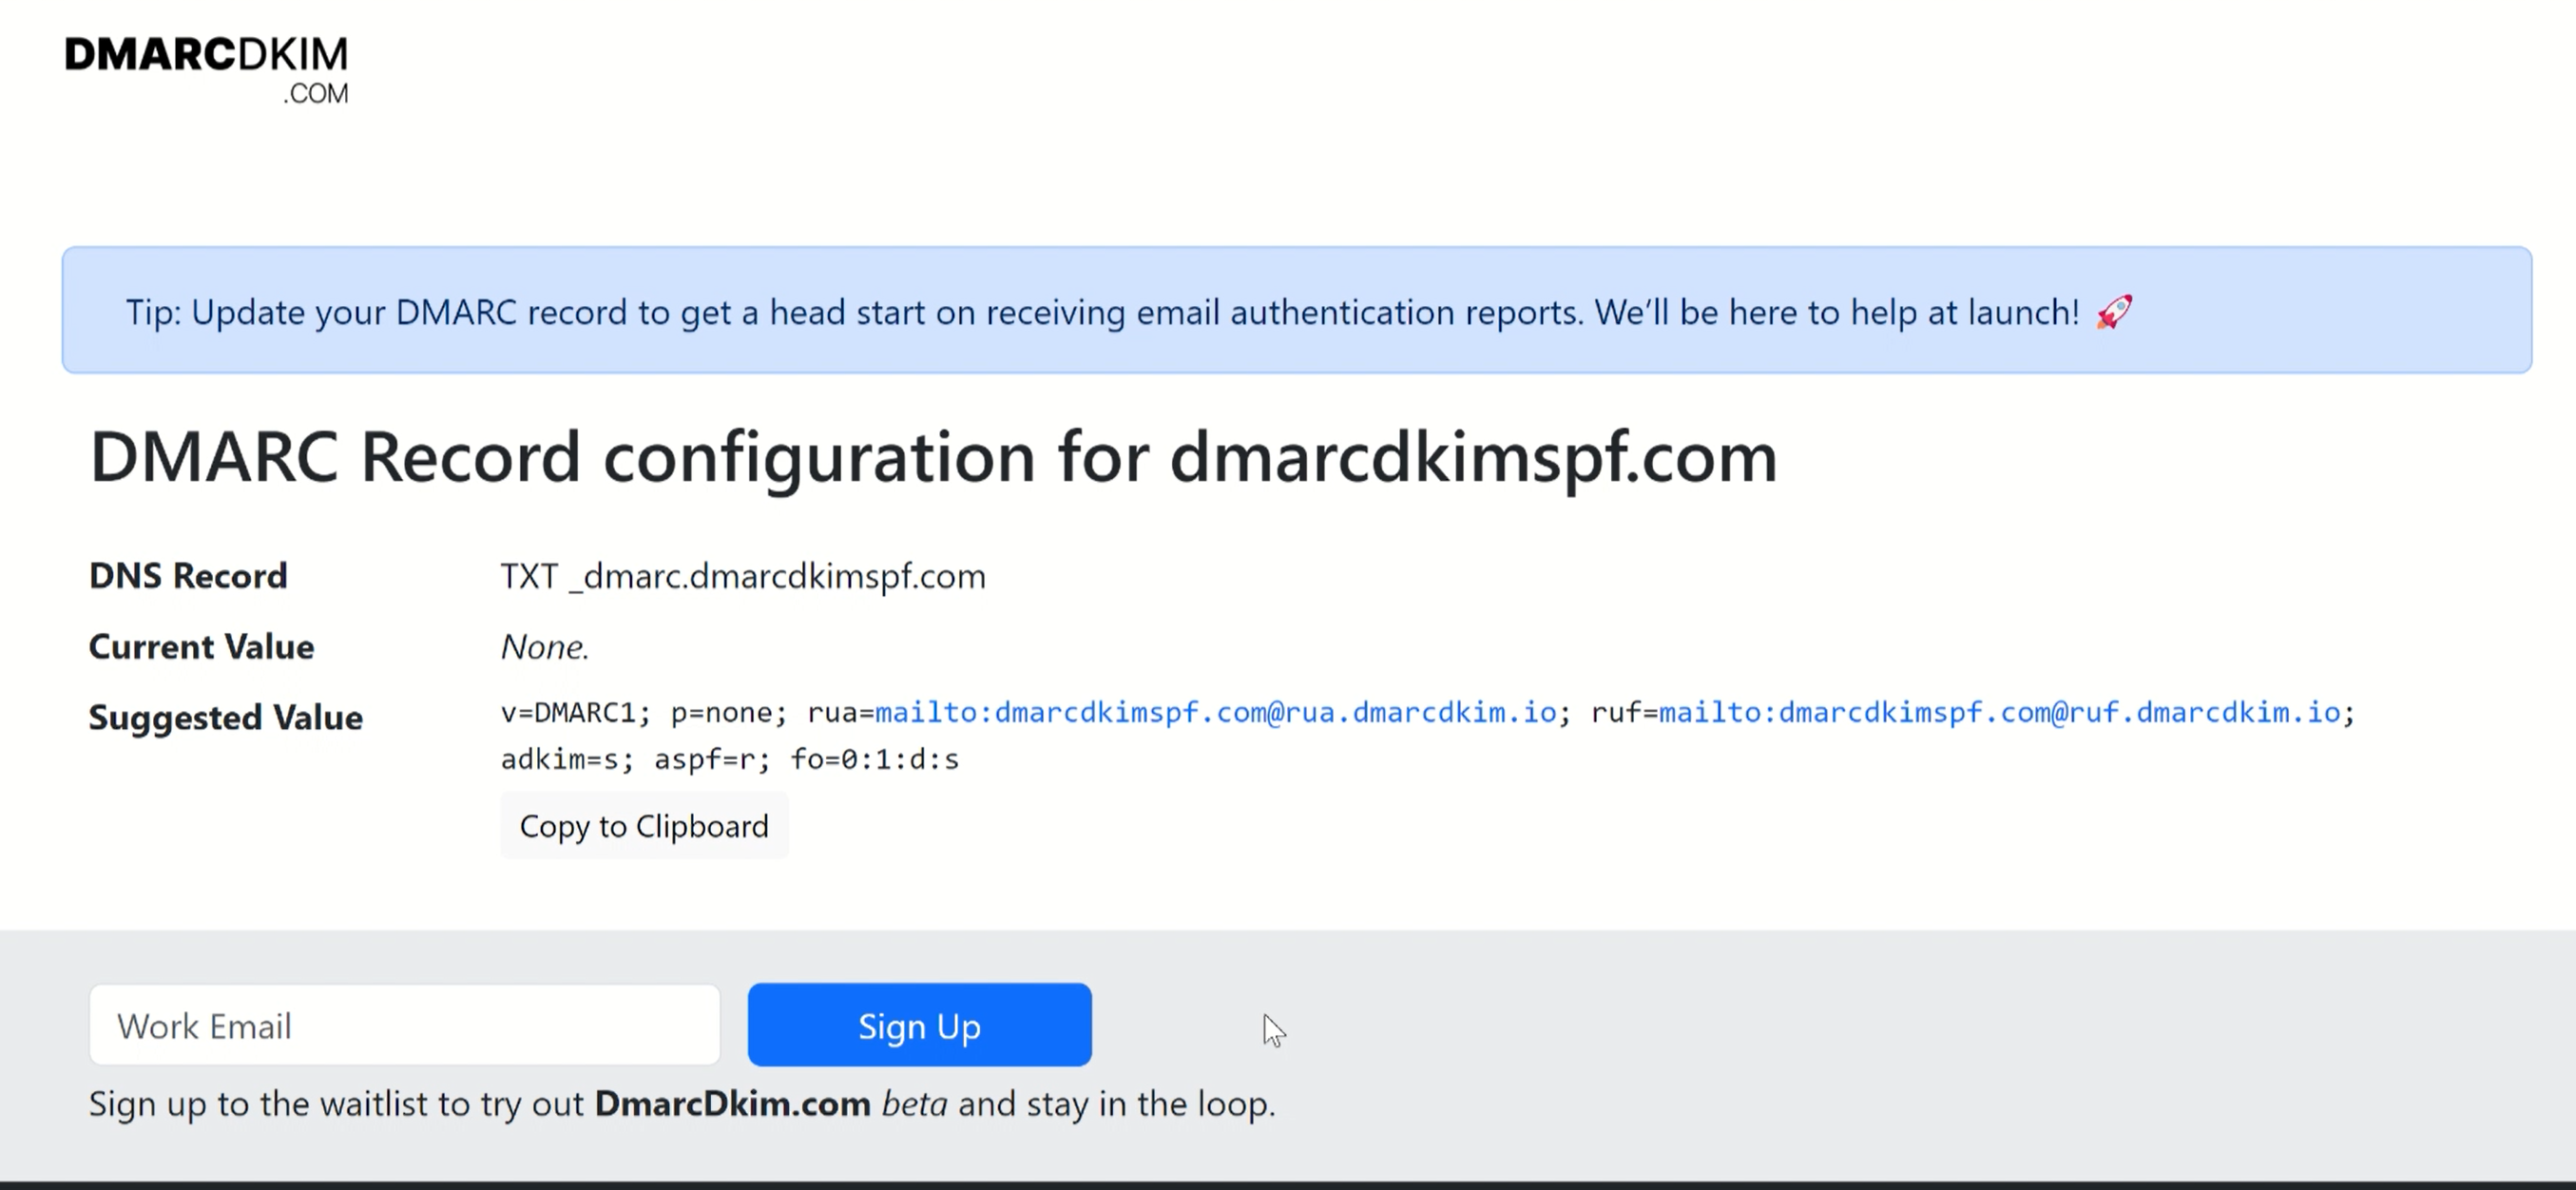
You can add the Mailtrap DMARC value or generate a custom DMARC value by using a Domain Check Tool. This tool also provides you actionable insights about DMARC reports so you can implement a strict policy over time.
Go to the DMARC Check Tool, write your domain name, and click Check.
-
The tool gives you the DNS Record (record name) and the suggested value.
In the DNS dashboard, click Add Record and select type TXT.
Copy the DNS Record and add it to the Name field in the DNS dashboard.
Copy the Suggested value and paste it into the Content field in the DNS provider.
Verify Mailtrap DNS Records:
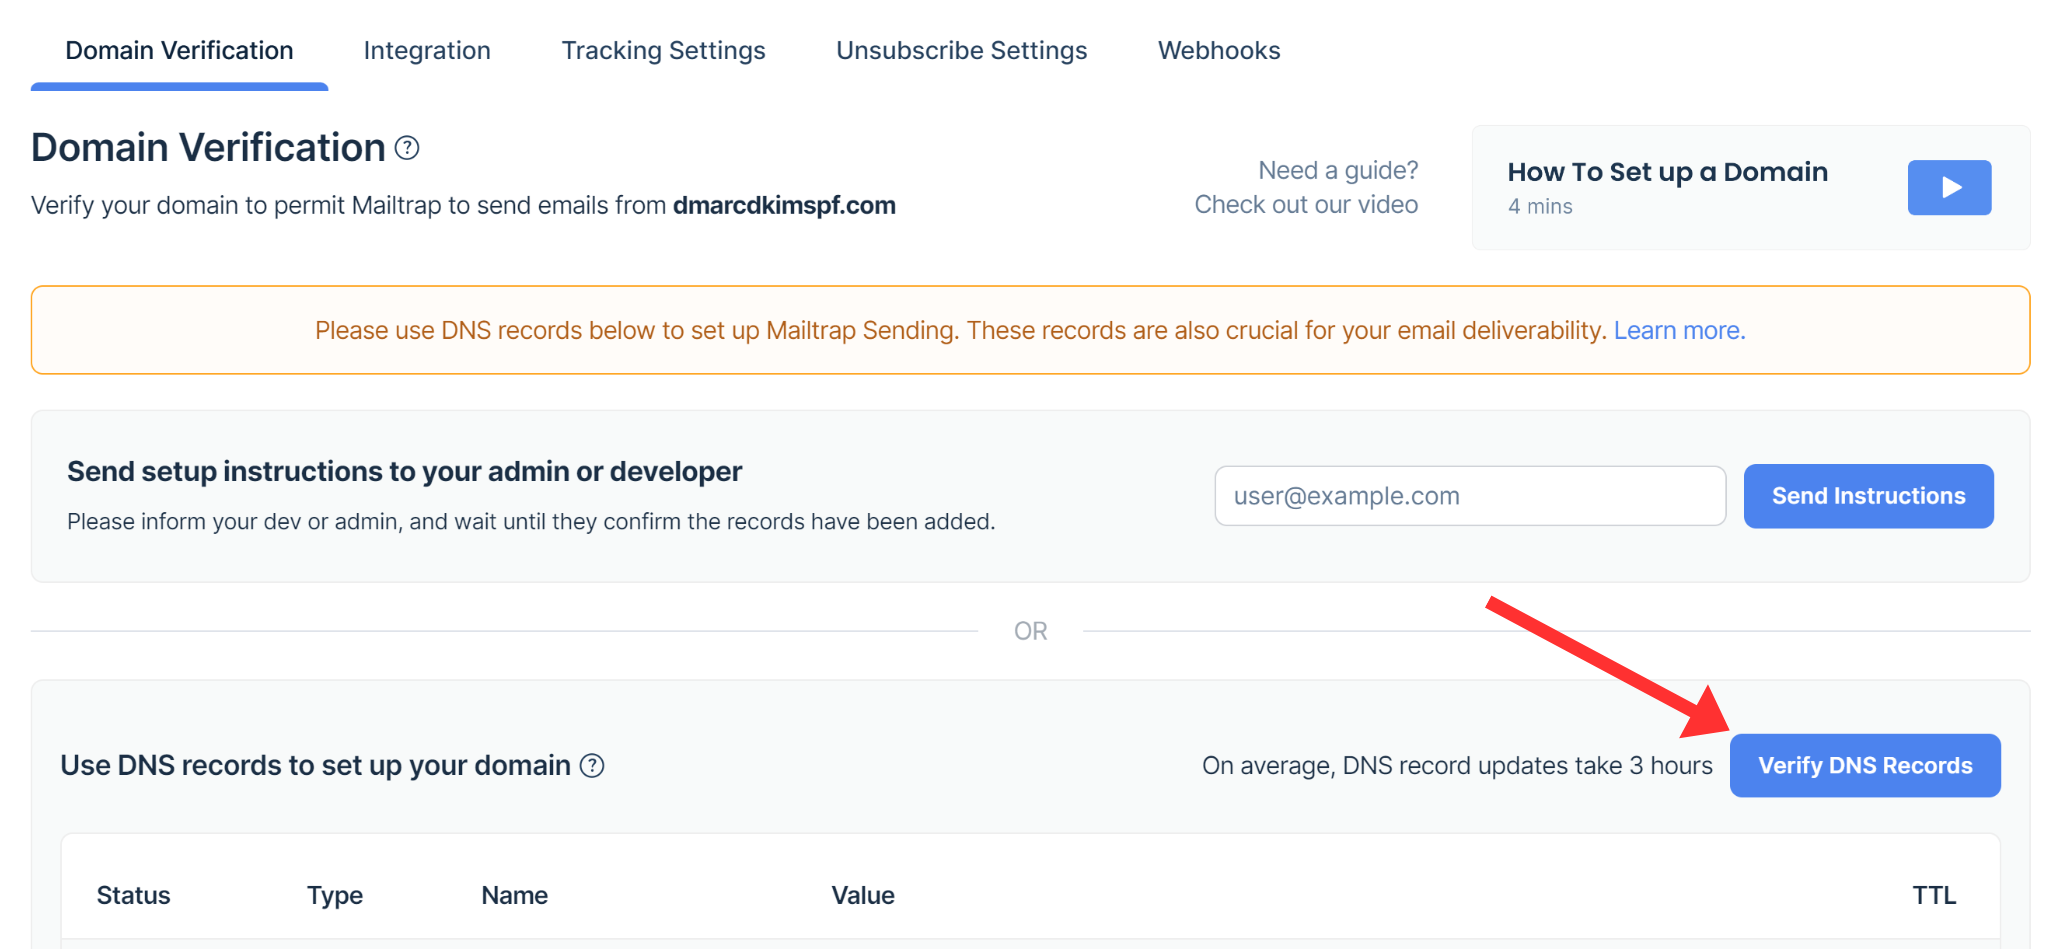
Once all records are added, return to the DNS records page on Mailtrap and click Verify DNS Records.
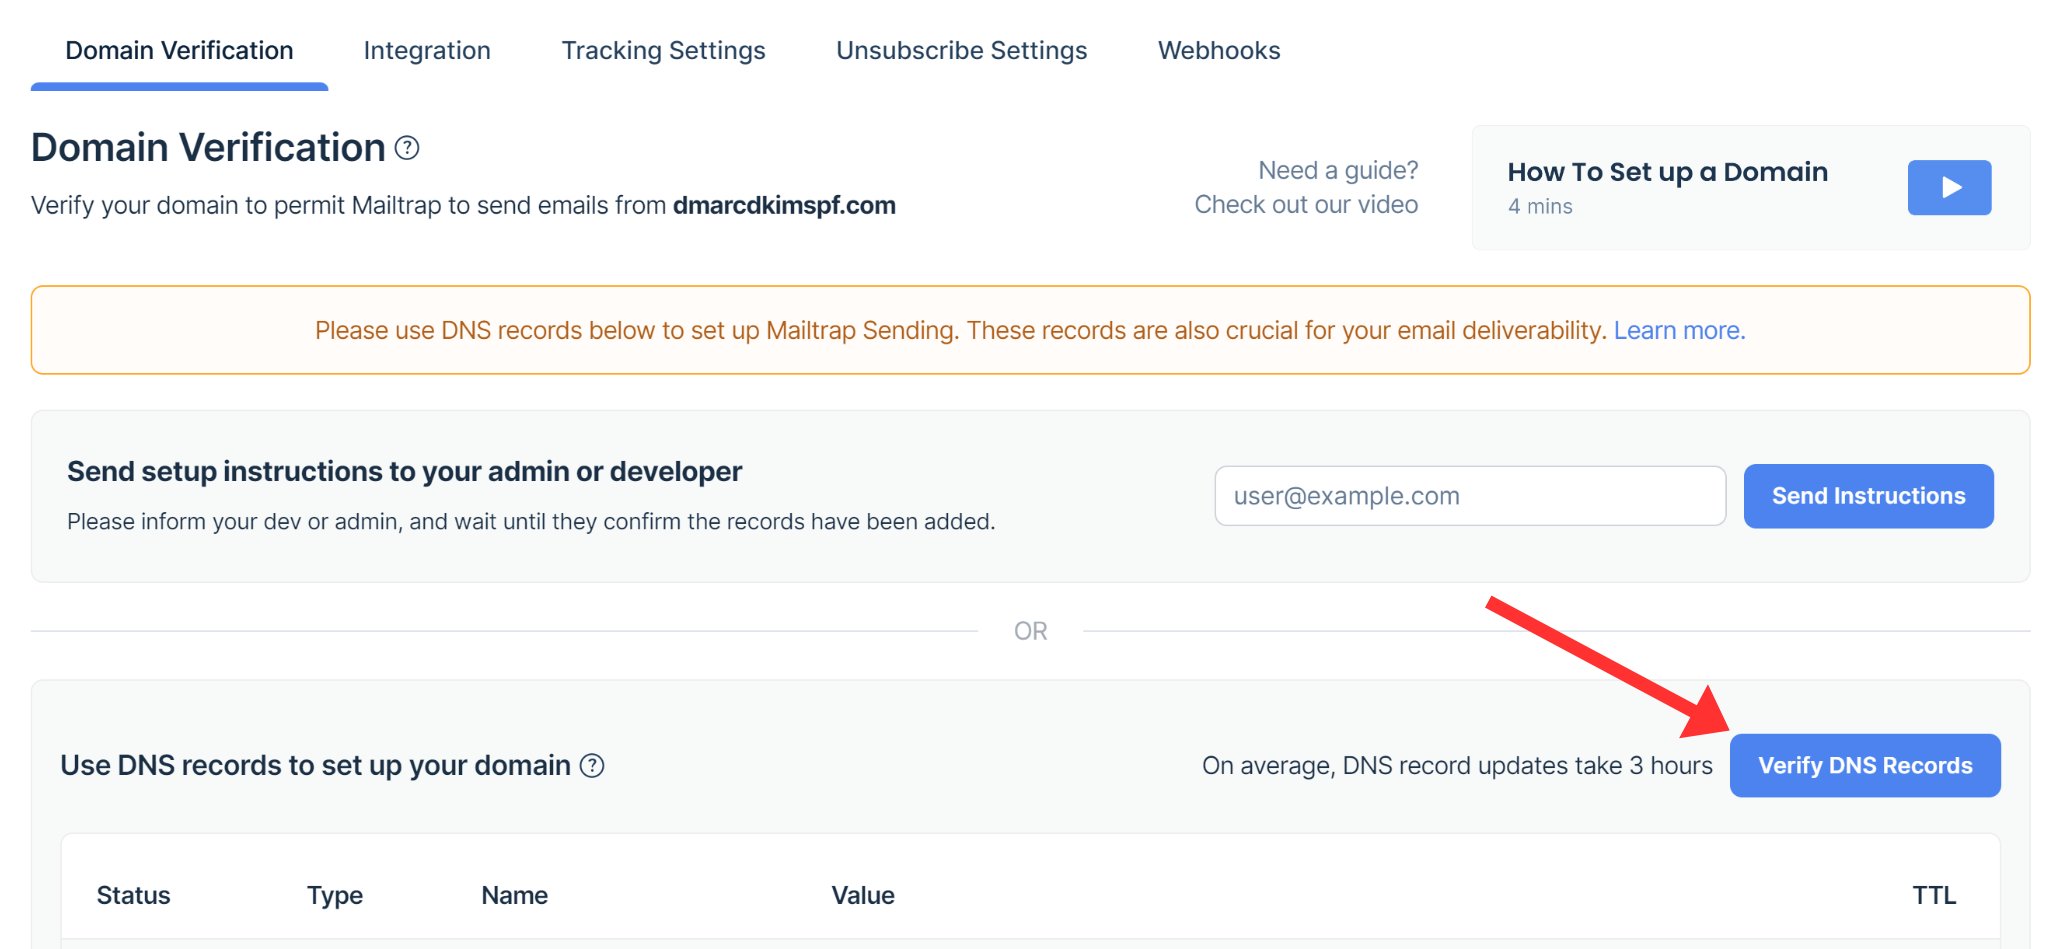
The green dots with each DNS record indicate that the record is now verified. You should see all six dots turn green under Verification Status.
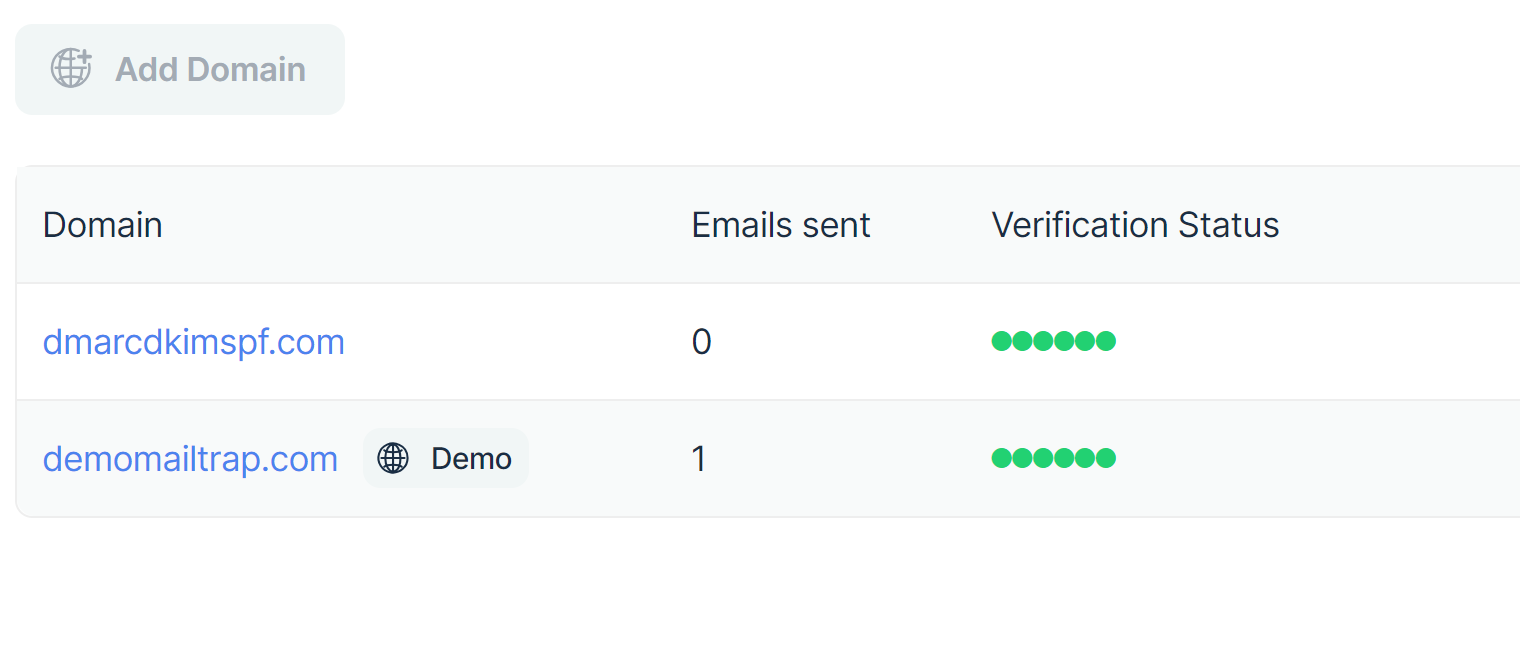
If the green dots don't appear right away after adding the domain, don't panic. DNS changes can sometimes take a while to propagate across servers. Allow up to 48 hours for your domain to complete authentication. If the verification isn't successful after this time, it indicates a potential misconfiguration in the DNS records that needs attention.
To troubleshoot sender domain verification issues, hire a DmarcDkim.com expert. So you can sit back and relax while we take care of your concerns.
Check domain and follow the instructions to nail down your DMARC configuration.
No expert knowledge needed!


