How to Authenticate Domain for ActiveCampaign DMARC?
Check your domain for DMARC, DKIM, SPF and MX records. Get a free report.
ActiveCampaign Domain Authentication Tutorial - DMARC, DKIM, SPF Configuration
If you aim for successful email campaigns, domain authentication is paramount for enhanced deliverability. ActiveCmpaign ensures deliverability success by providing DNS records for domain authentication. Setting up DNS records in your DNS provider may sound like a technical task but not when DmarcDkim.com is here to guide you. In this guide post, we will configure DMARC, DKIM, and SPF records in ActiveCampaign and add them to the DNS provider for email domain authentication. We are using Cloudflare for this tutorial but you can add DNS records to any DNS provider you use.
Log in to your ActiveCampaign account, go to Settings, and click Advanced.
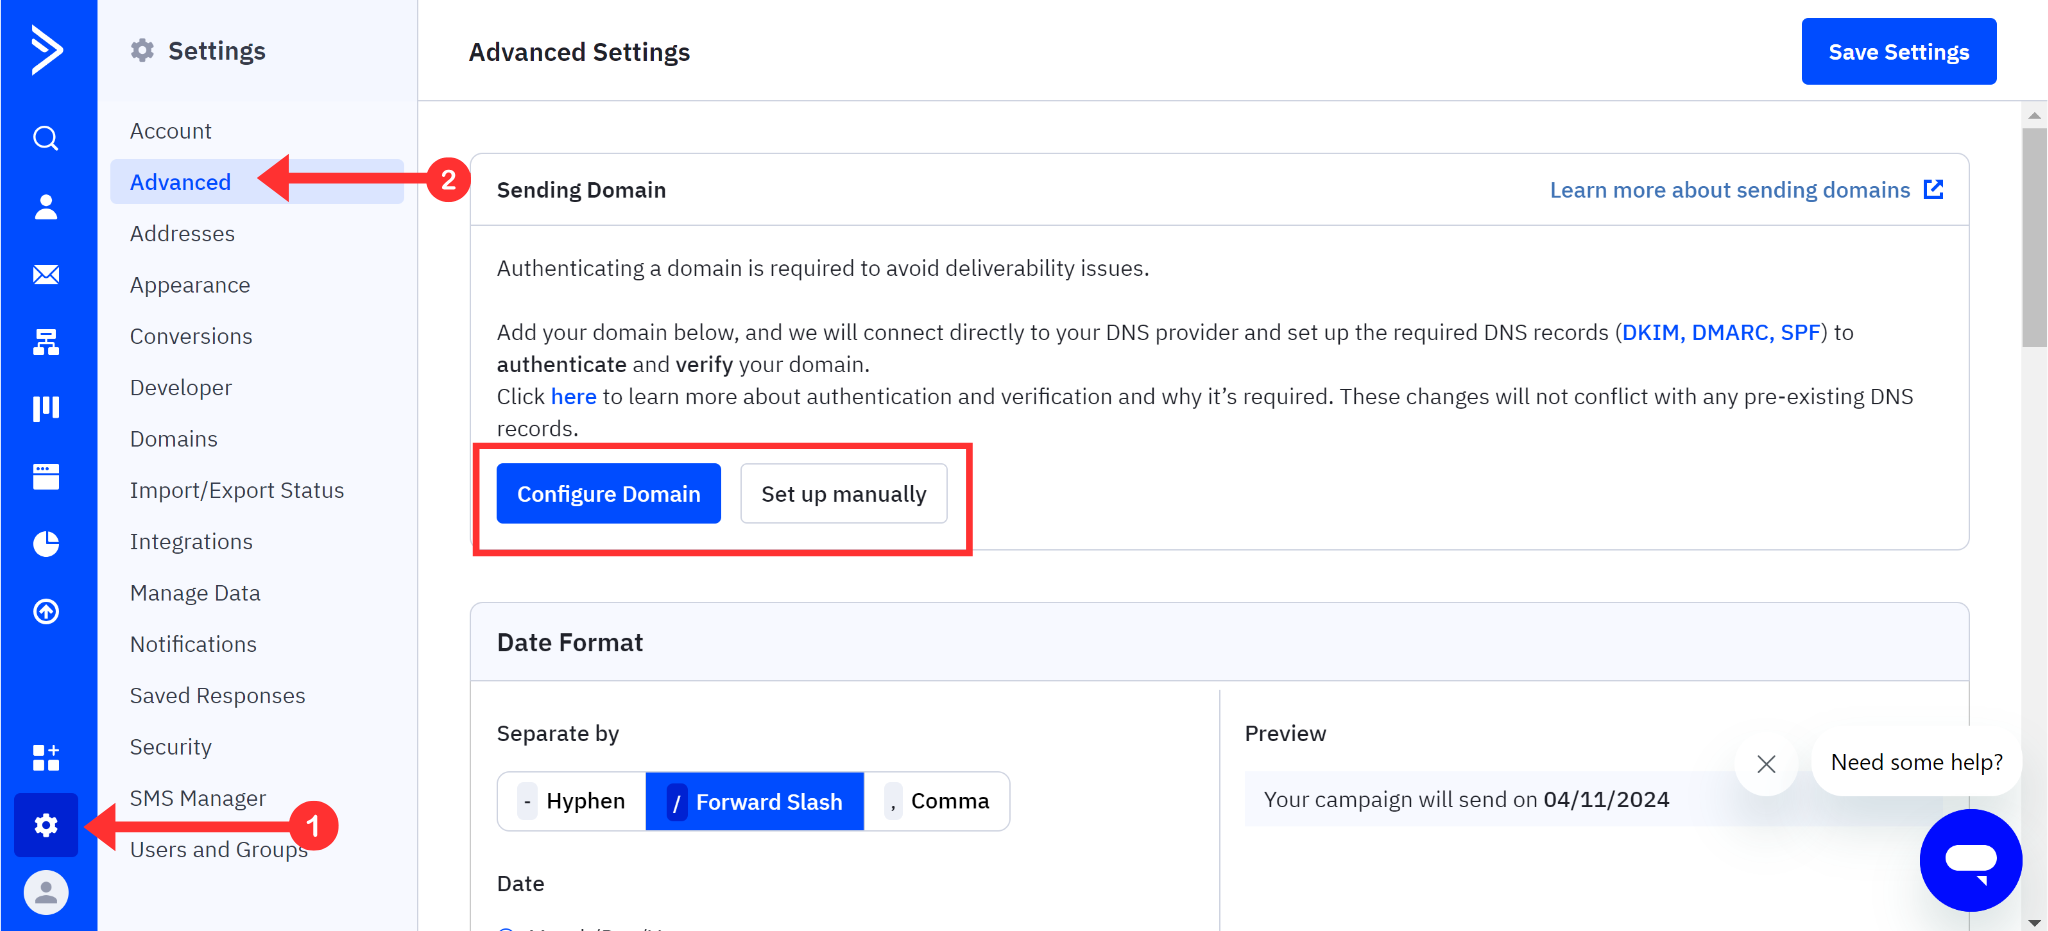
By selecting the "Configure Domain" option, ActiveCampaign will automatically add DNS records to your DNS provider.
Selecting "Set up manually" requires you to copy DNS records and add them to the DNS provider manually.

NOTE: Your DNS provider might not be supported by the "Configure Domain" option. In this case, proceed with manually adding records. Moreover, you can see the list of DNS providers supported for automatic authentication.
Automatic ActiveCampaign Domain Authentication:
-
Click the "Configure Domain" option and enter your domain name in the provided field. Hit the Continue button to proceed.

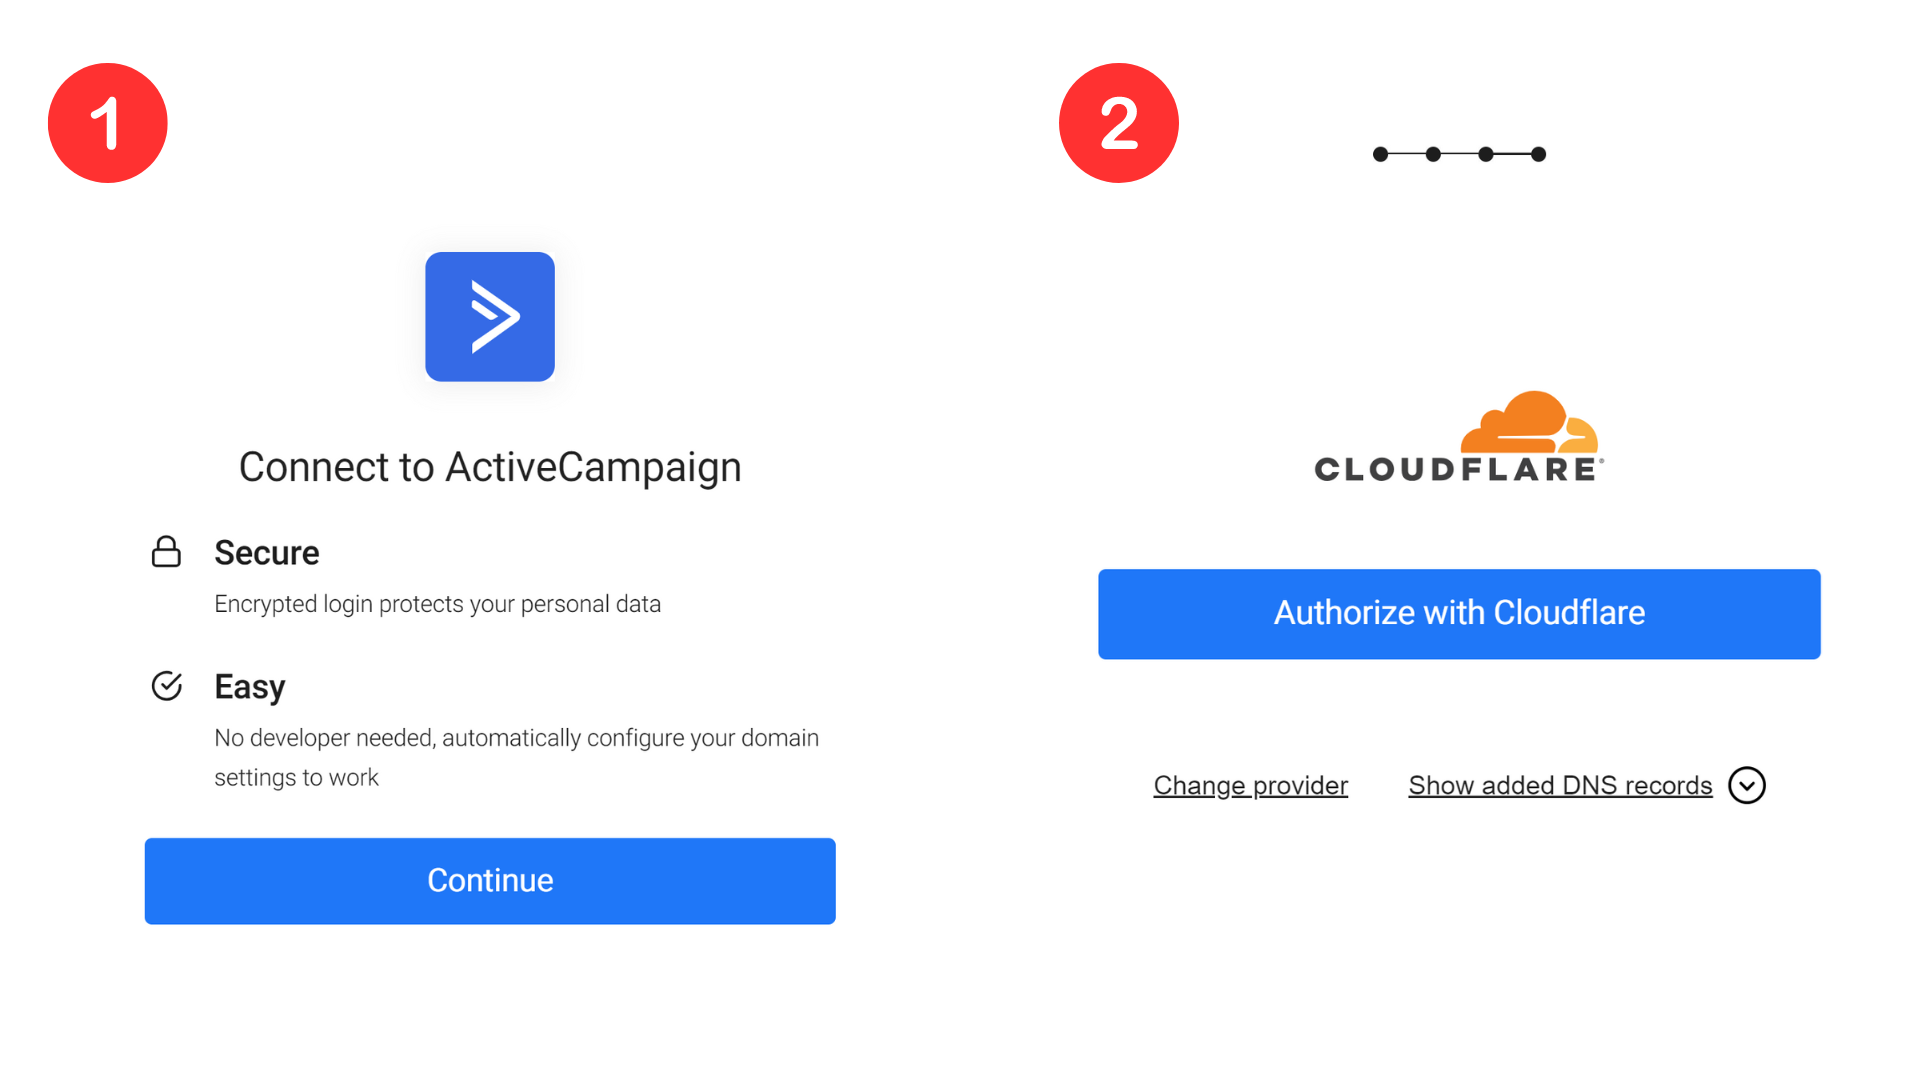
Next, click Continue to connect the ActiveCampaign account with the DNS provider account.
-
Now the server will search for your domain provider. Once detected, it will start setting up DNS records. Click "Authorize with (Domain name)" to proceed with the DNS setting.
-
It will take you to the DNS provider login page and after logging in, you'll see all records already added to your dashboard. Click Authorize to allow the server to add DMARC, DKIM, and SPF records to your DNS provider.
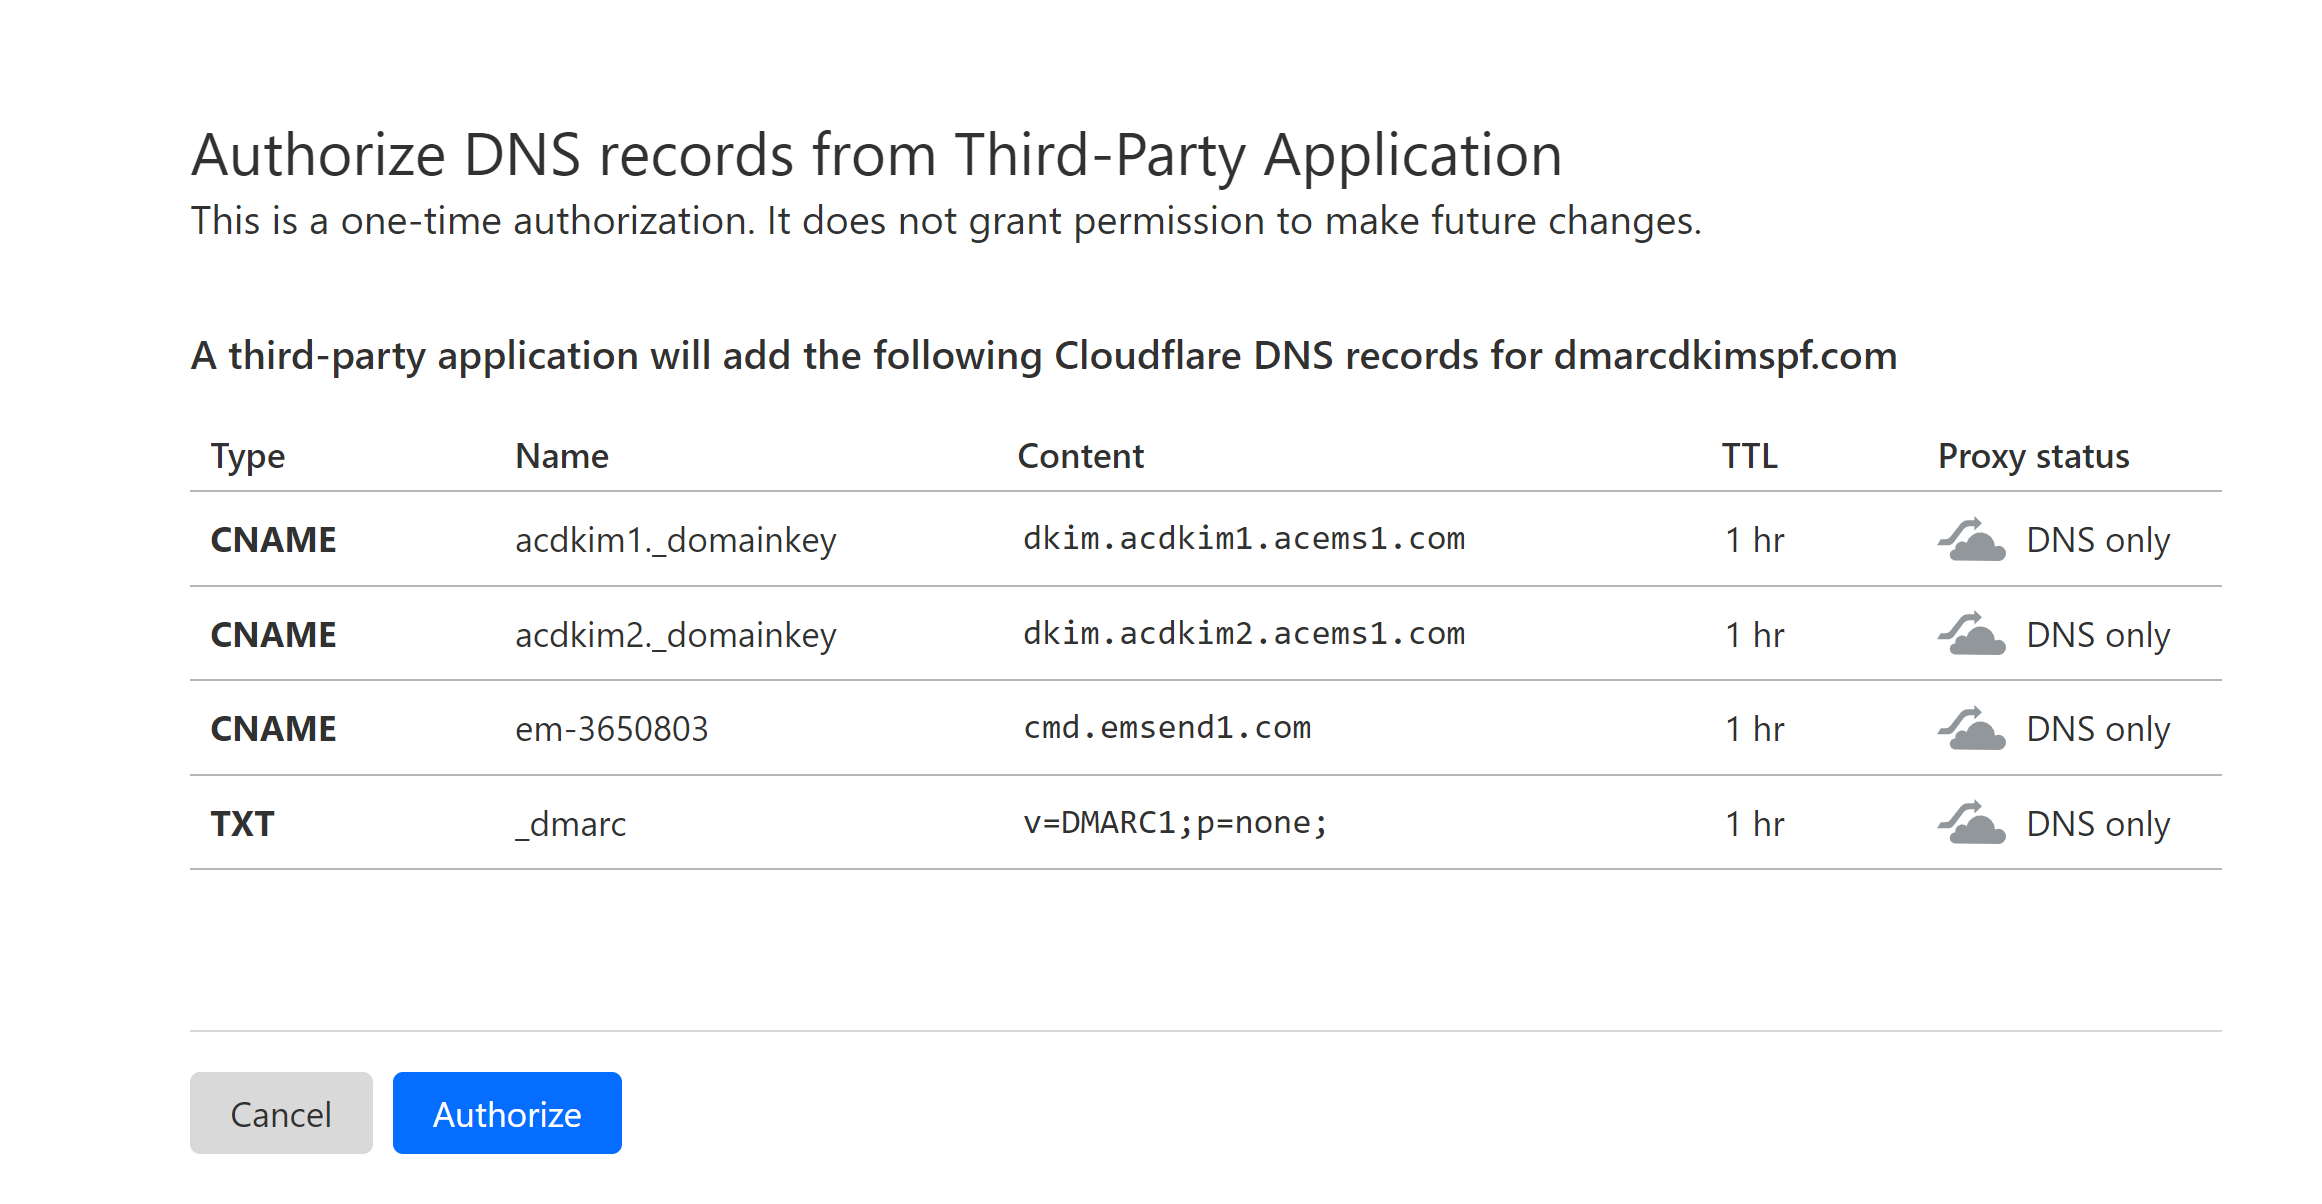
Note: You can add only one SPF record at a time to your DNS provider. Adding a second SPF will make one of them stop working. If you already have another SPF record, use the SPF Merger tool to combine it with ActiveCampaign's SPF record for both to work without issues.
Manual ActiveCampaign Domain Authentication:
Click "Set up Manually" and check your email inbox for a verification link. Click the link and it will take you back to the ActiveCampaign dashboard.
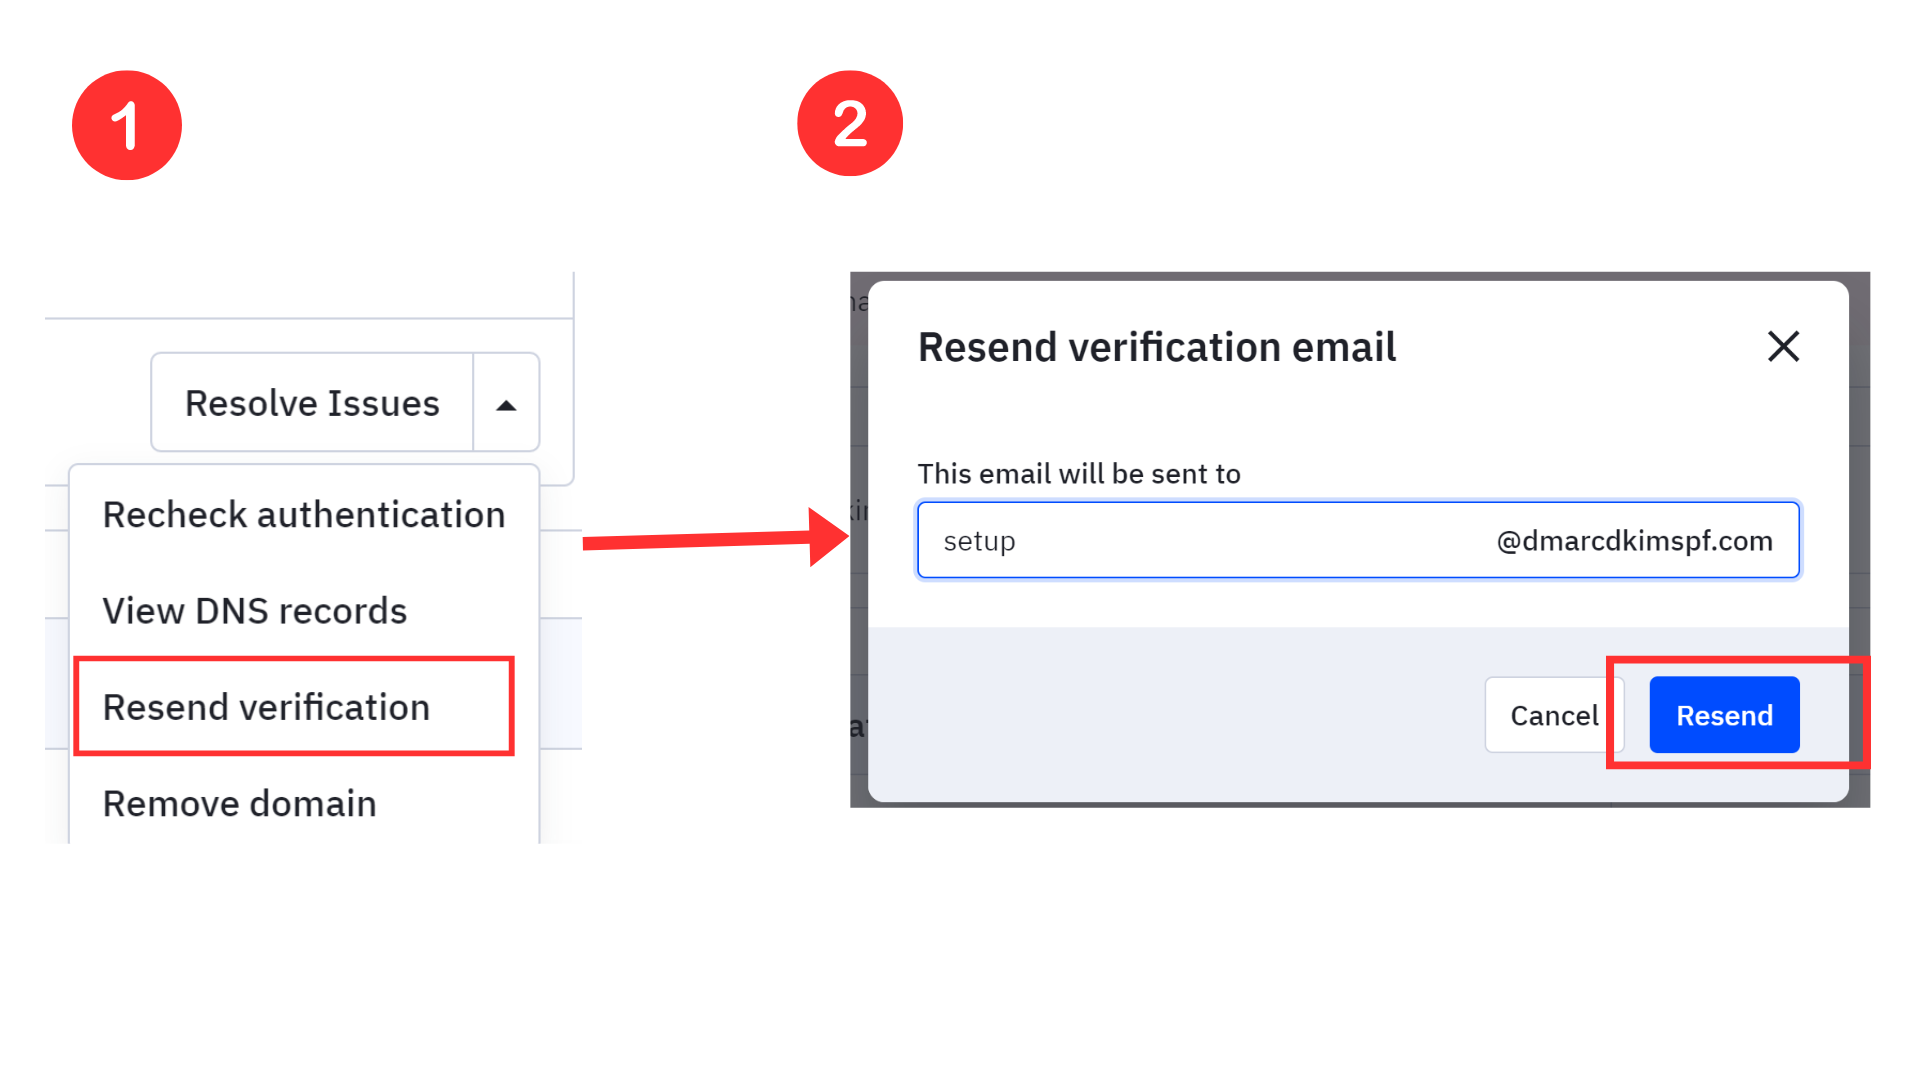
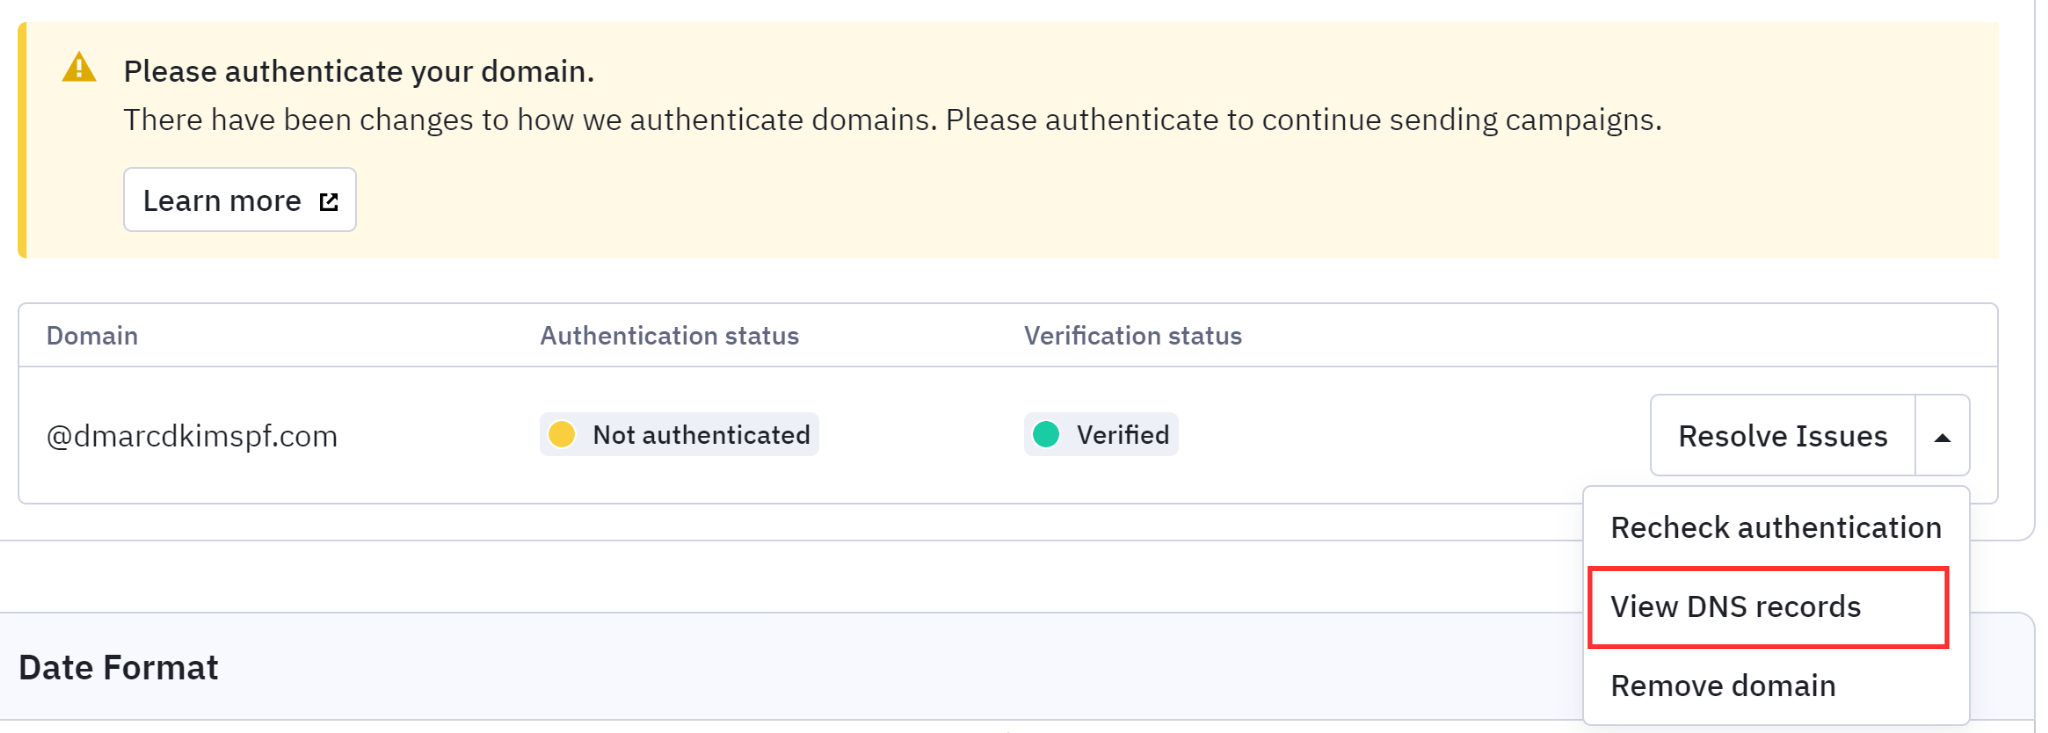
If you haven't received an email verification link in your inbox, go back to ActiveCampaign and click the drop-down arrow next to "Resolve Issues."
-
Select "Resend Verification," write your email in the provided field, and click "Resend."
Check your email inbox again and click the link to verify your email.
After successful email verification, the status will be shown as "Verified."
-
Again click the drop-down arrow and select View DNS records.
-
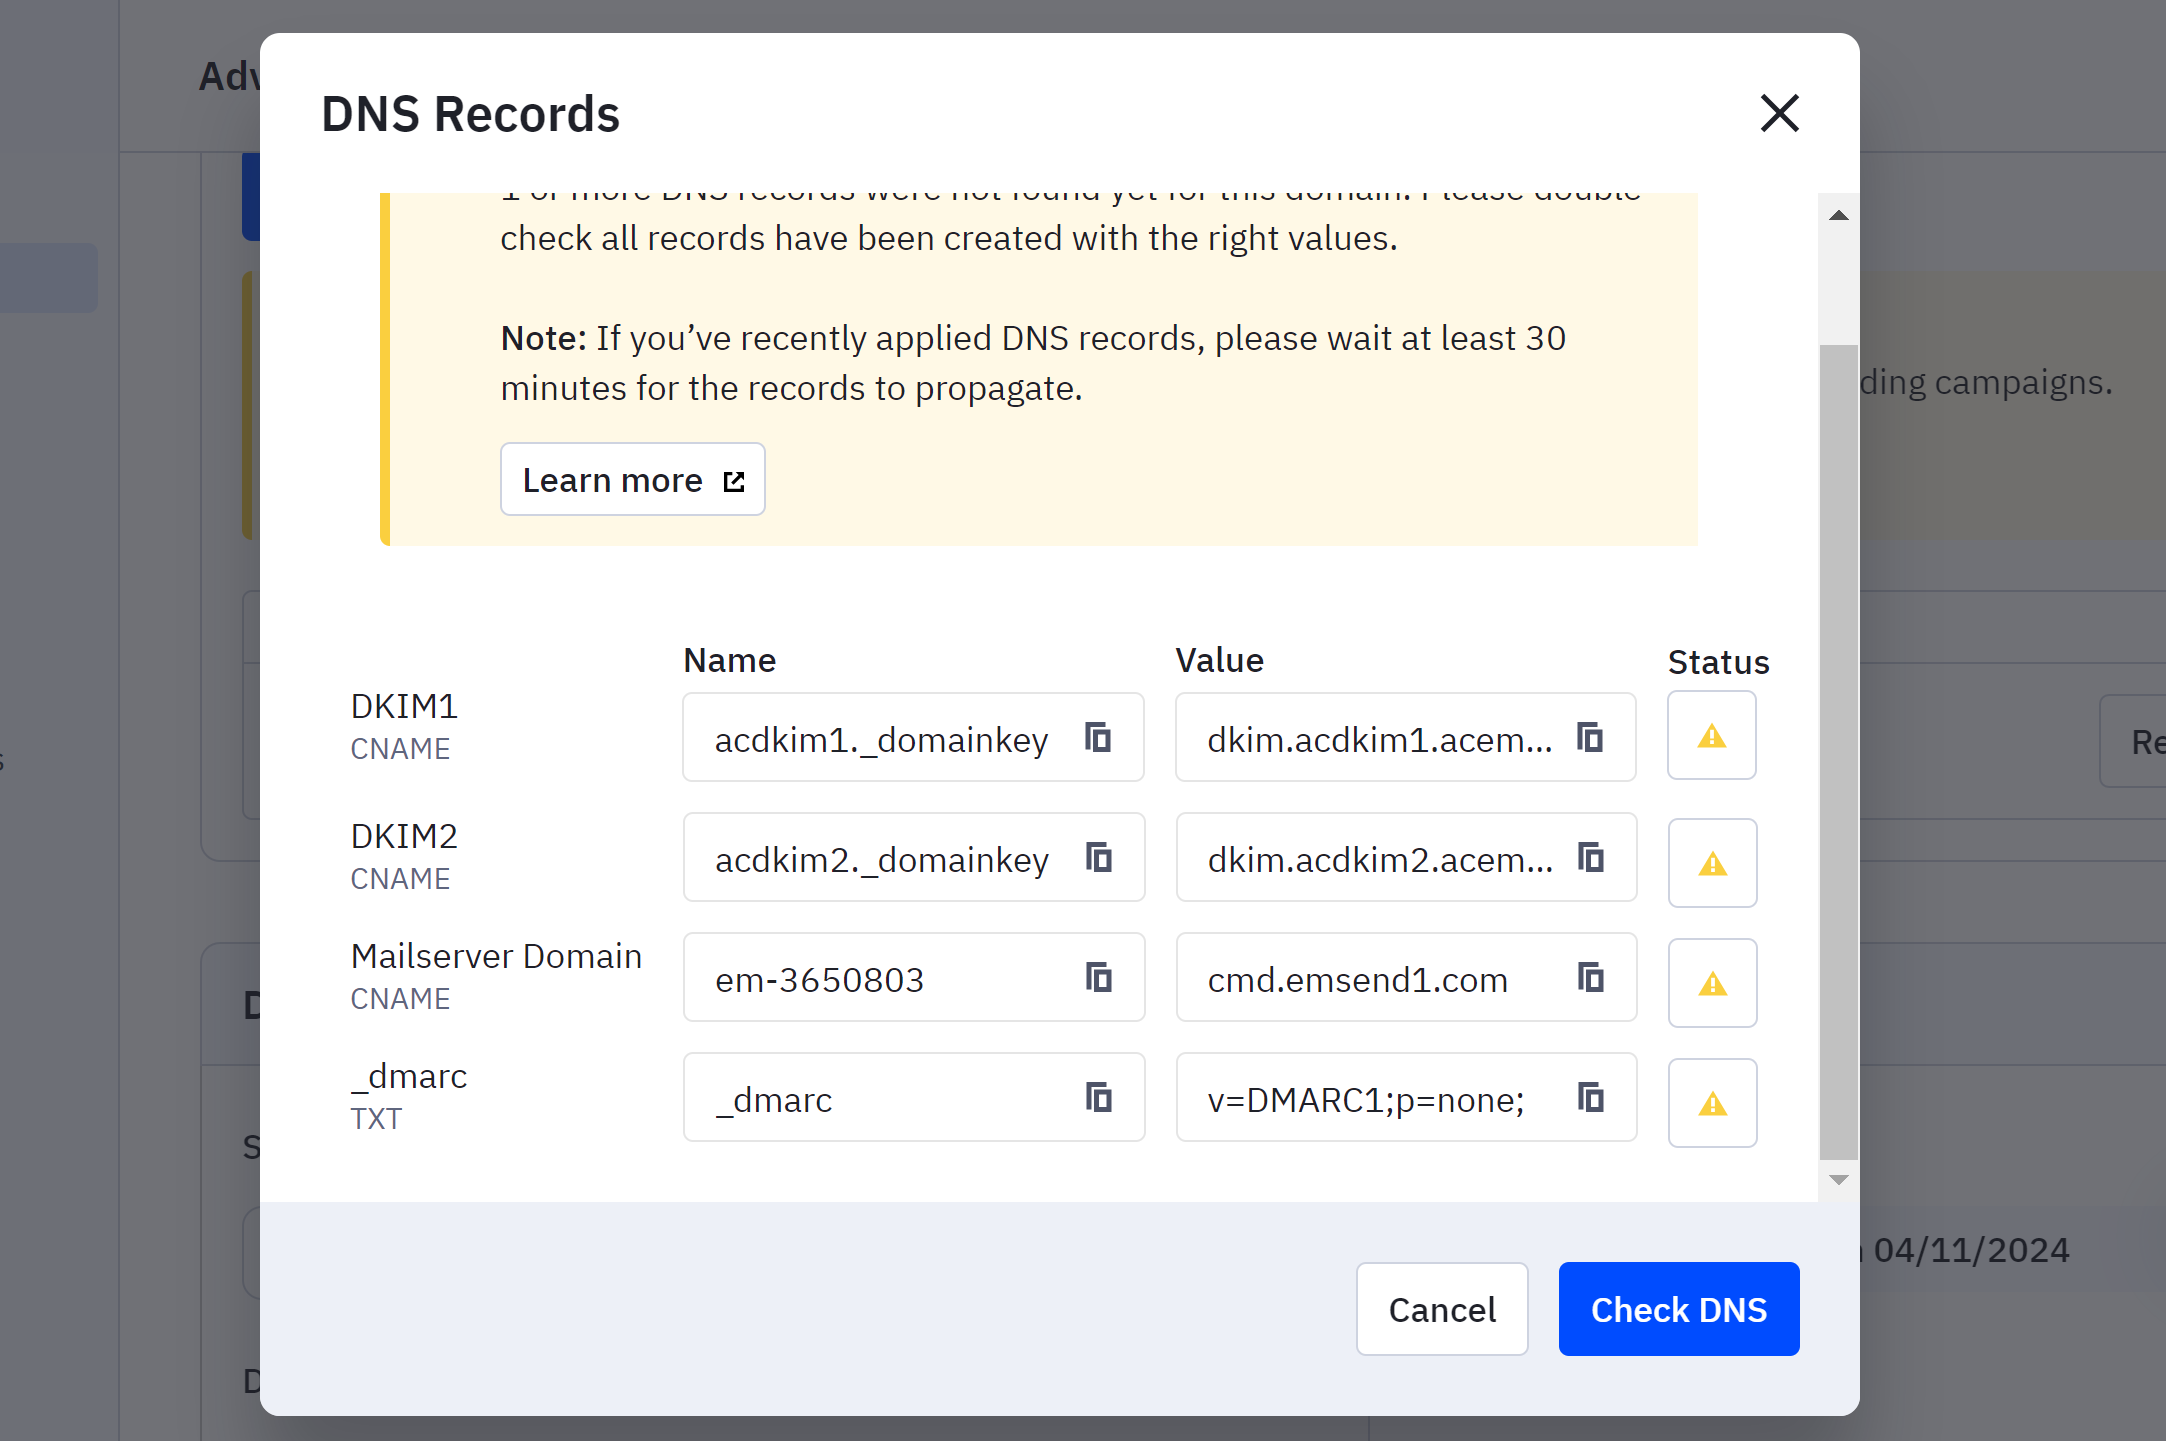
Next, you will see DMARC, DKIM, and SPF records on your screen. Copy each record and manually add it to your DNS provider one by one.
-
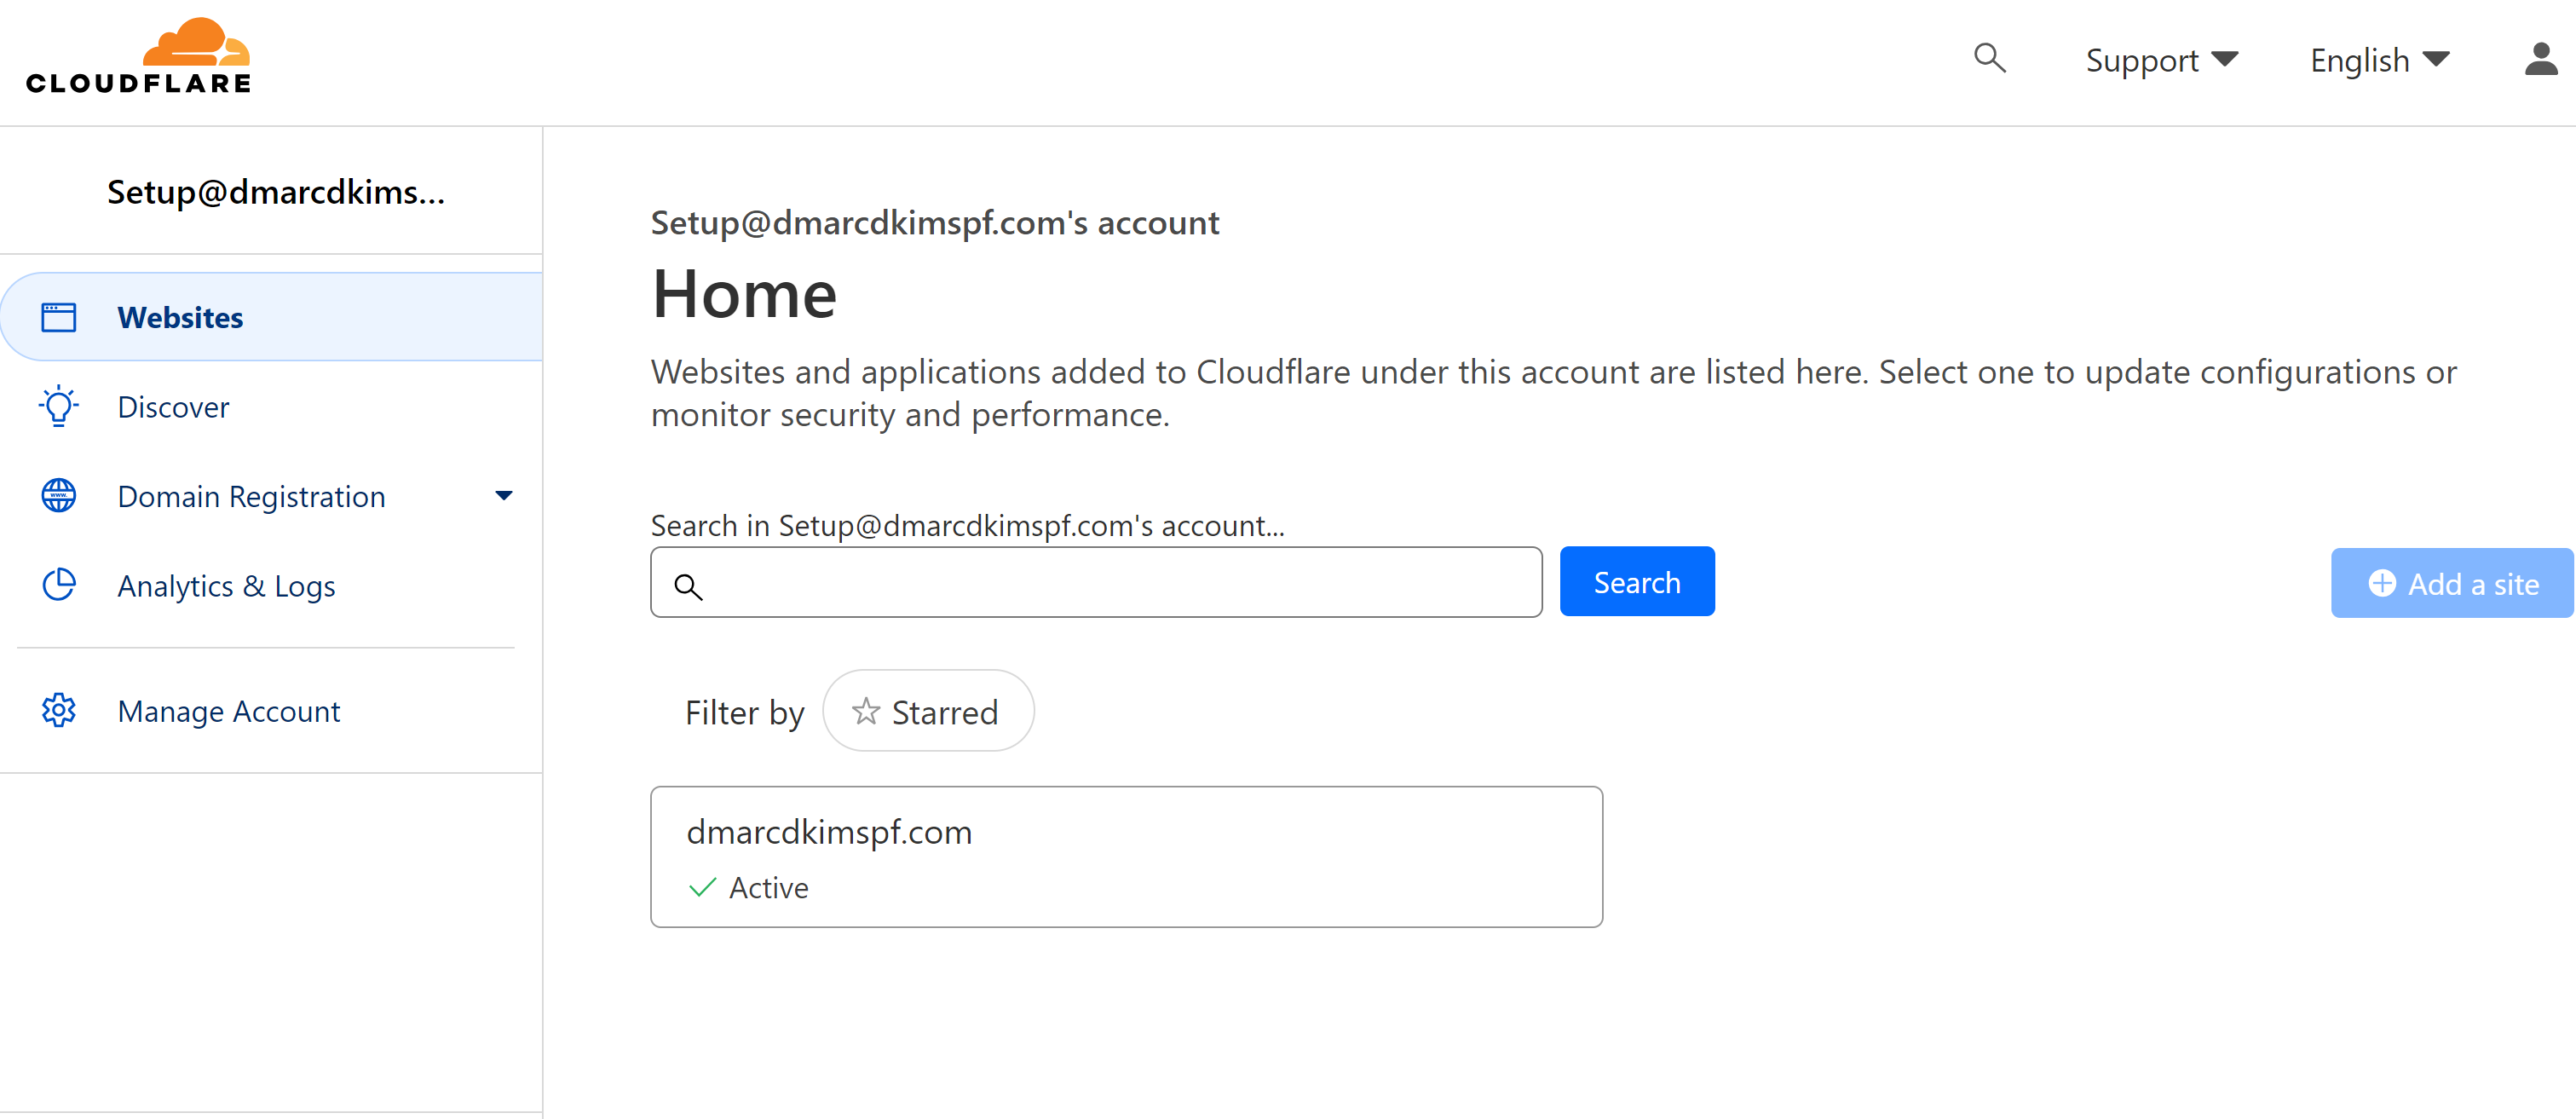
Head to your DNS Provider dashboard and click on your Website.
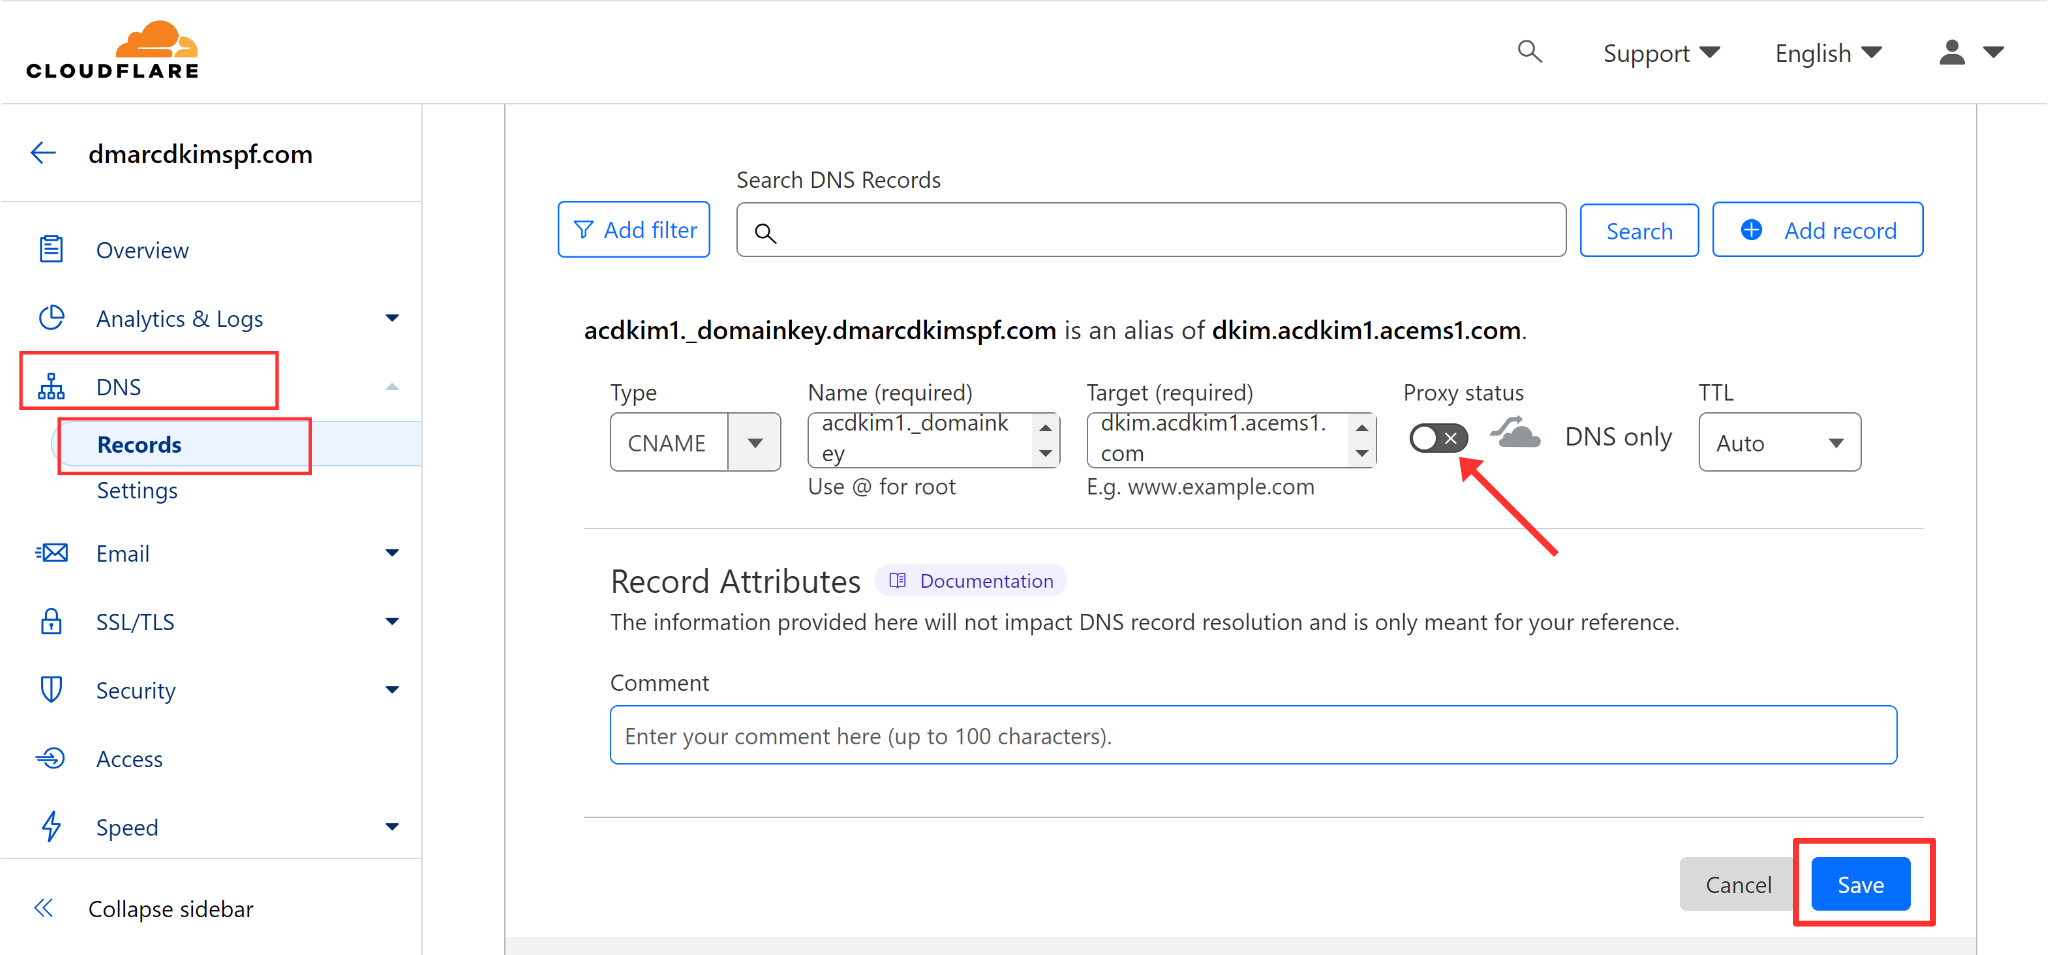
Click DNS to open Records and click Add Record.
Copy each record Name and Value from ActiveCampaign and paste them into the designated fields in the DNS provider. Lastly, click Save to add.
-
Turn off the proxy (orange toggle) for CNAME records. Disabling the proxy ensures that traffic goes directly to the ActiveCampaign server. When enabled, it routes the traffic through Cloudflare's network before reaching the email service platform.
When all records are added, go back to ActiveCampaign and click "Check DNS" under the DMARC, DKIM, and SPF record list.
-
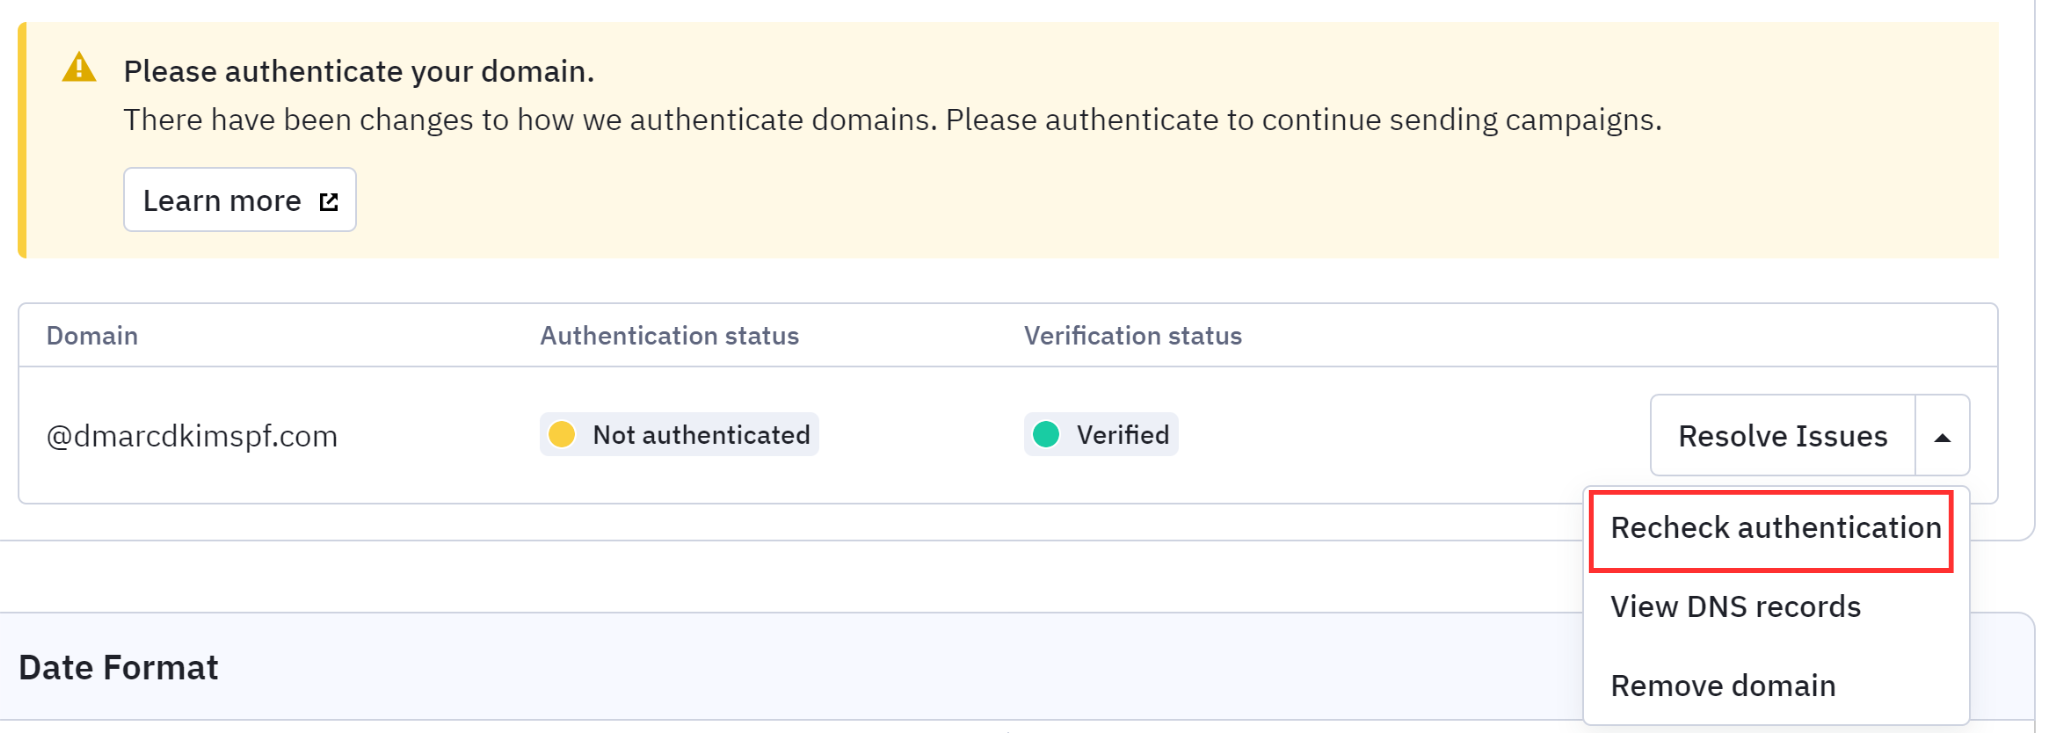
If your domain is not yet authenticated, click the drop-down arrow next to "Resolve Issues" and click "Recheck Authentication."
-
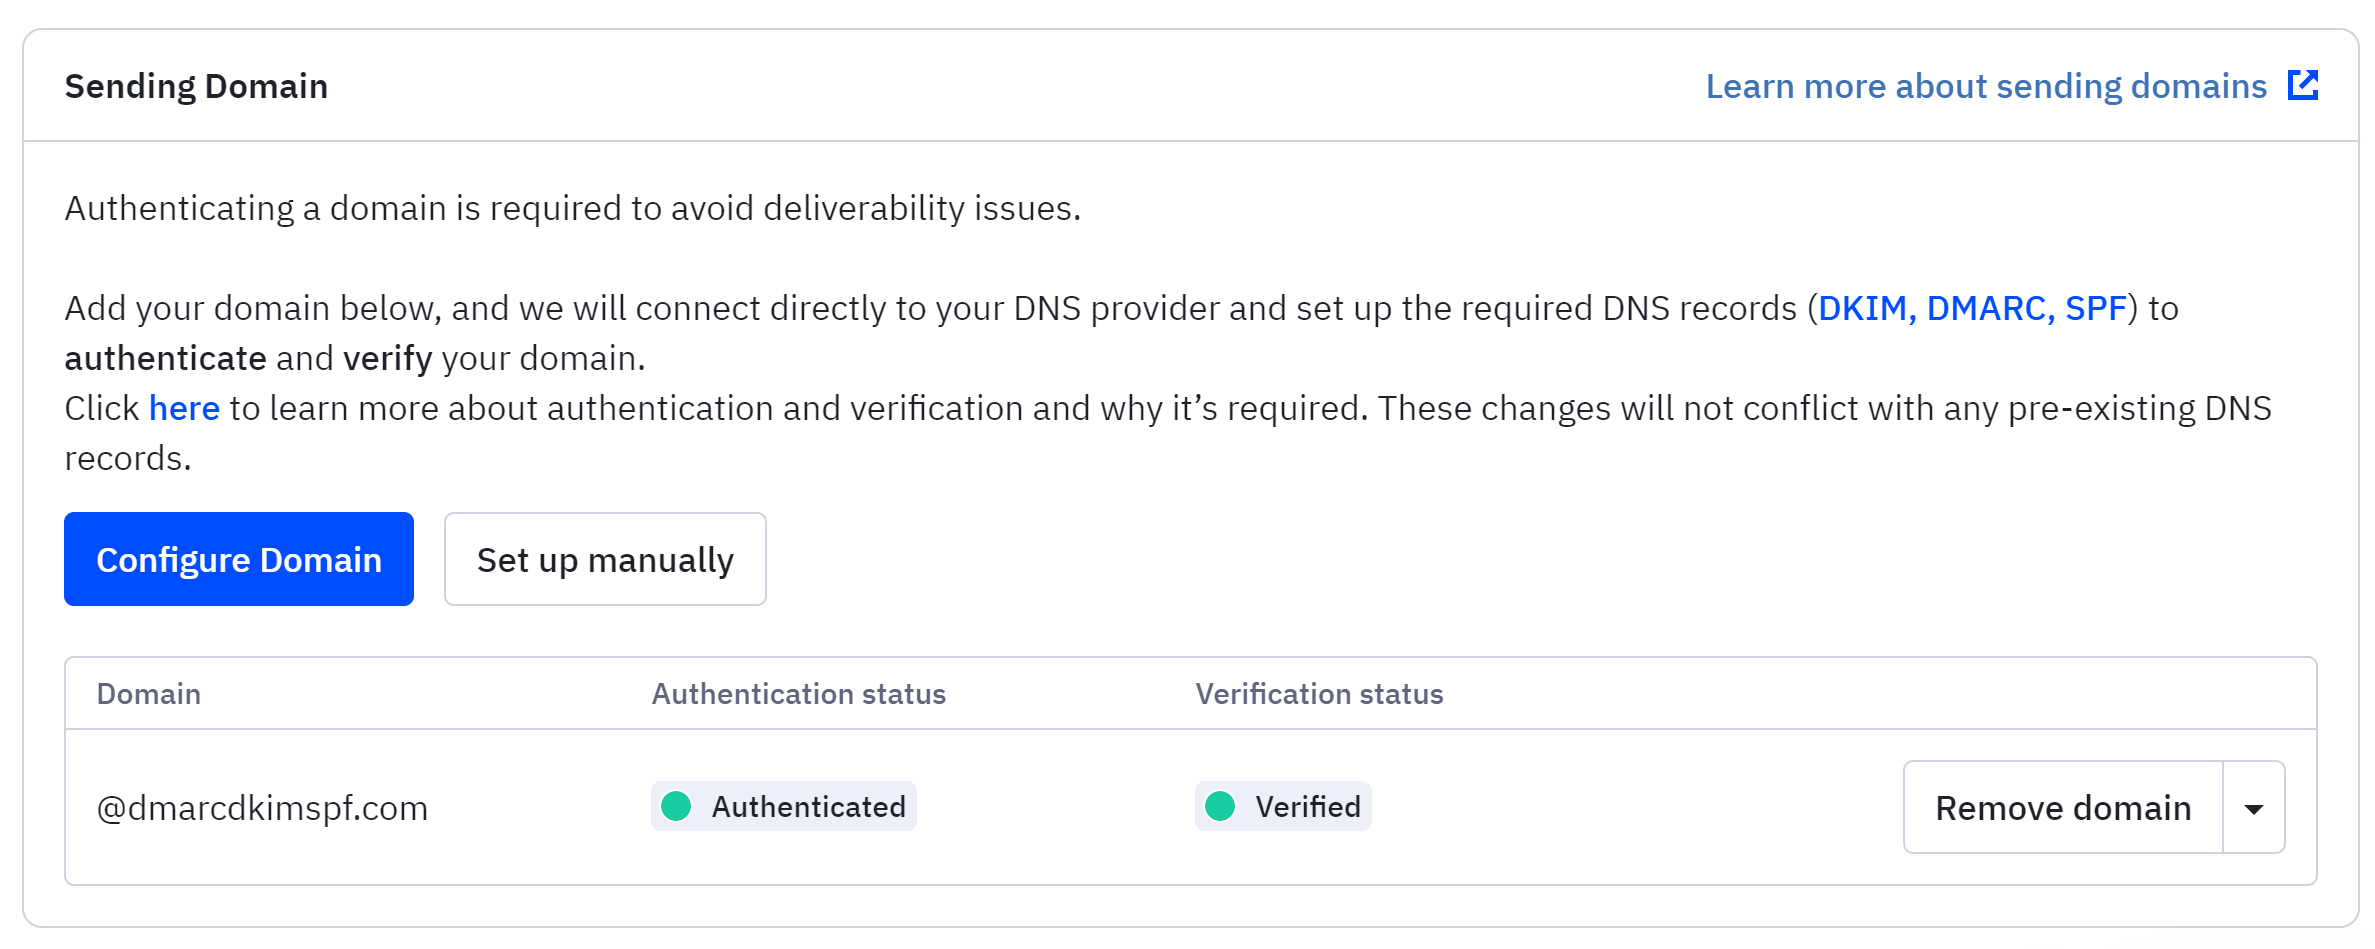
After one or two tries, your domain status will be shown as "Authenticated."
Setup ActiveCampaign DMARC Record:
When connecting your domain to ActiveCampaign, you need to use DmarcDkim.com DMARC check tool. It helps you implement a strict policy and gives access the DMARC Reports and Analytics dashboard.
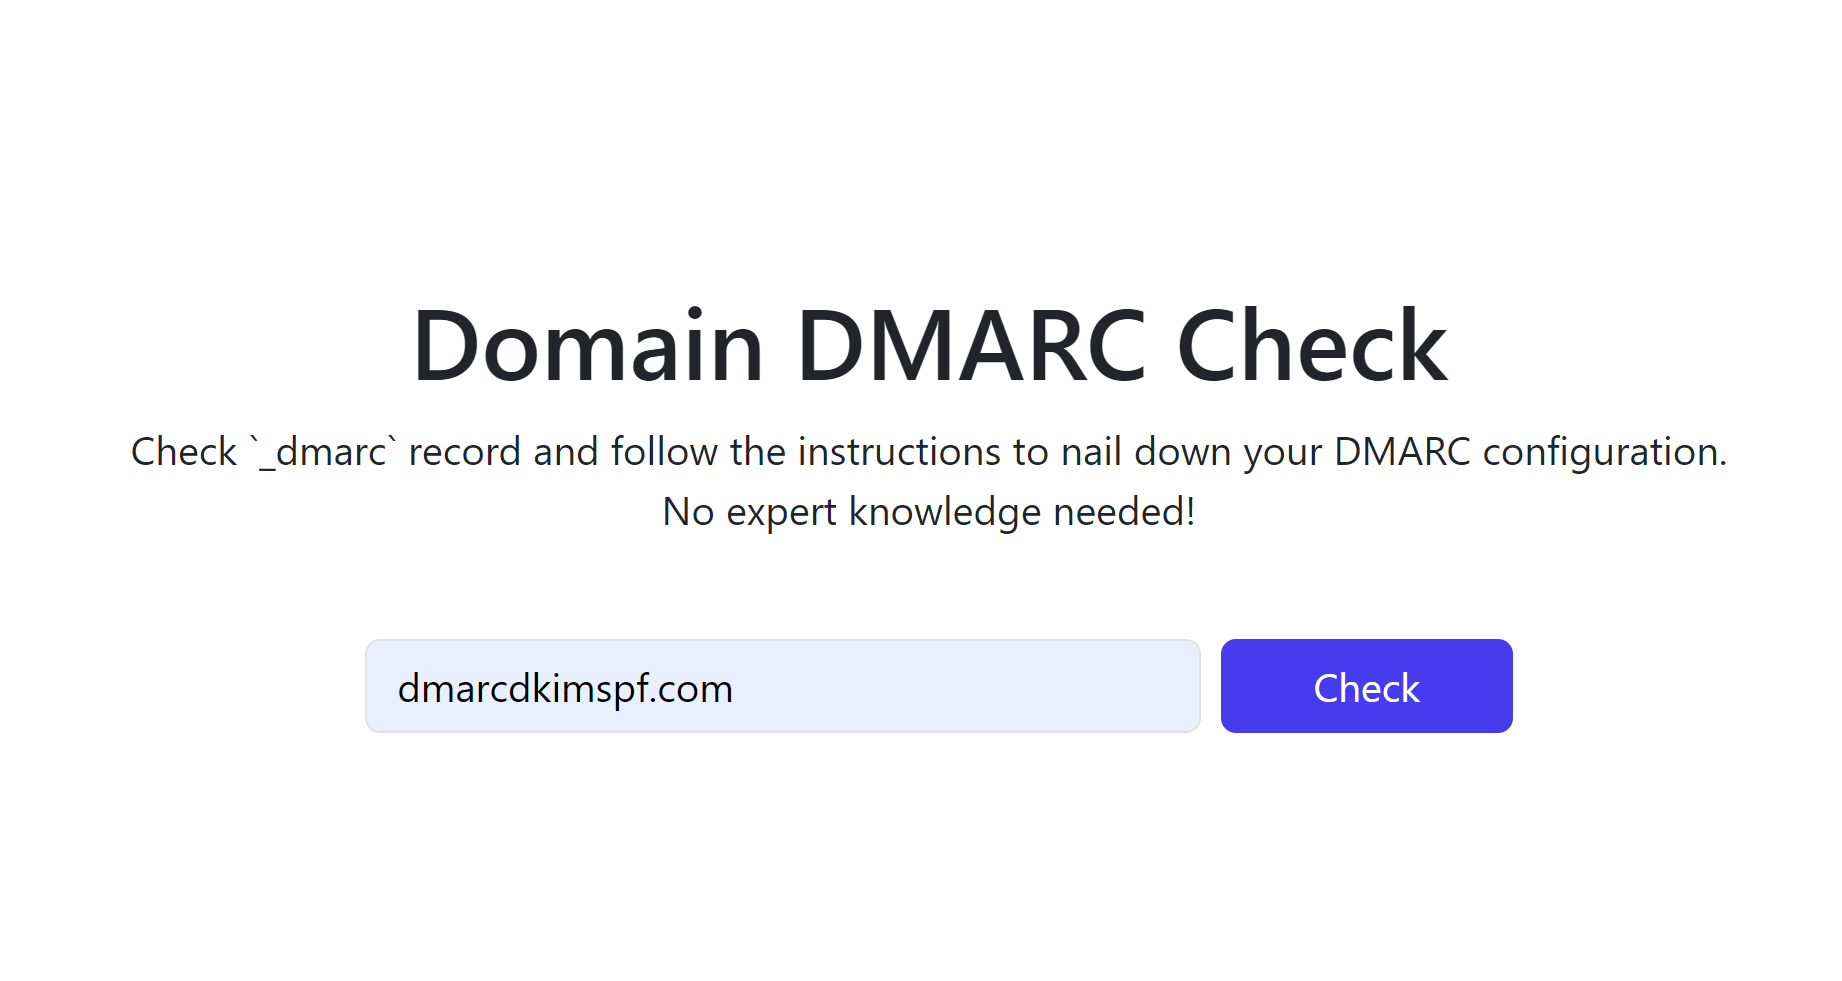
Go to DMARC Check Tool.
-
Add your domain name and click Check.
-
Copy the Record name and Suggested value and add them to your DNS dashboard.
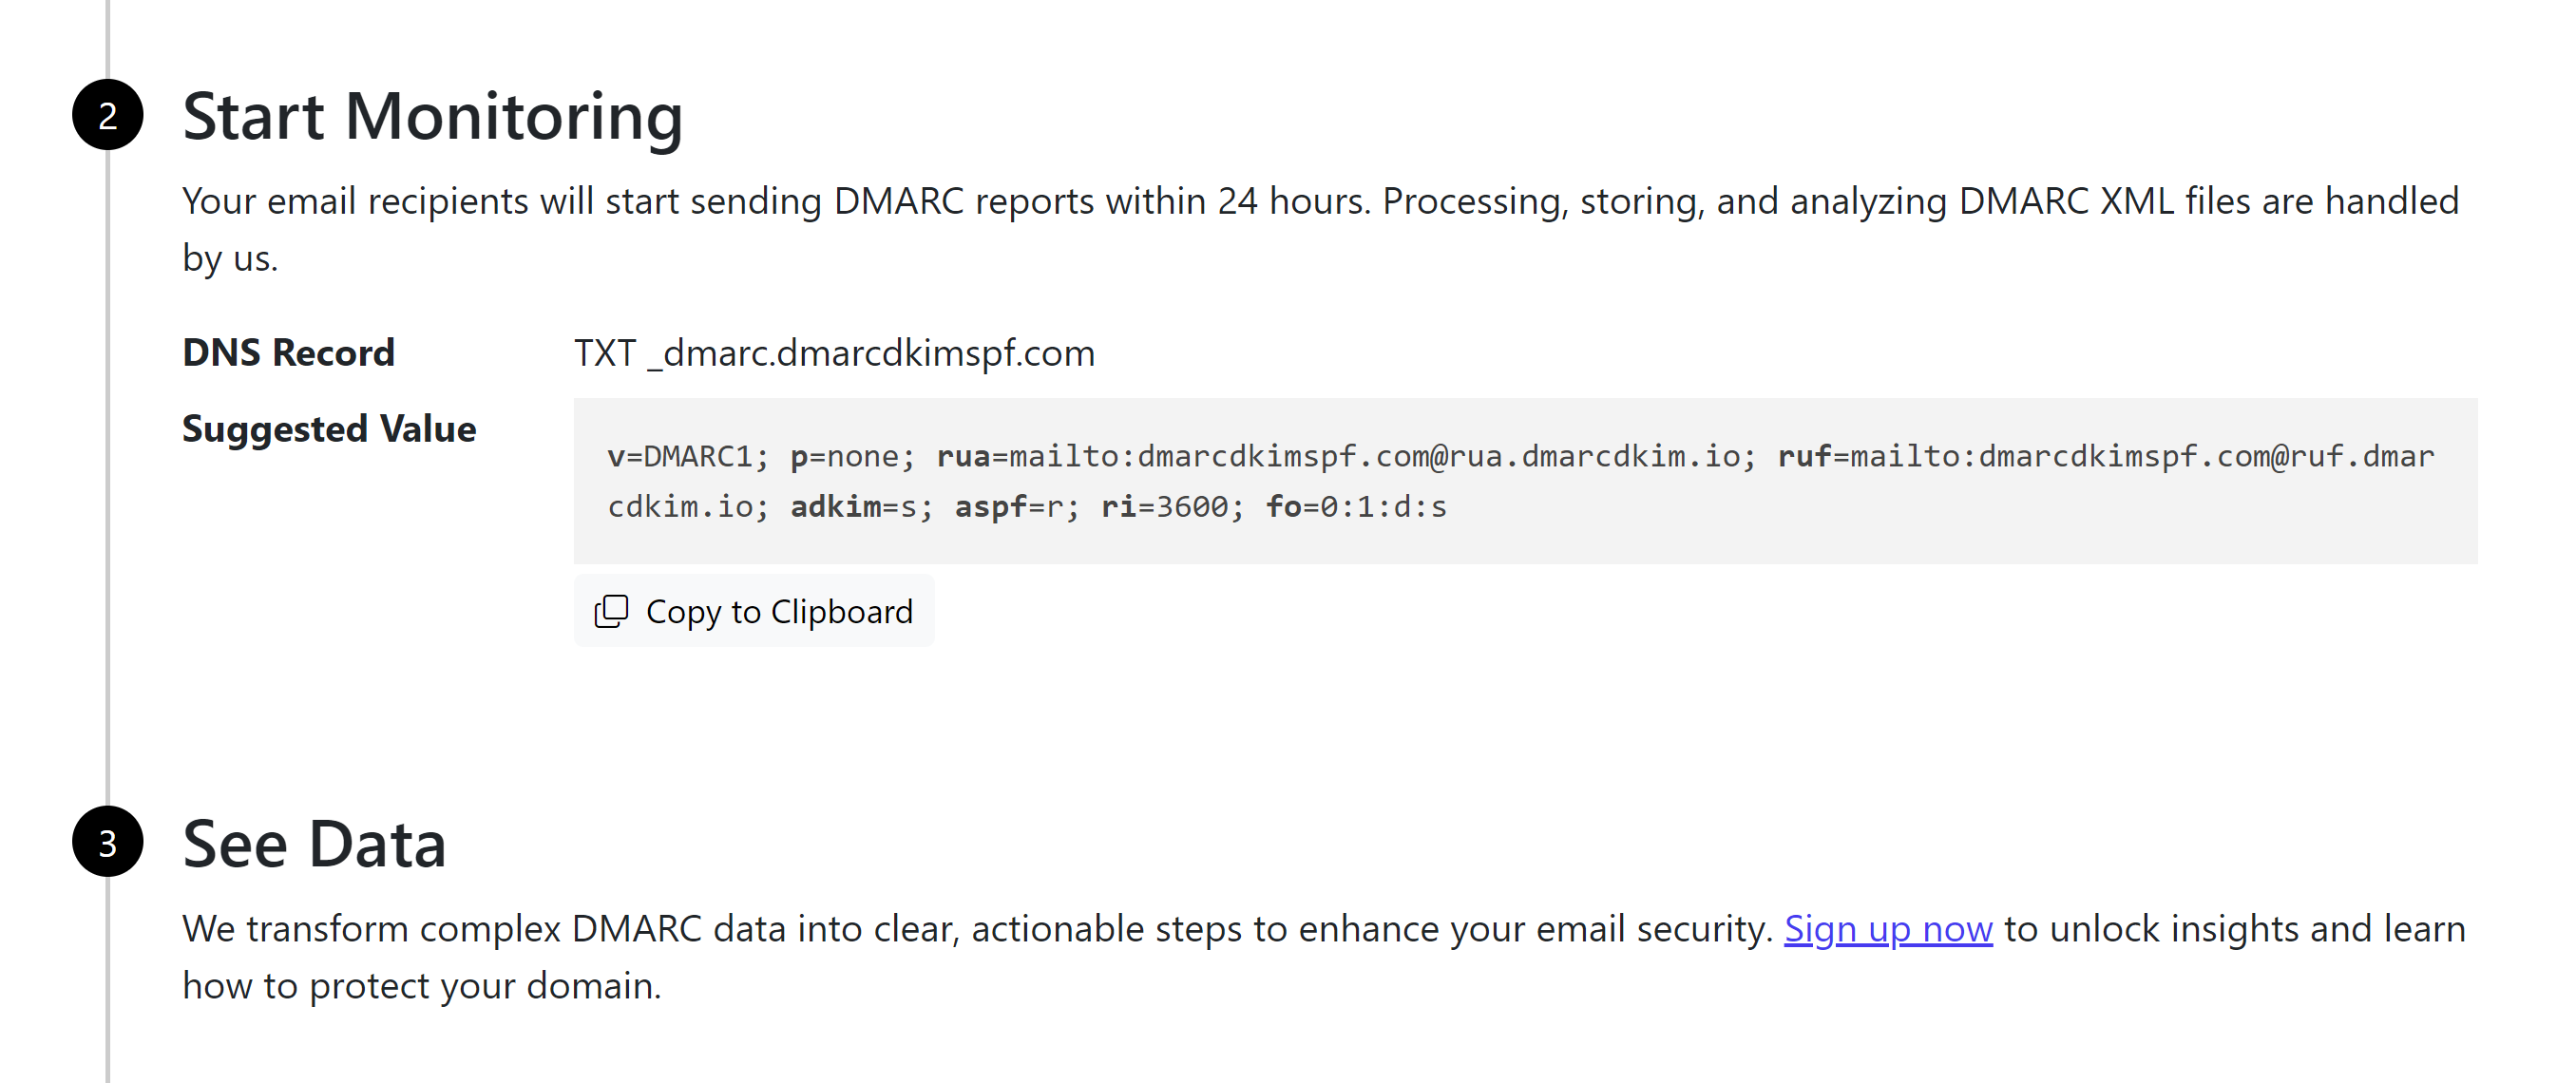
Click Sign up now to access the reports dashboard.
For support and assistance, contact a DmarcDkim.com expert.
Check domain and follow the instructions to nail down your DMARC configuration.
No expert knowledge needed!


