Setup Spacemail DMARC DNS Records for Domain Authentication
How to Setup DNS Records for Spacemail DMARC?
Email spoofing has become a major threat to businesses these days, that's why email inbox providers like Google require you to comply with its security standards strictly.
SPF (Sender Policy Framework), DKIM (DomainKeys Identified Mail), and DMARC (Domain-based Message Authentication Reporting and Conformance) are the commonly used security standards for domain authentication and email verification.
Spacemail provides you with all the necessary records to protect your email communication. You need to add these records to your domain provider and wait for them to get validated.
In this article, we will walk you through the step-by-step DNS configuration and domain authentication process. So, stay tuned!
Configure Spacemail DNS Records:
-
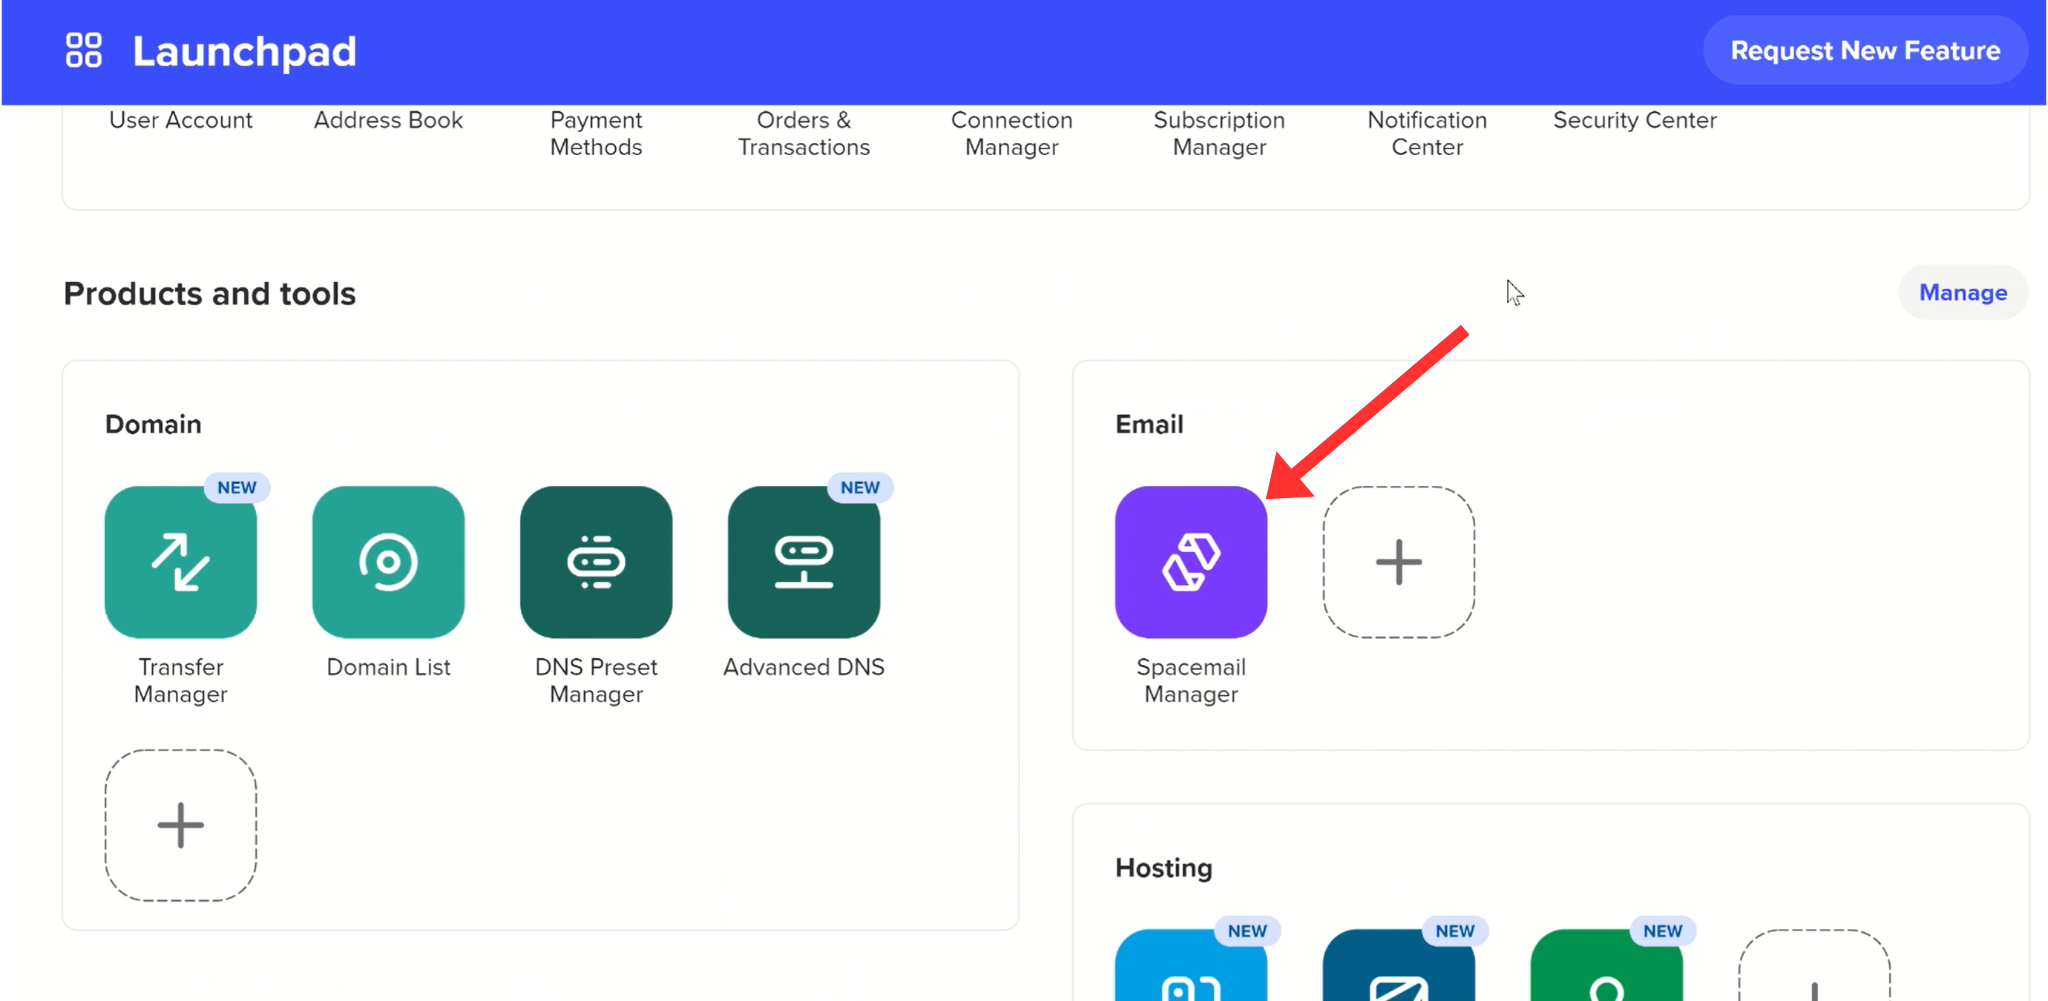
On your Spaceship dashboard, click Spacemail Manager in the Email section.
-
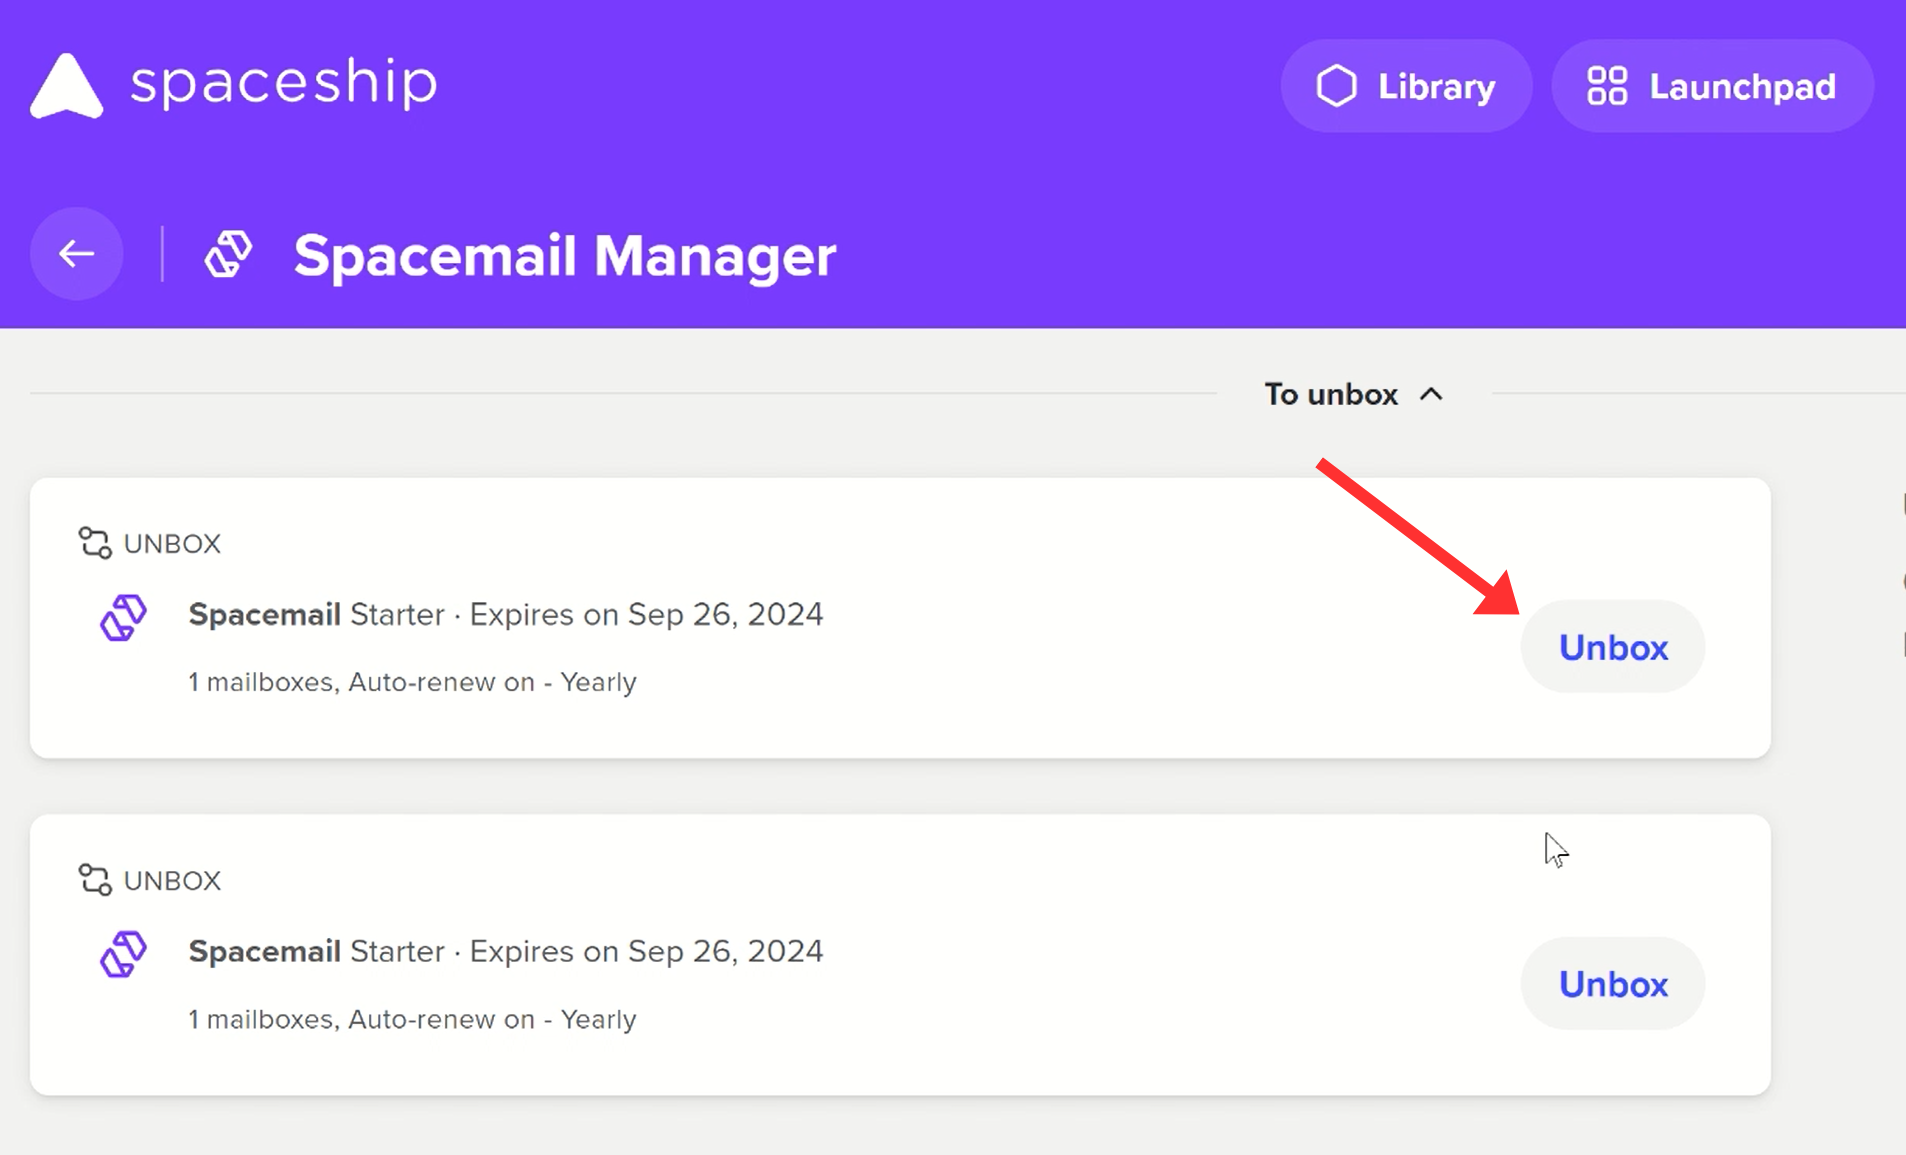
Hit the Unbox button and click Start on the pop-up window.
-
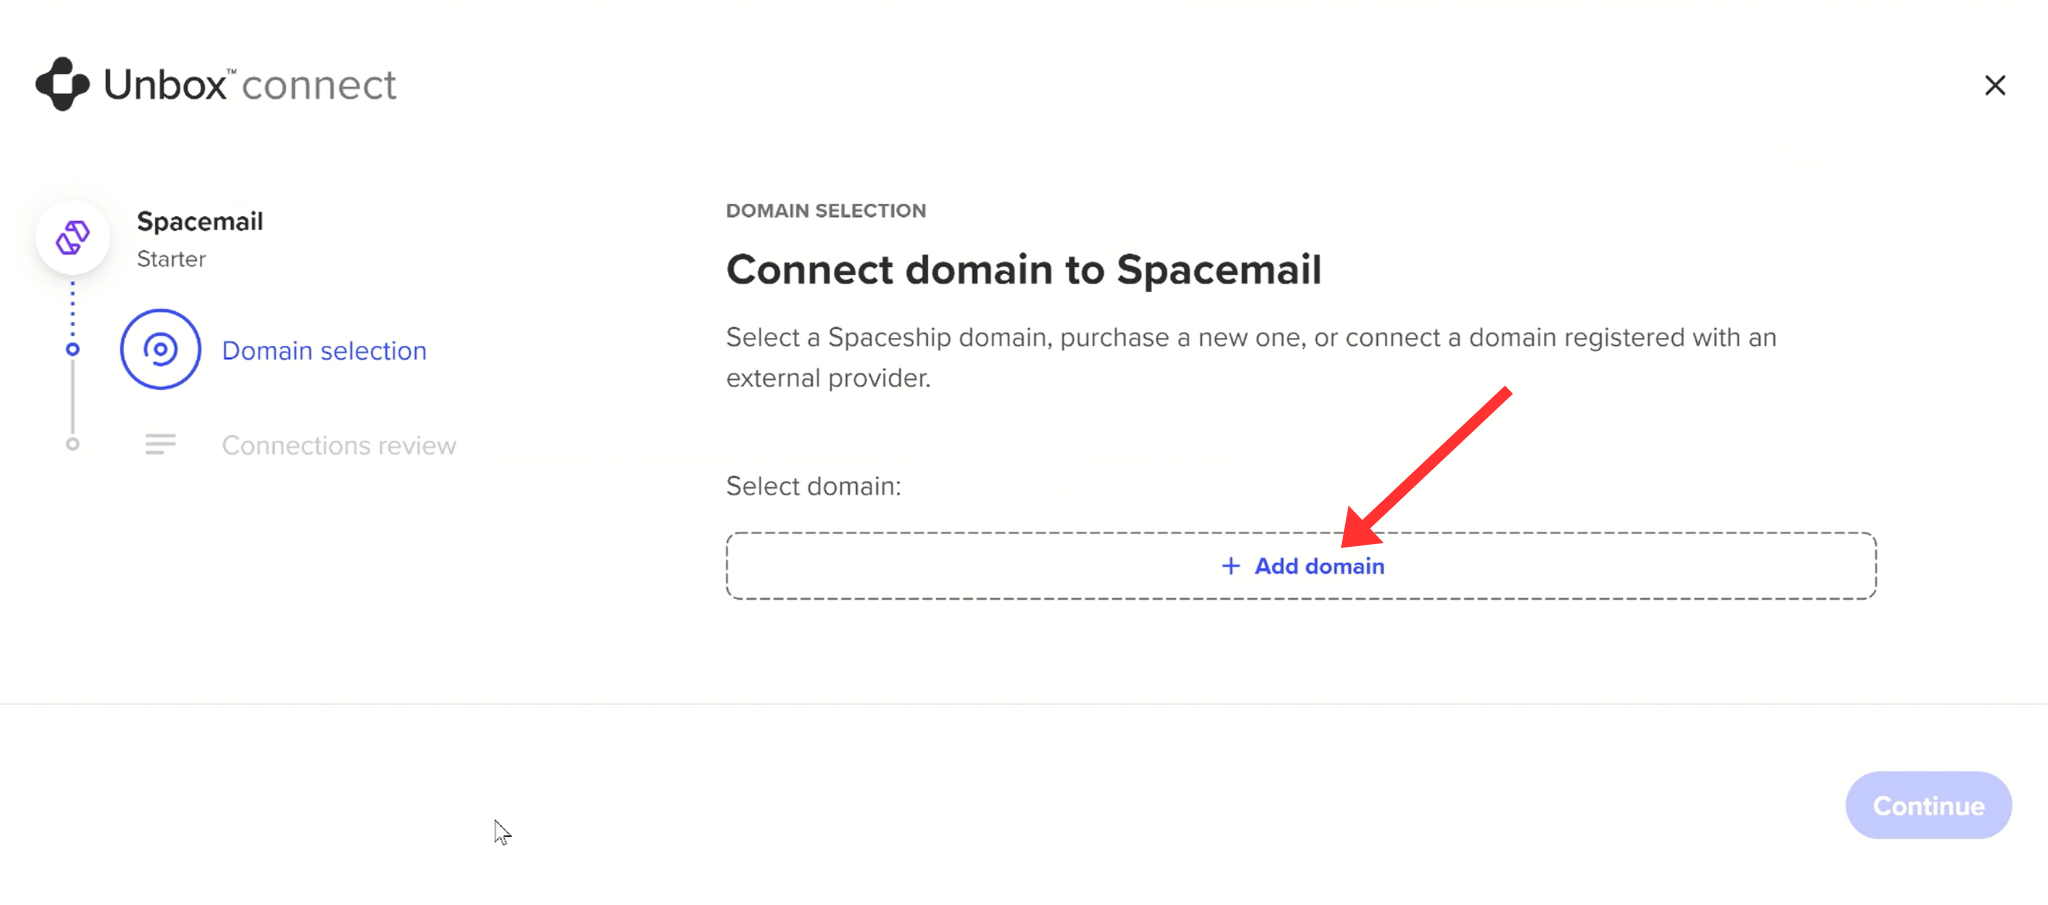
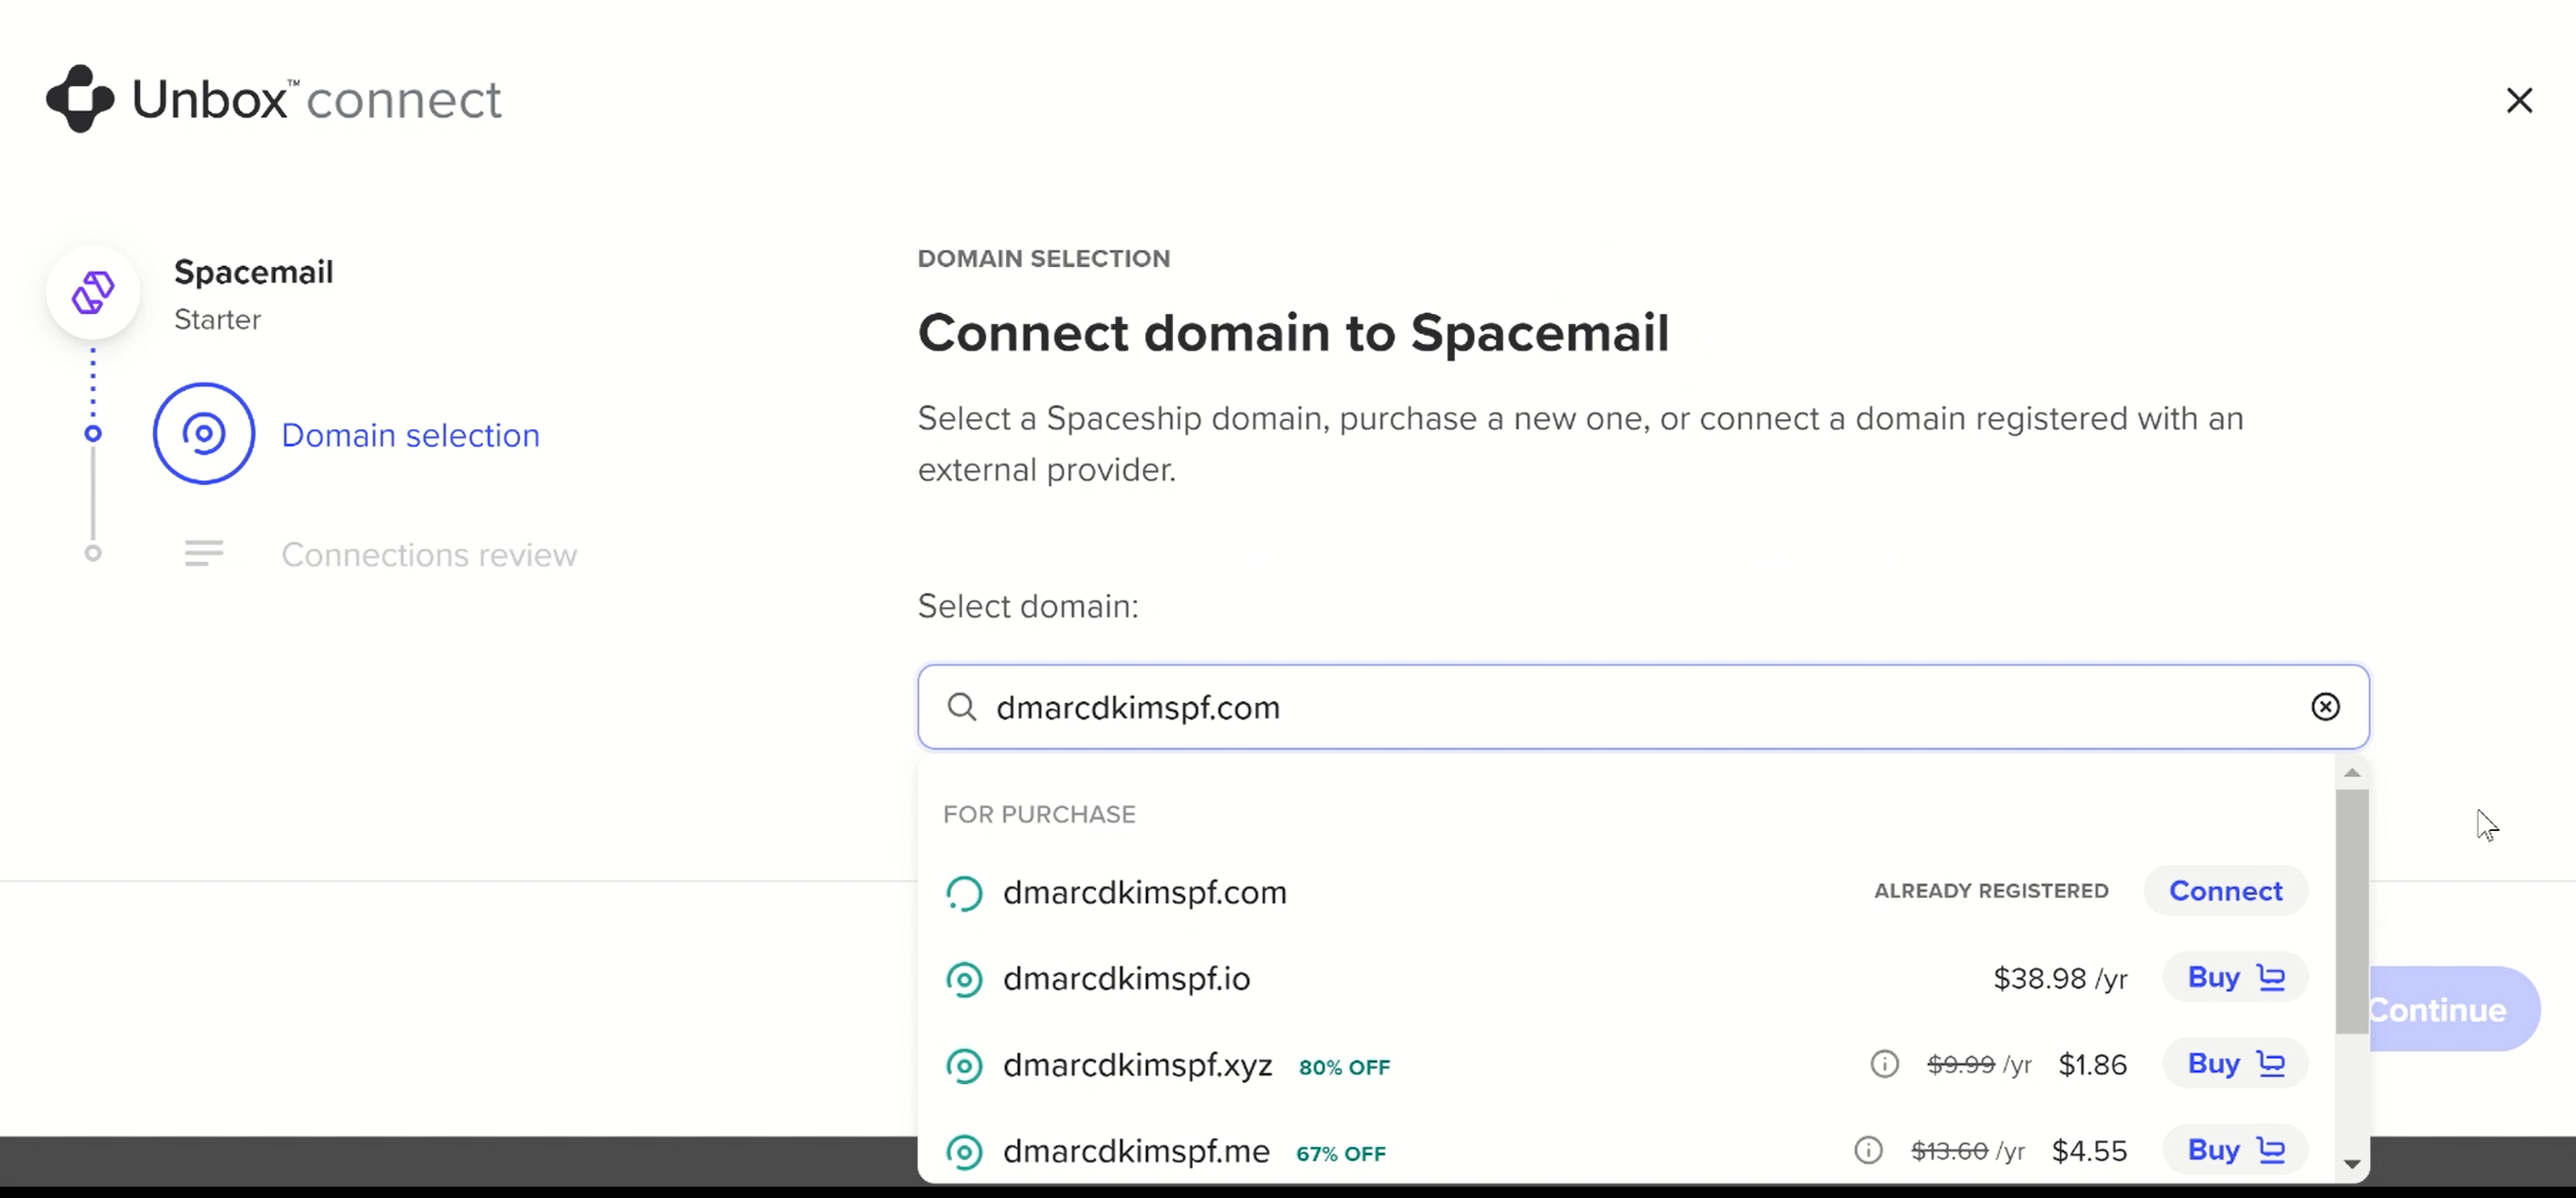
Click the Add Domain.
-
Write down your domain name, and connect it to Spacemail.
-
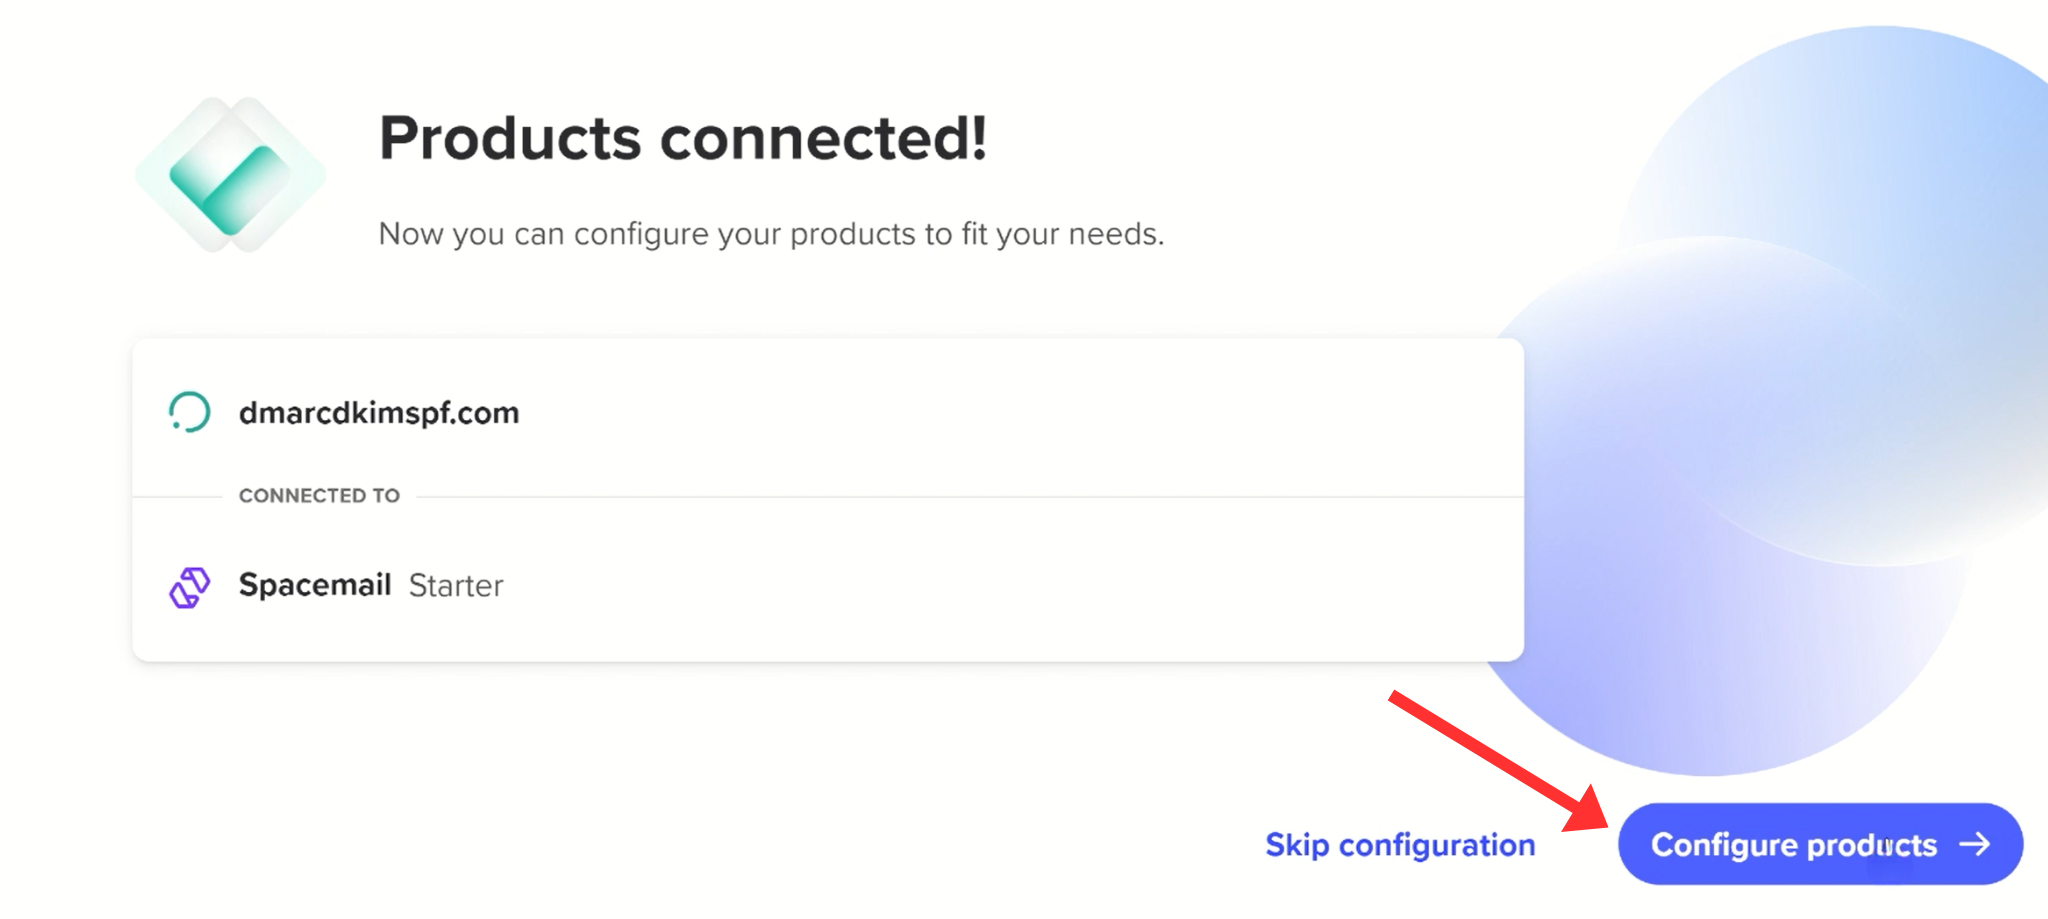
Once your product is connected, click Configure Products.
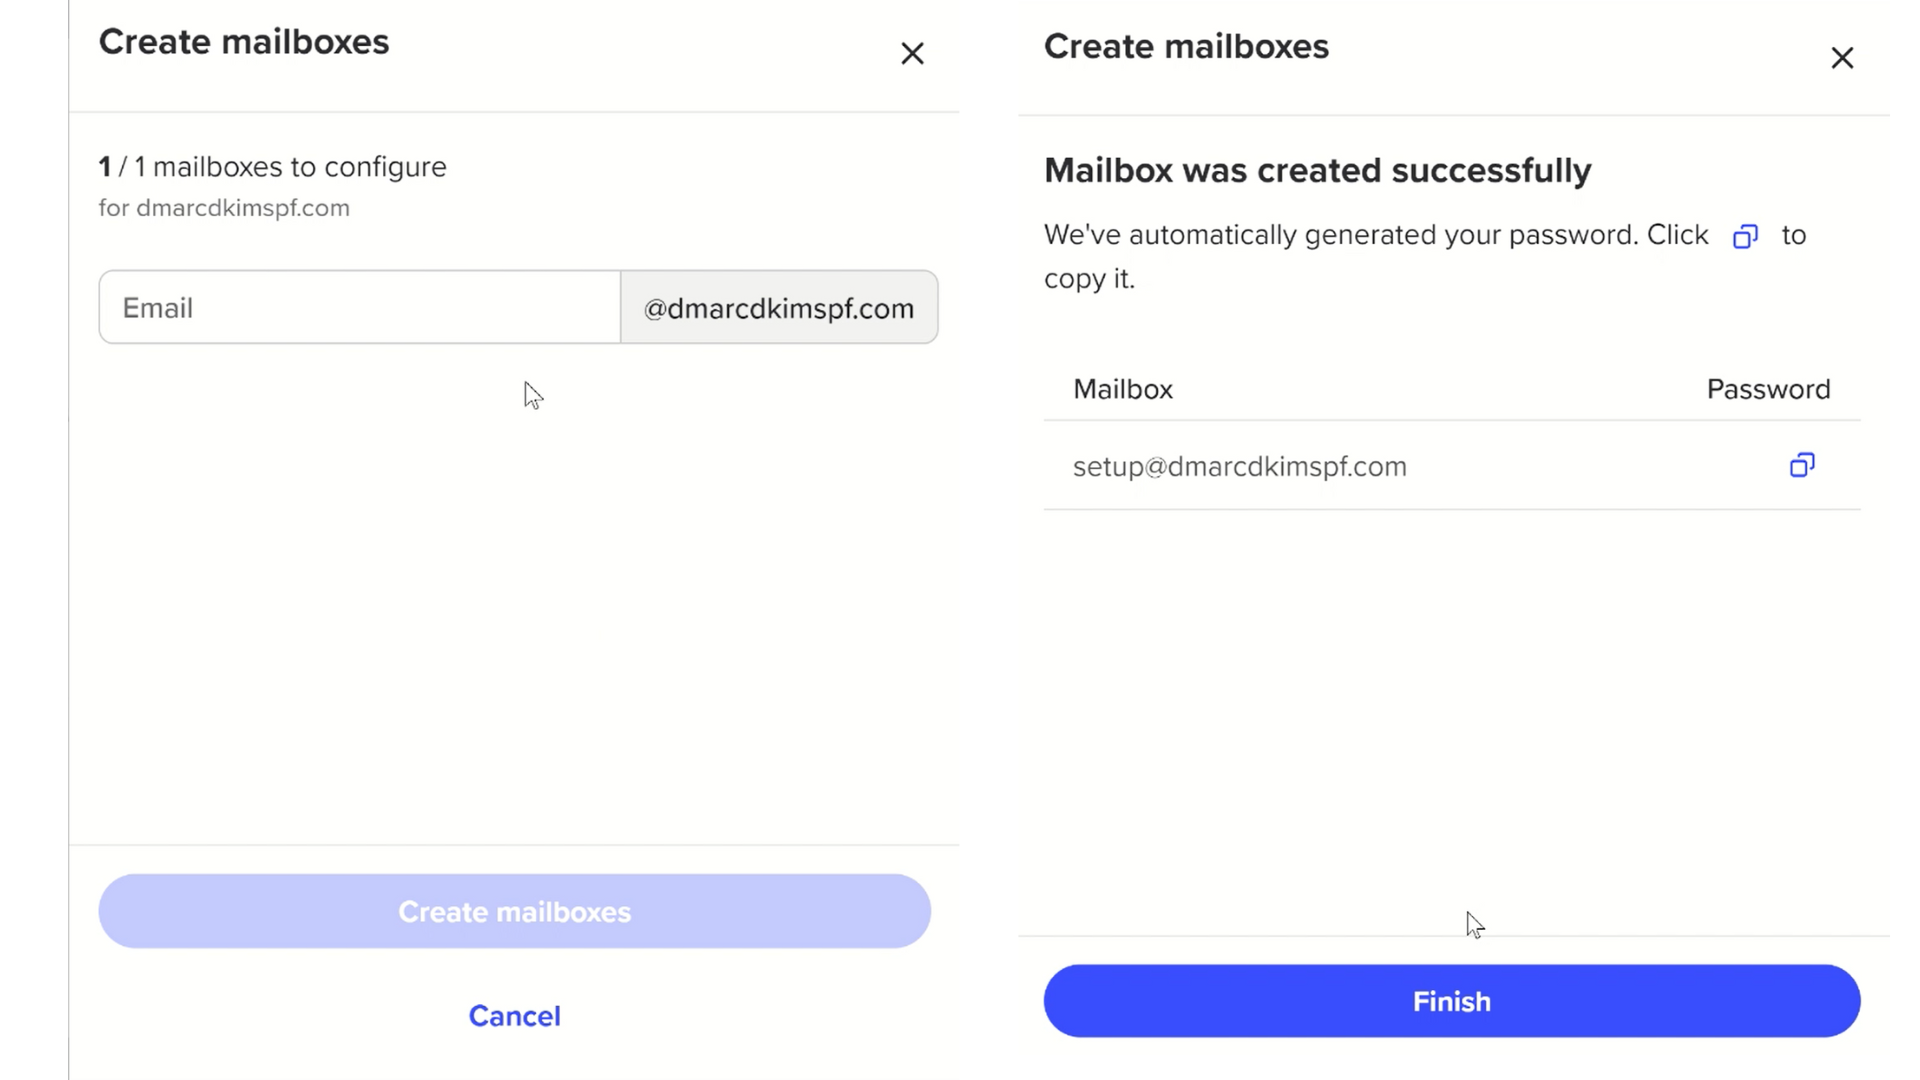
Next, write your Email and click Create Mailbox.
-
Spacemail automatically creates a password for your mailbox - save it and click Continue.
-
Now click the View Guides option in the "Configure DNS Settings" box.
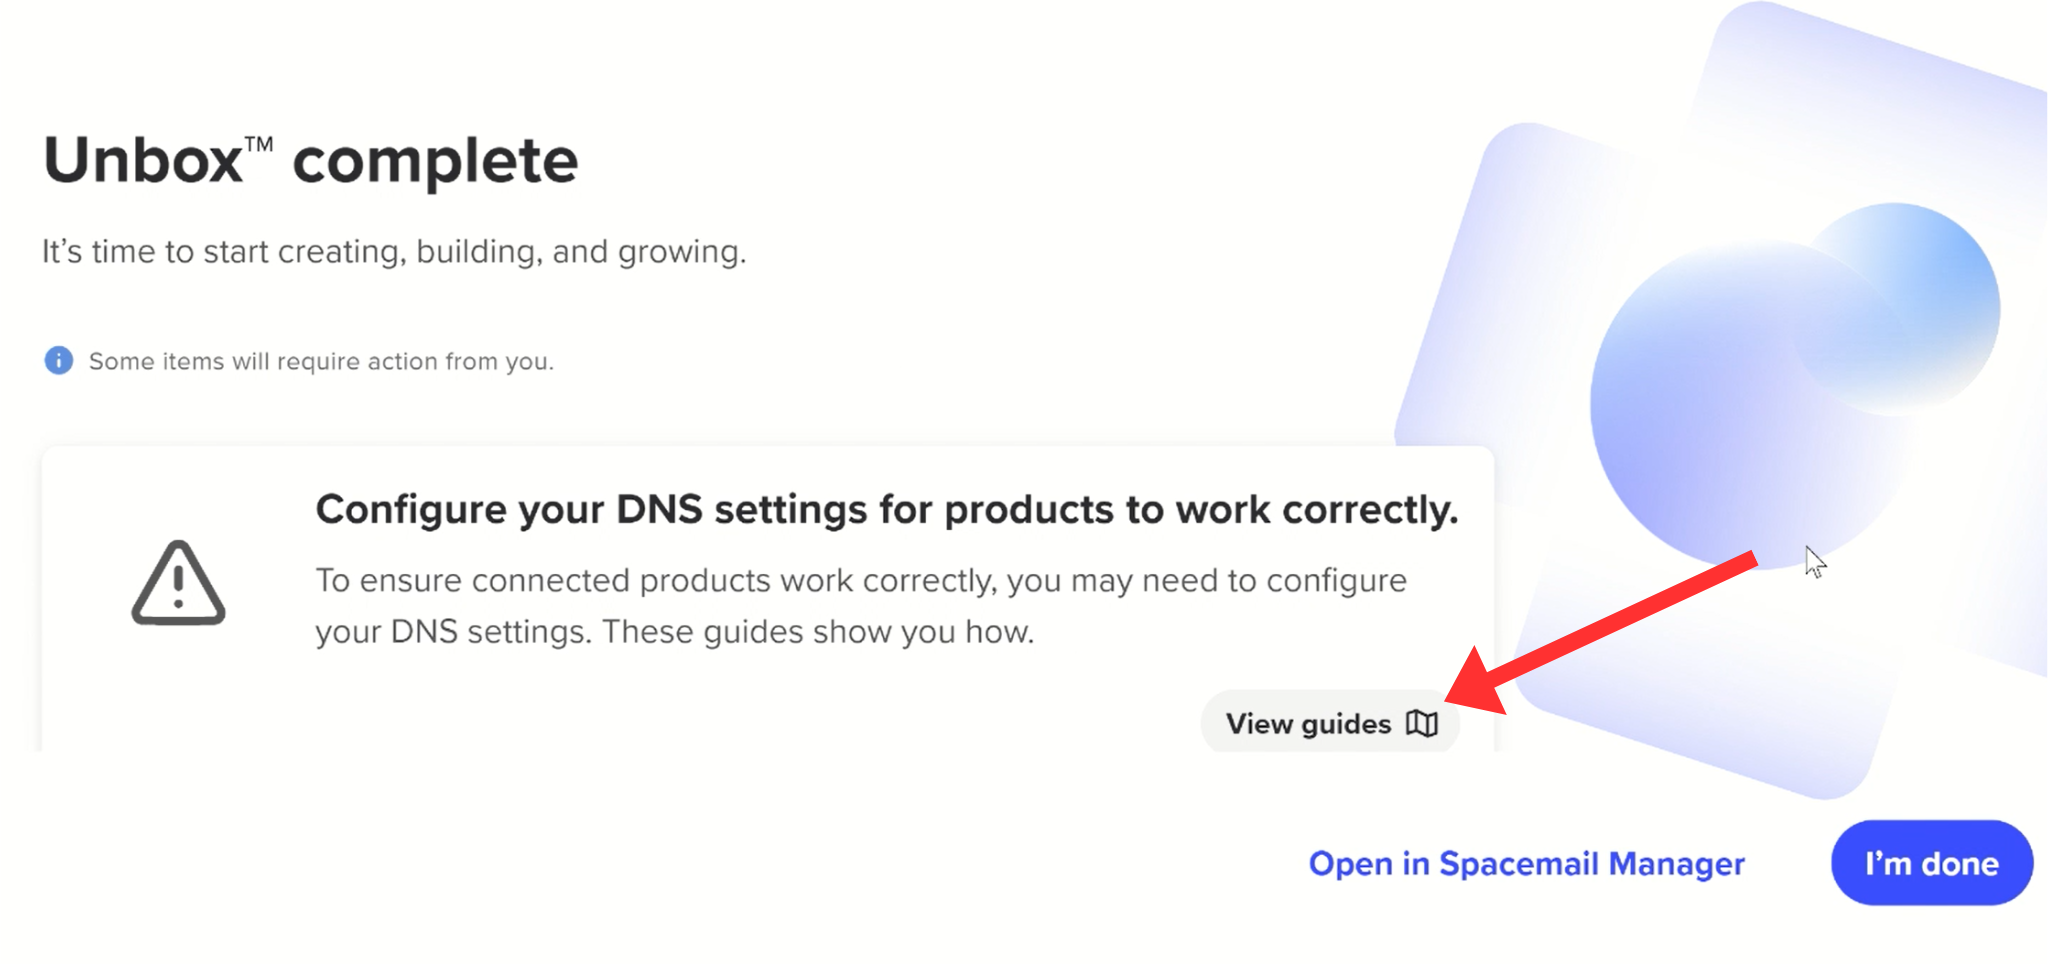
-
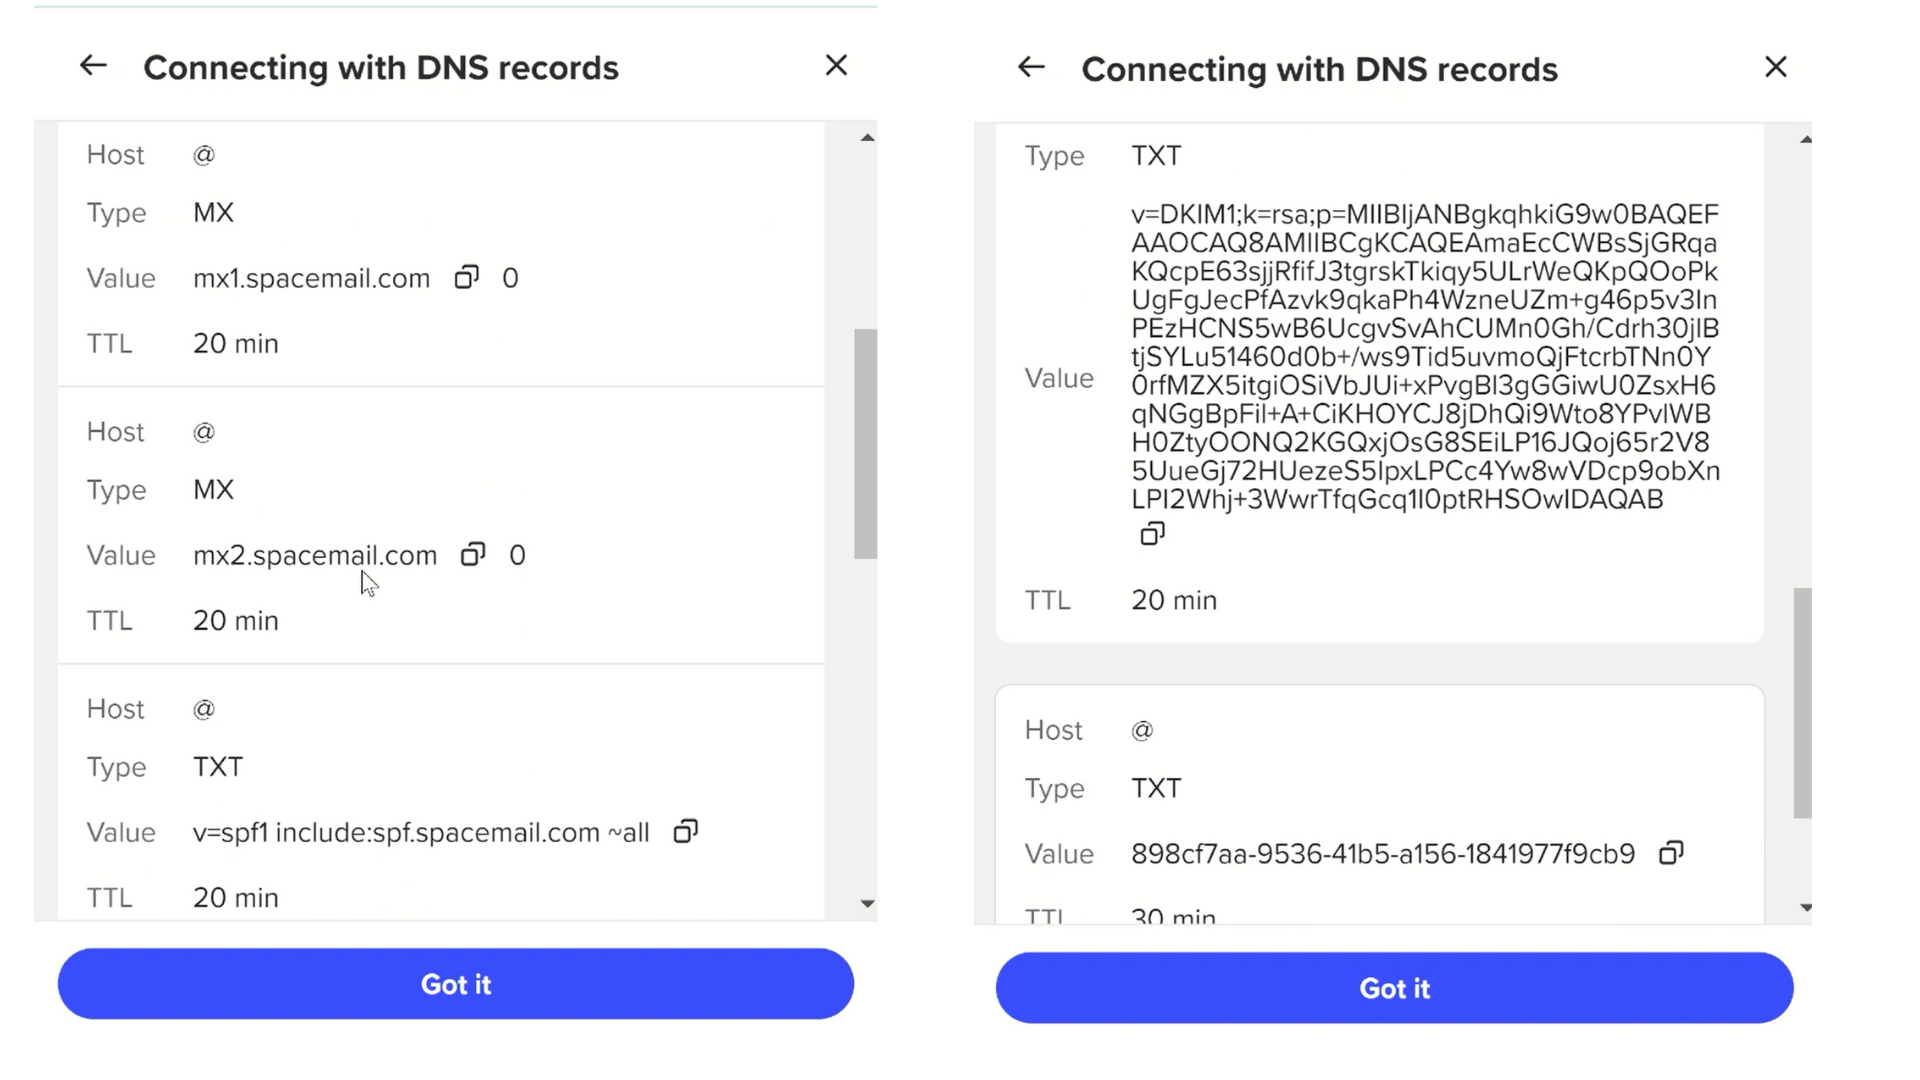
The next pop-up window shows you the SPF, DKIM, MX, and domain ownership records.


Setup Spacemail MX Records:
-
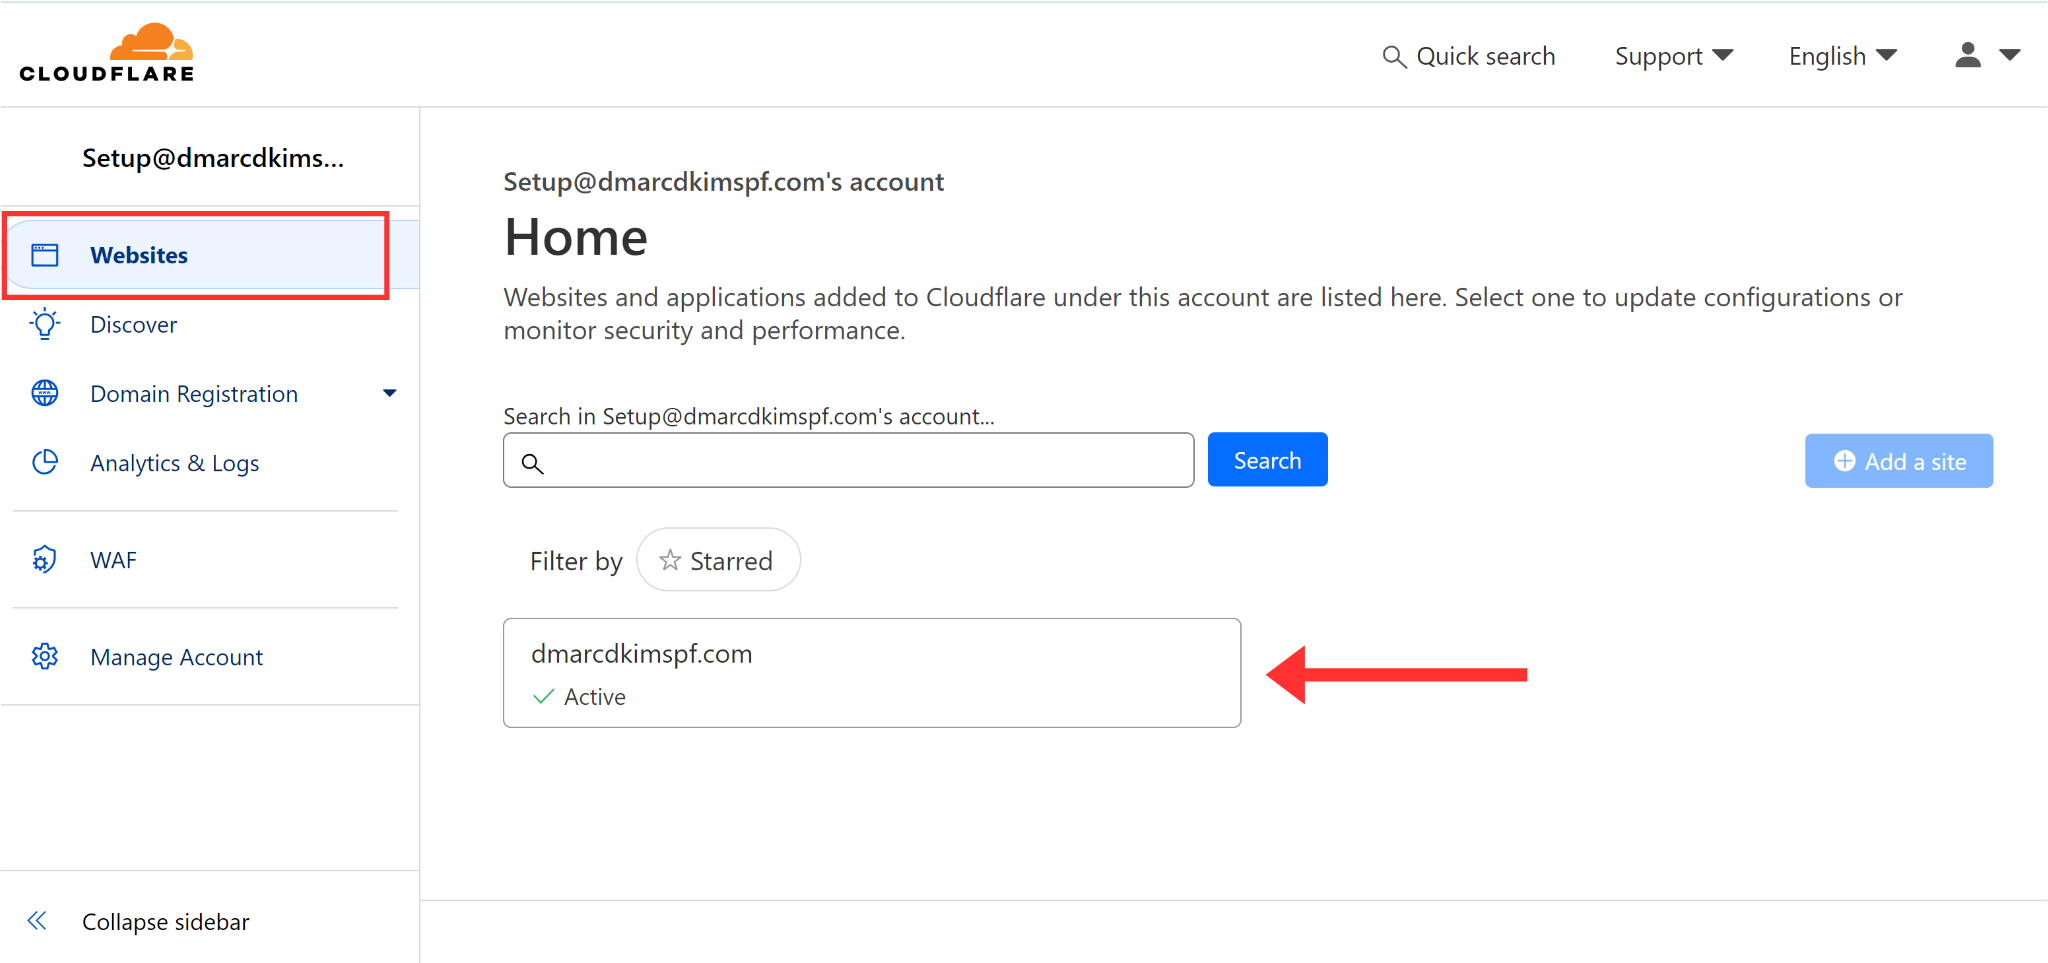
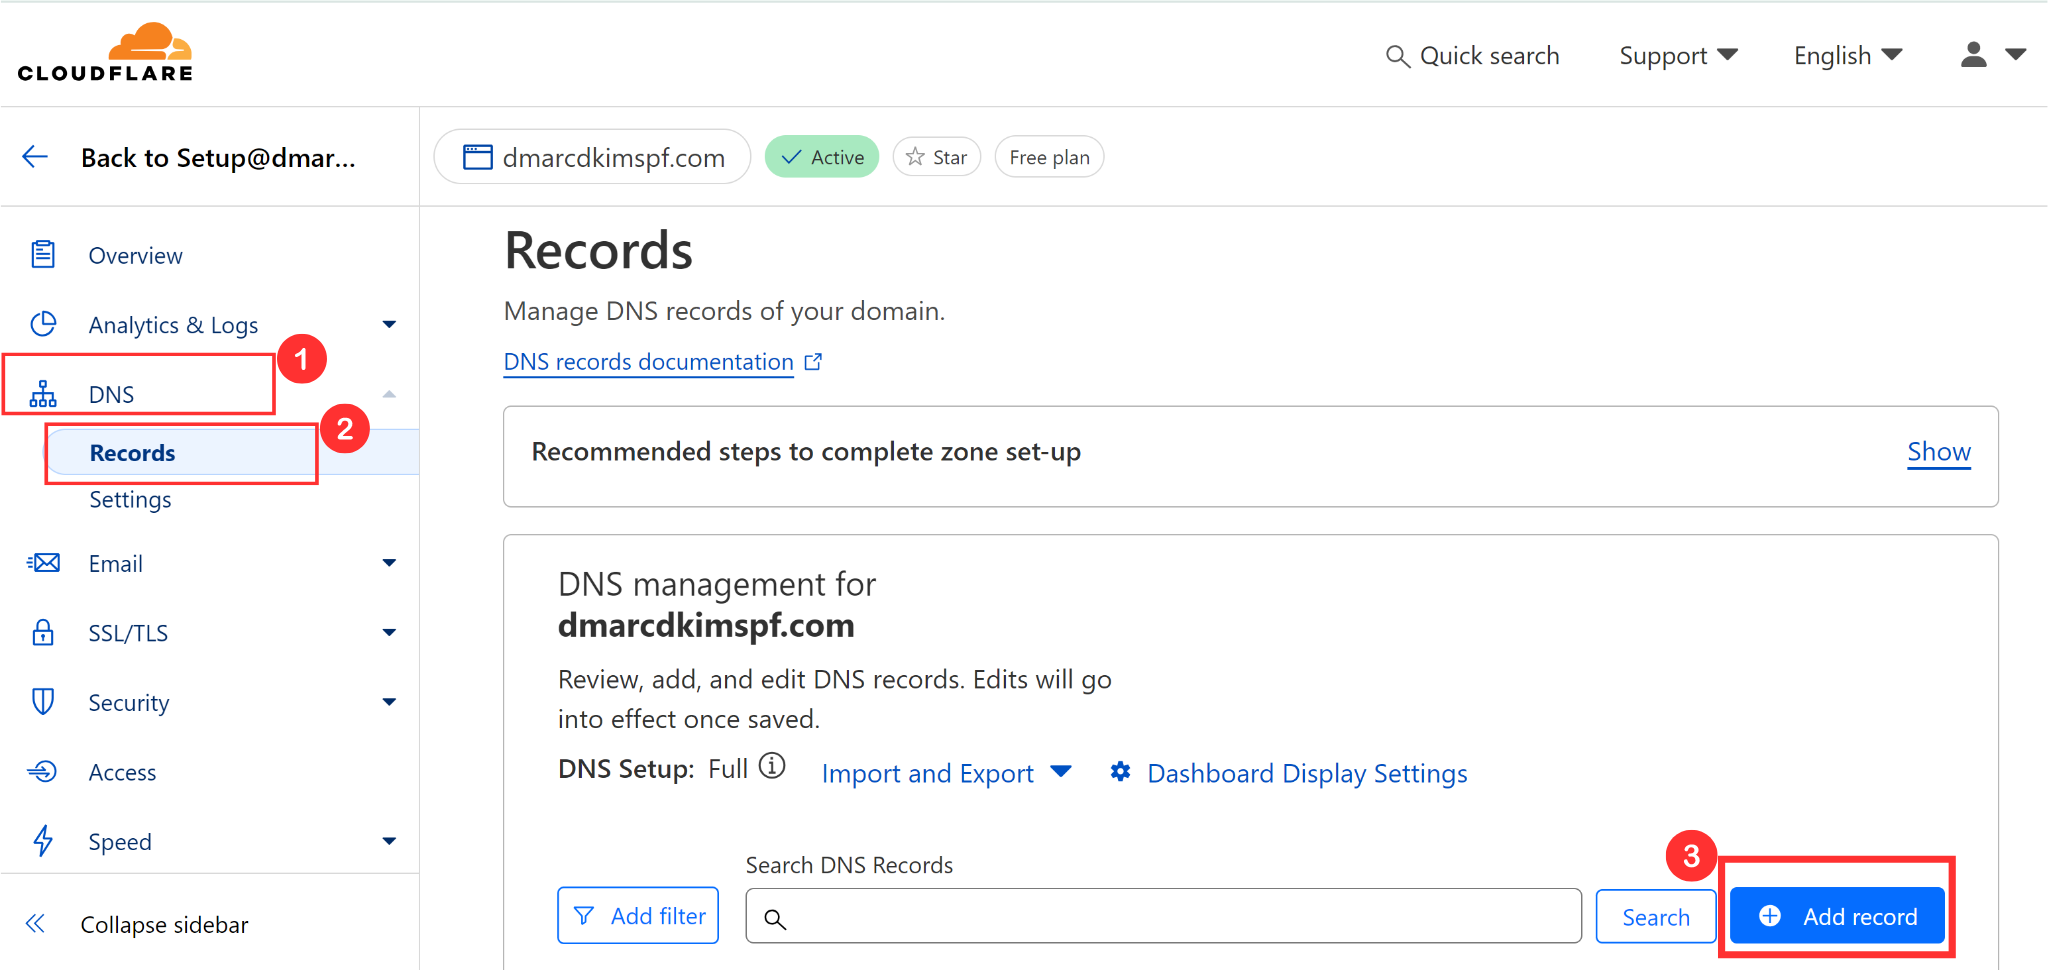
Login to your DNS dashboard and go to your domain. We are using Cloudflare for this guide.
-
In the DNS tab, click the Add Record button.
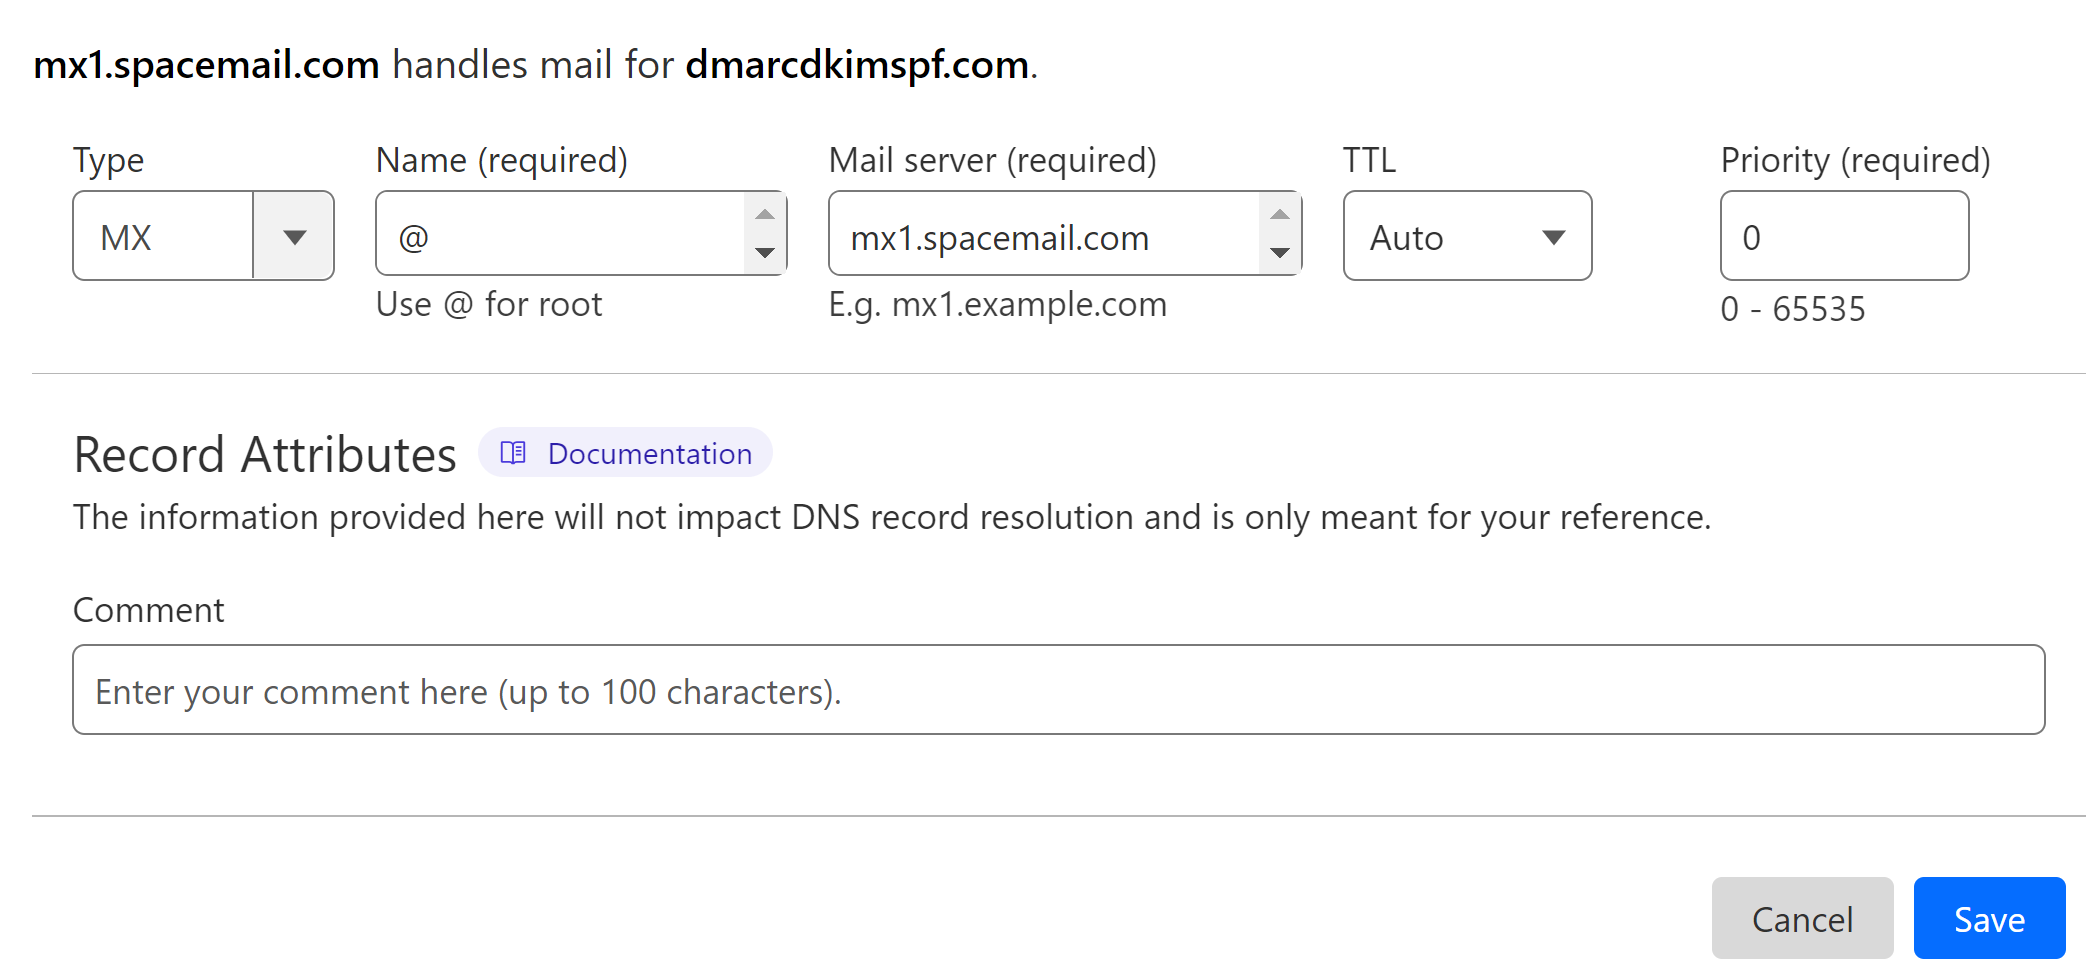
Select type MX.
Write "@" in the record name field.
In the Mail Server or value field, paste the MX value.
-
Select priority "0" and click Save.
Add the second MX record following the same steps.


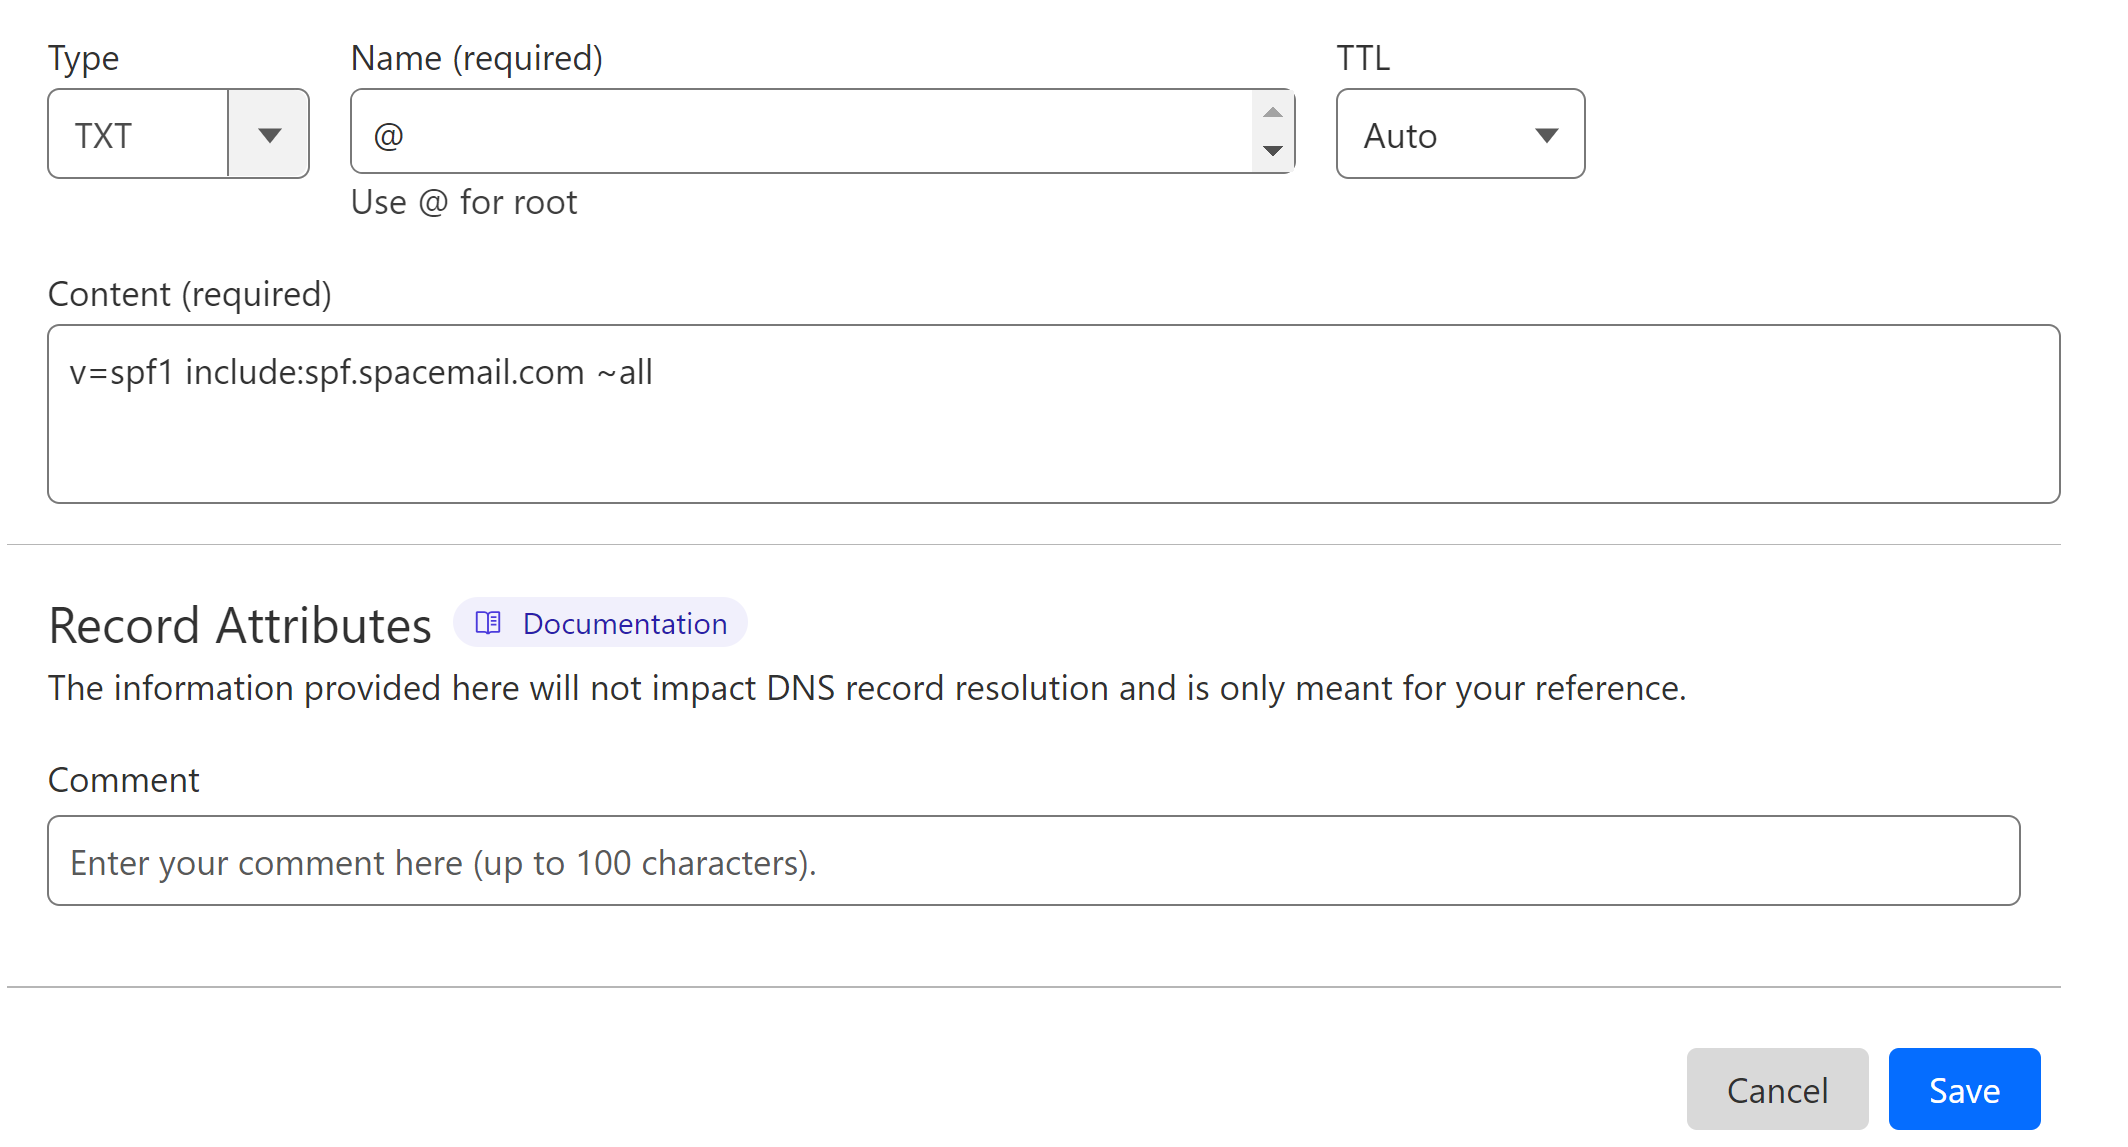
Setup Spacemail SPF Record:
If there is no SPF record already added to your domain, then follow the steps below to add Spacemail SPF.
Click Add Record and select type TXT.
In the Name field, write "@."
Copy the Spacemail SPF value and paste it into the Content field.
-
Lastly, click Save.

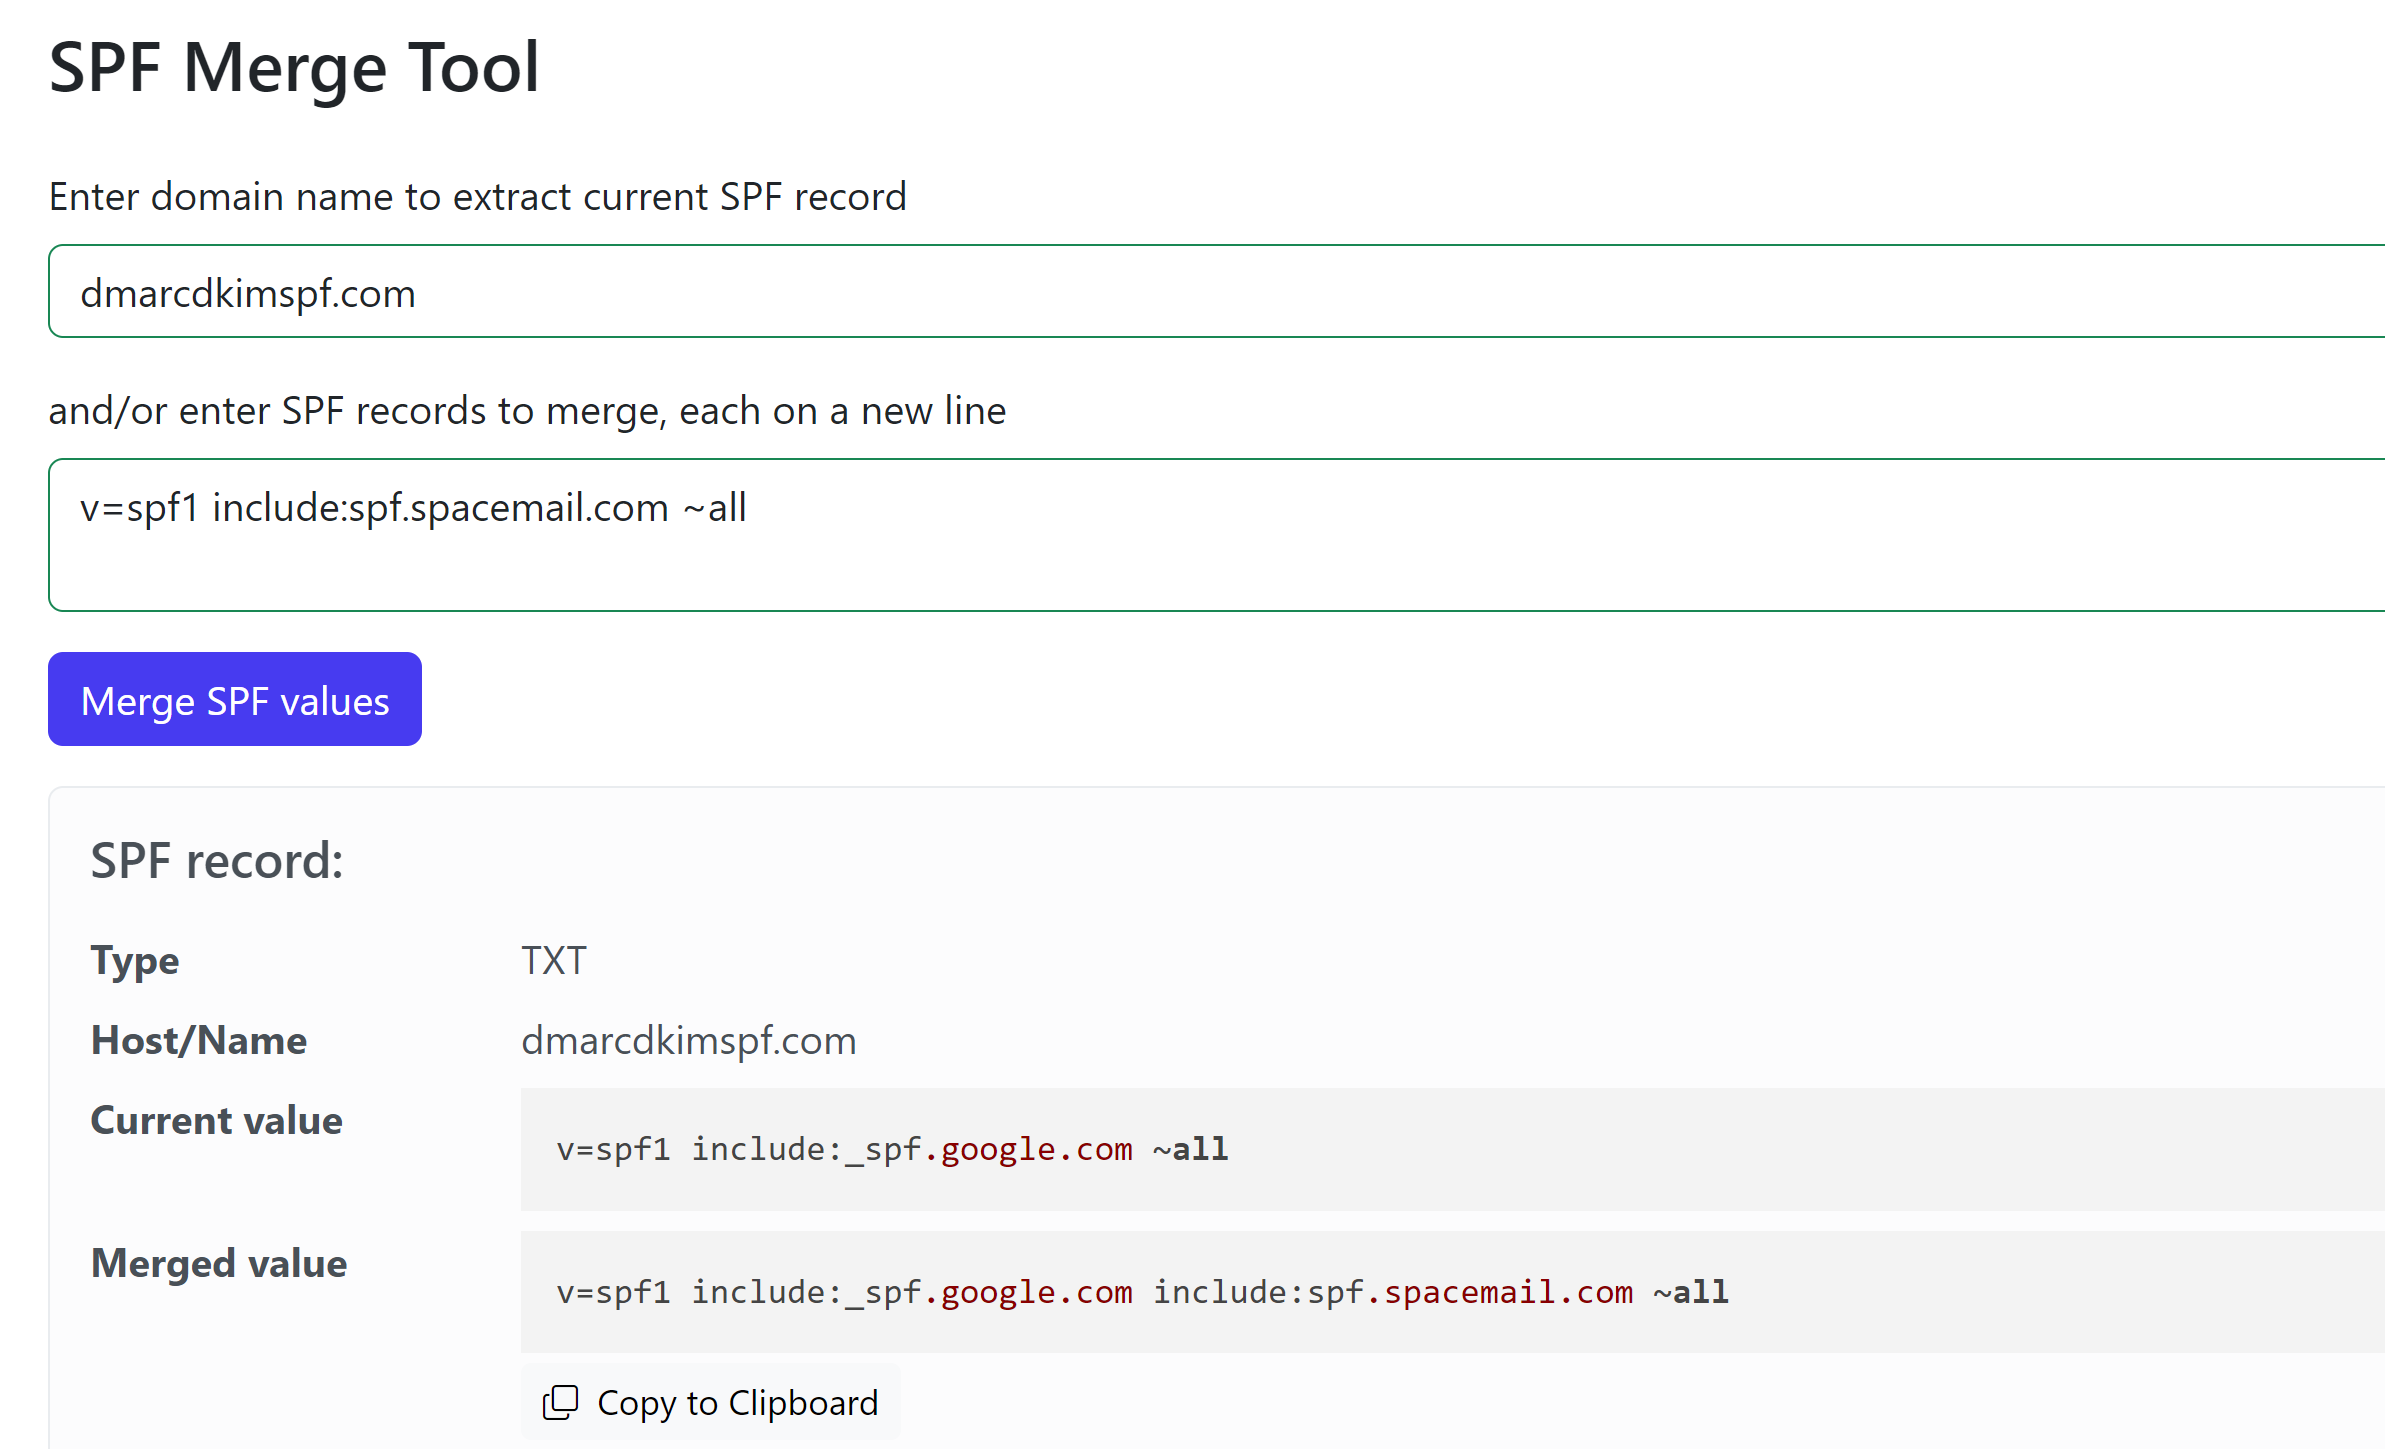
Merge Multiple SPF Record:
Having more than one SPF record for a domain causes conflicts. If your DNS dashboard has an SPF record from another source, then you need to merge the Spacemail SPF value with the previous one to integrate them into one.
Go to the SPF merge tool.
Add your domain name and Spacemail SPF value.
Click the Merge SPF Values button.
-
Copy the Merged value and edit your existing SPF record.

Add Spacemail DKIM and Domain Ownership Record:
For both records, select type TXT.
Copy the record name and value, and add them to the dedicated fields.
Click Save to add the records.
Verify the Spacemail DNS records:
When all records are added, click the "Got it" button at the bottom.
Wait for a few hours for the DNS propagation to complete.
-
You can see the propagation status in the Advanced DNS settings.
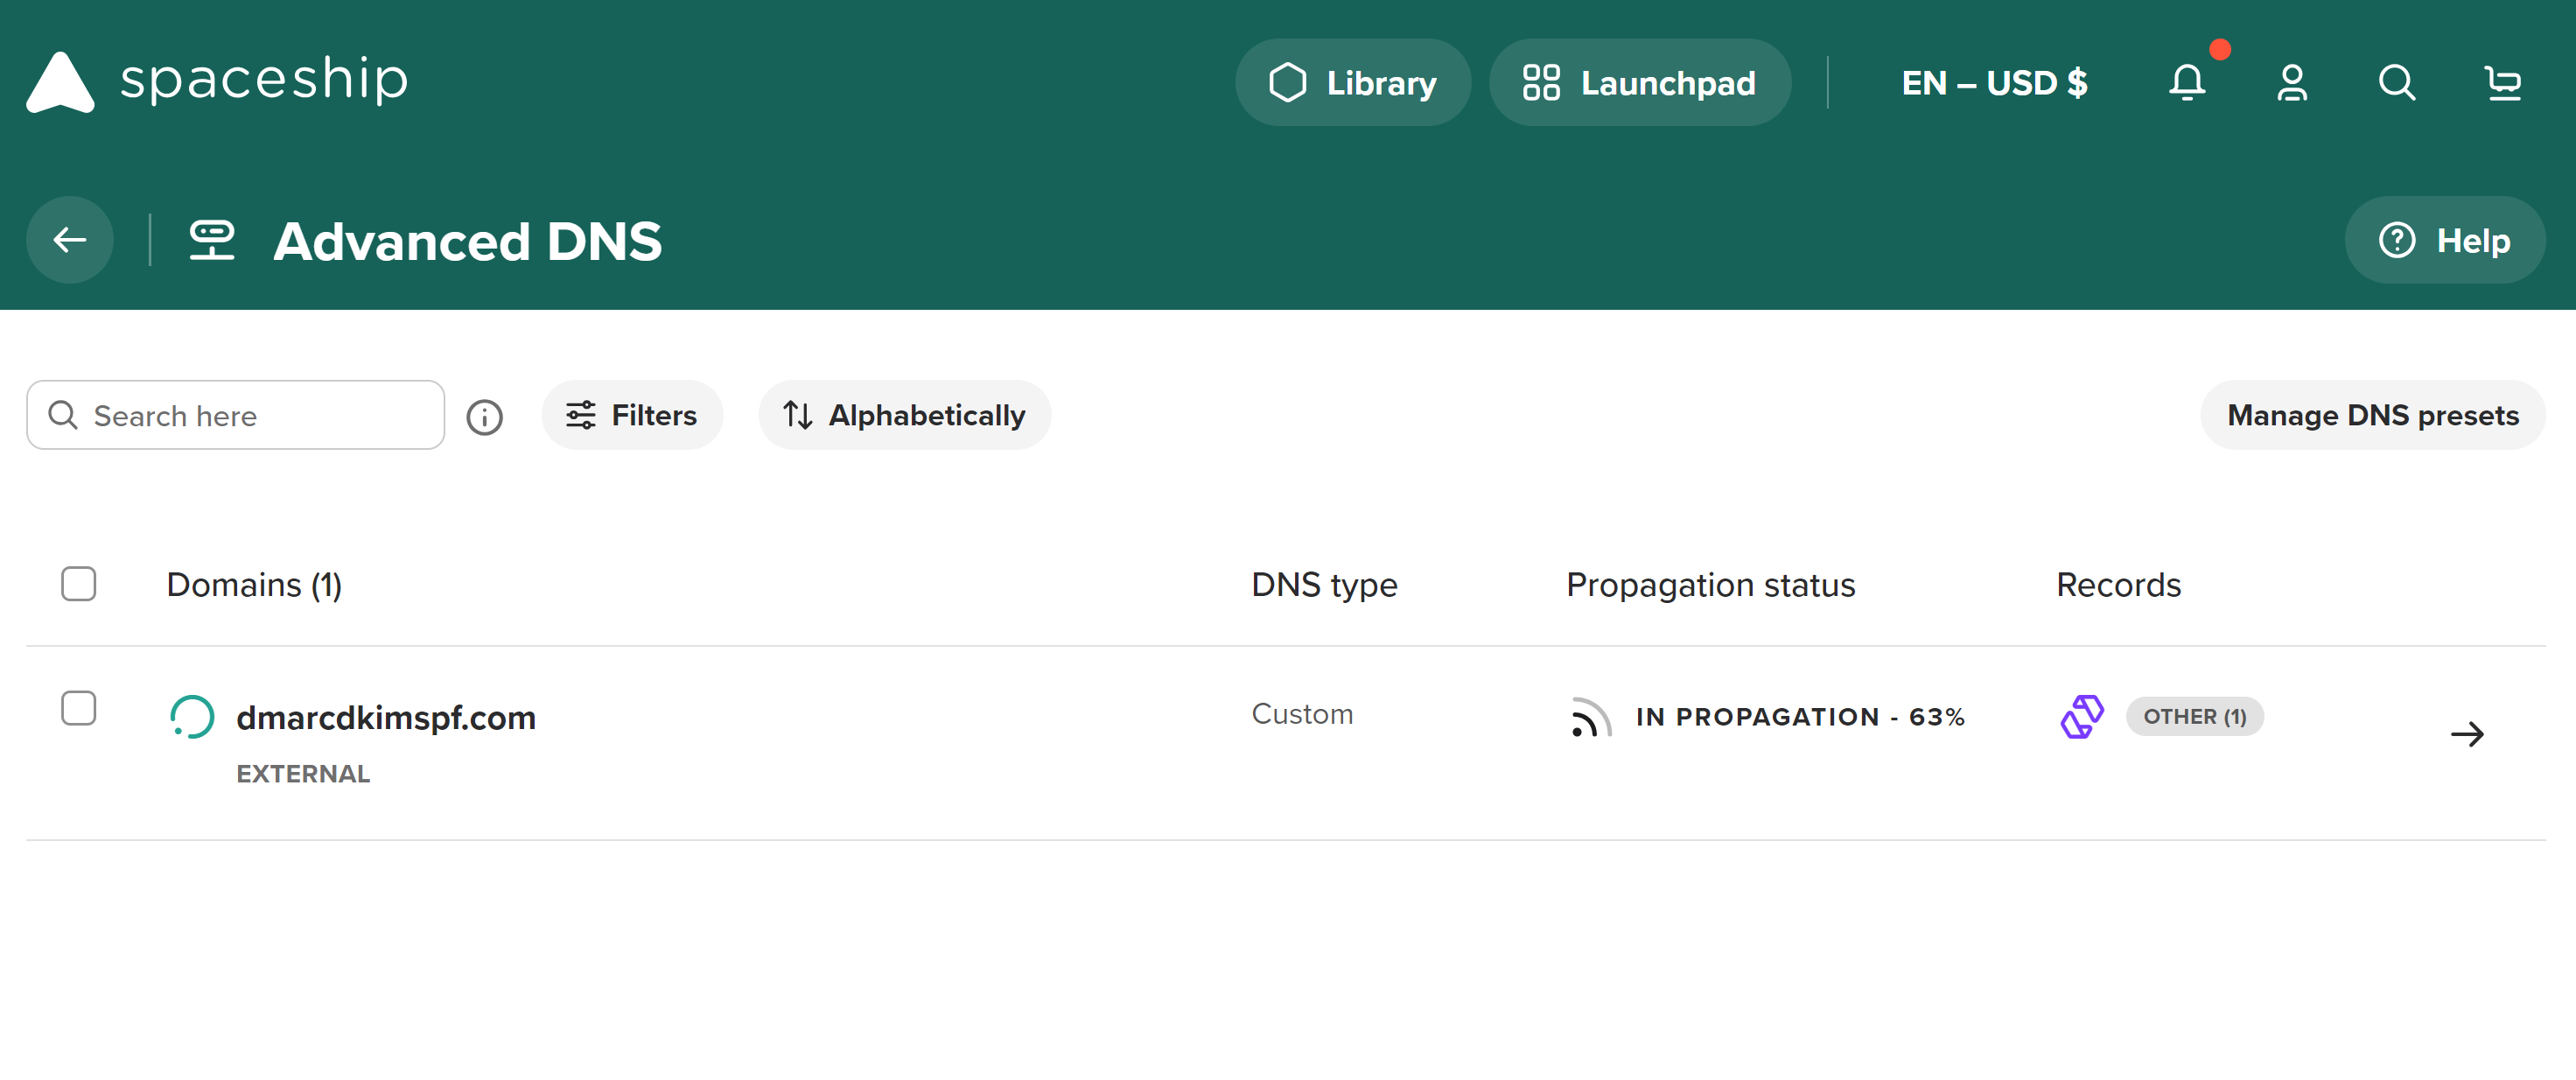

NOTE: DNS validation may take up to 48 hours.
If records do not validate after 48 hours, there might be a misconfiguration in your DNS setup. Hire a DmarcDkim.com expert to troubleshoot the domain authentication errors.
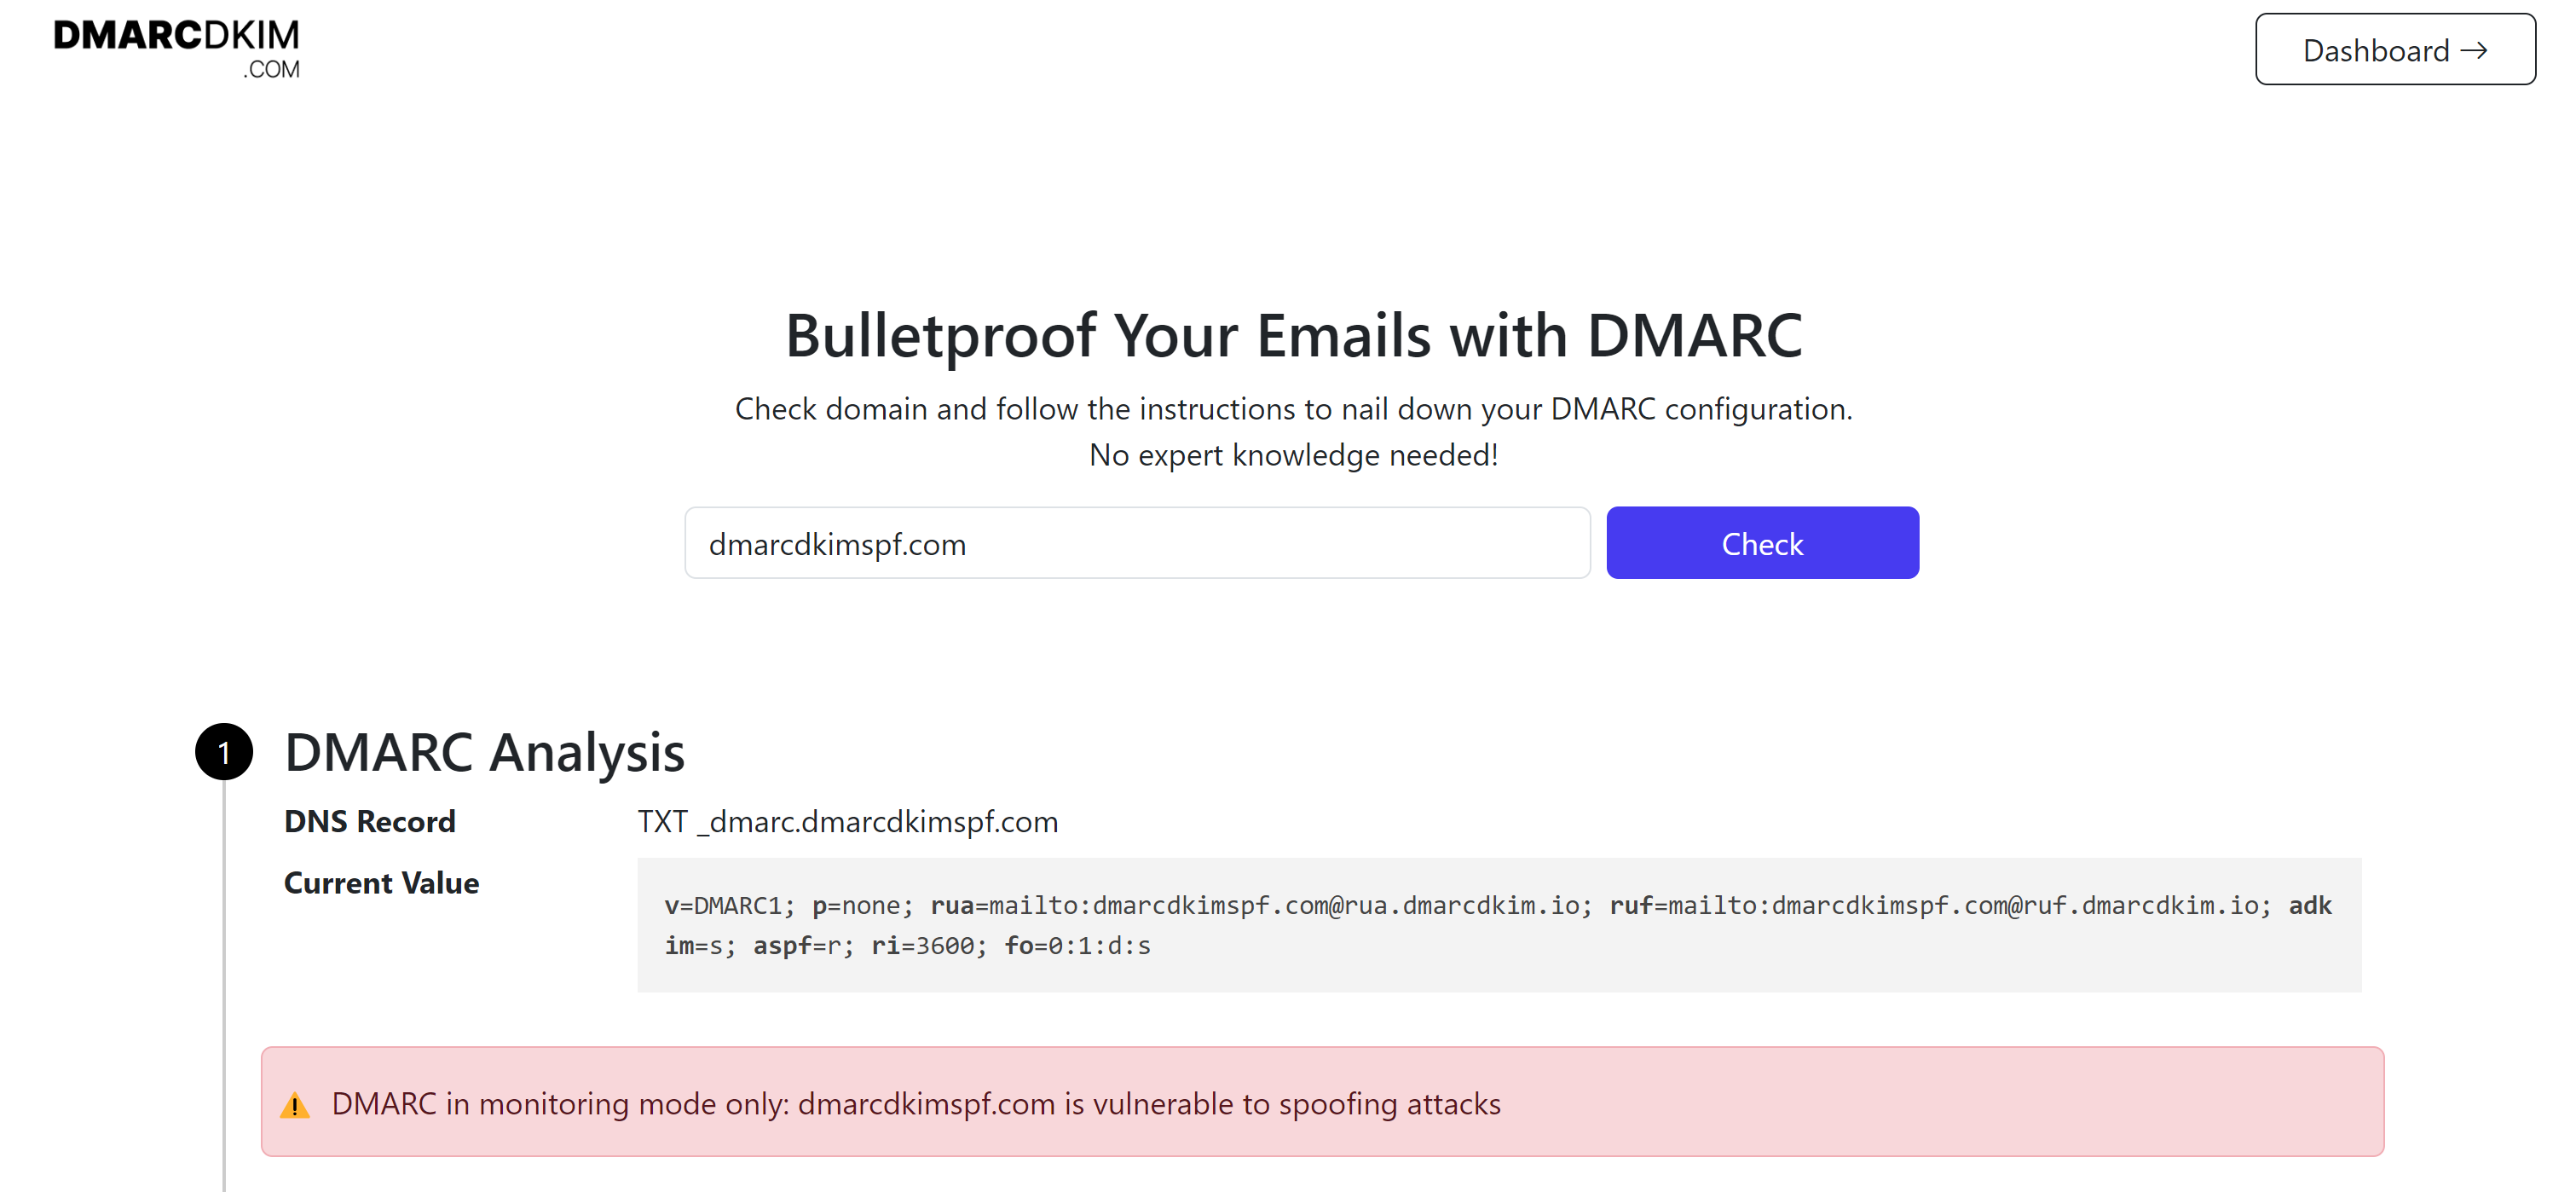
Setup Spacemail DMARC Record:
You can generate a DMARC record with the help of the DmarcDkim.com DMARC check tool. This tool guides you through setting up a strict policy and updates you with insights on email activity. This way, you can stop spoofing in its tracks.
Go to the DMARC check tool.
Add your domain name and click Check.
-
Copy the record name and Suggested value and add them to your DNS dashboard.
Sign up for the tool to access the DMARC reports dashboard.

For support and assistance, contact the DmarcDkim.com team.
Check your domain for DMARC, DKIM, SPF and MX records. Get a free report.