Salesforce SPF, DKIM, and DMARC Configuration - Domain Authentication Guide
How to Setup SPF, DKIM, and DMARC Records for Salesforce Domains?
If you are tired of emails going to the spam, this article is for you. It will guide you on how to setup Salesforce SPF, DKIM, and DMARC records for email domain authentication
Email spoofing has become a major threat to businesses these days, that's why email inbox providers like Google require you to comply with their security standards strictly.
SPF (Sender Policy Framework), DKIM (DomainKeys Identified Mail), and DMARC (Domain-based Message Authentication Reporting and Conformance) are the commonly used security standards for domain authentication and email verification.
Salesforce provides you with all the necessary records to protect your email communication. You need to add these records to your domain provider and wait for them to get validated.
Setup DKIM Record:
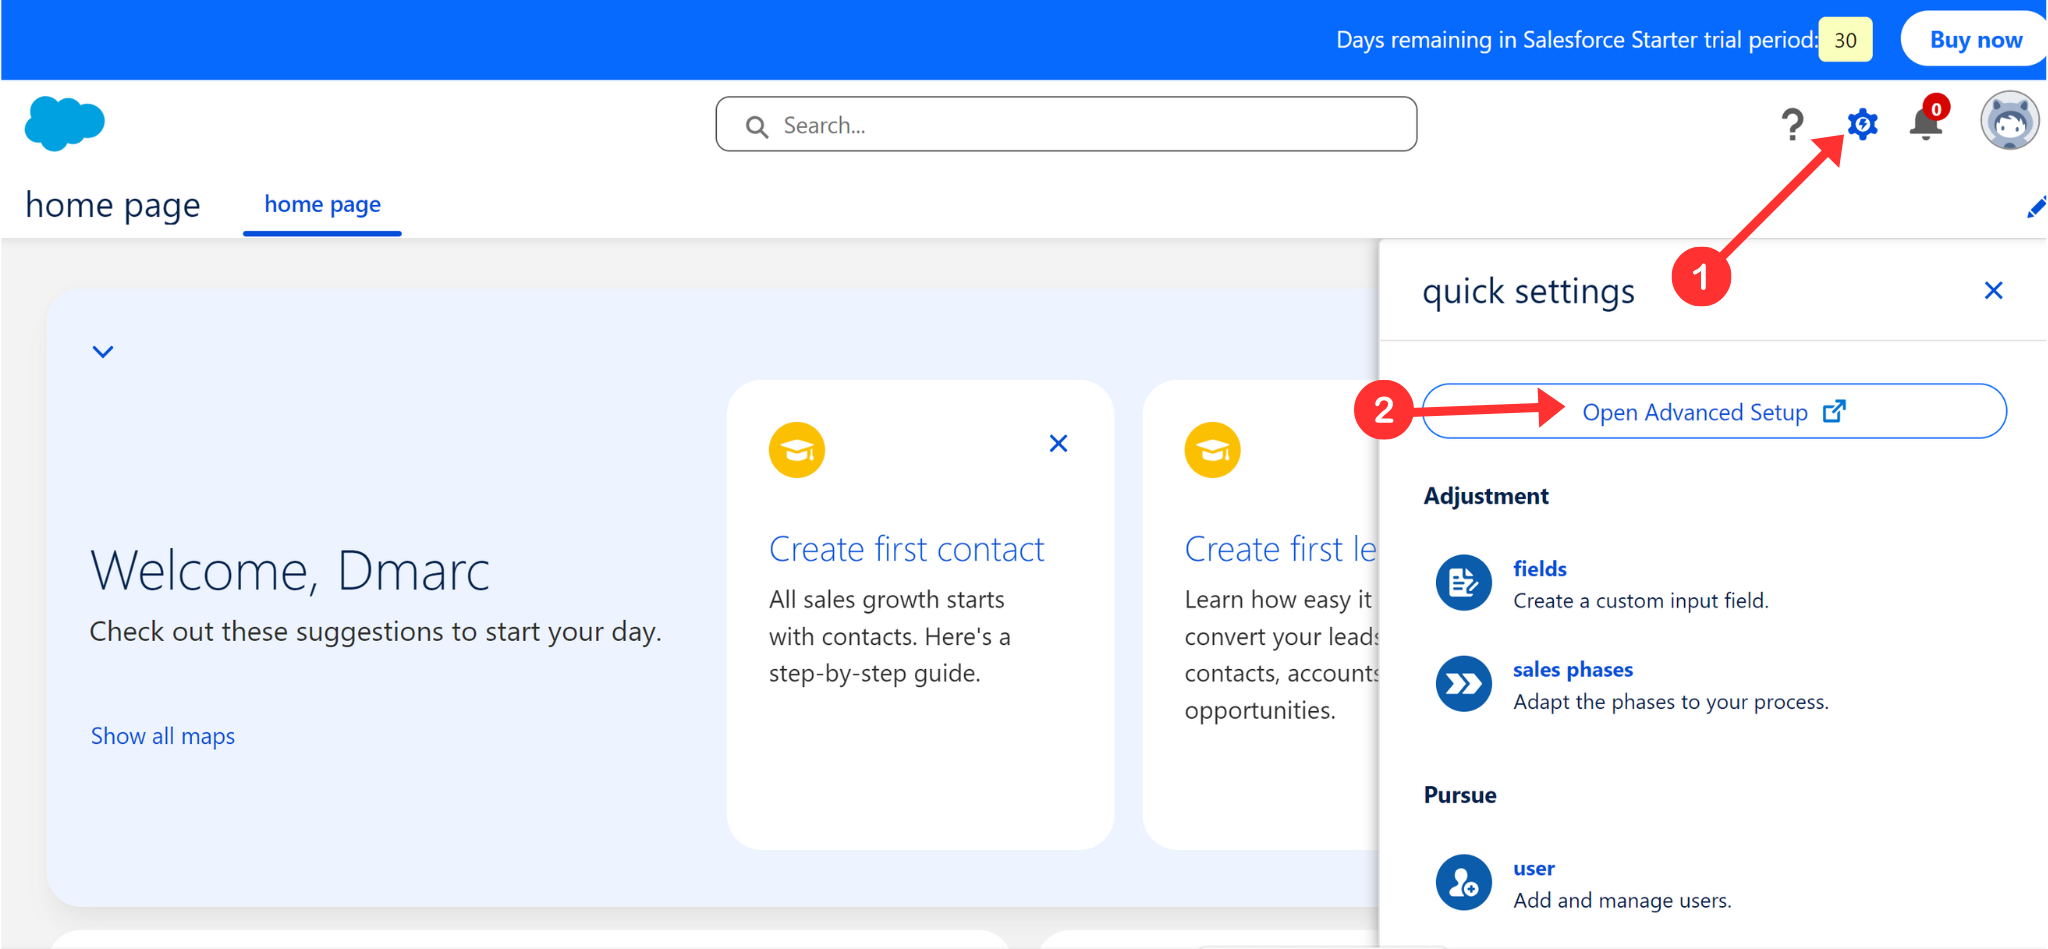
Click the Settings icon in the top right corner of the Salesforce dashboard.
-
Go to the Open Advanced Setup option.
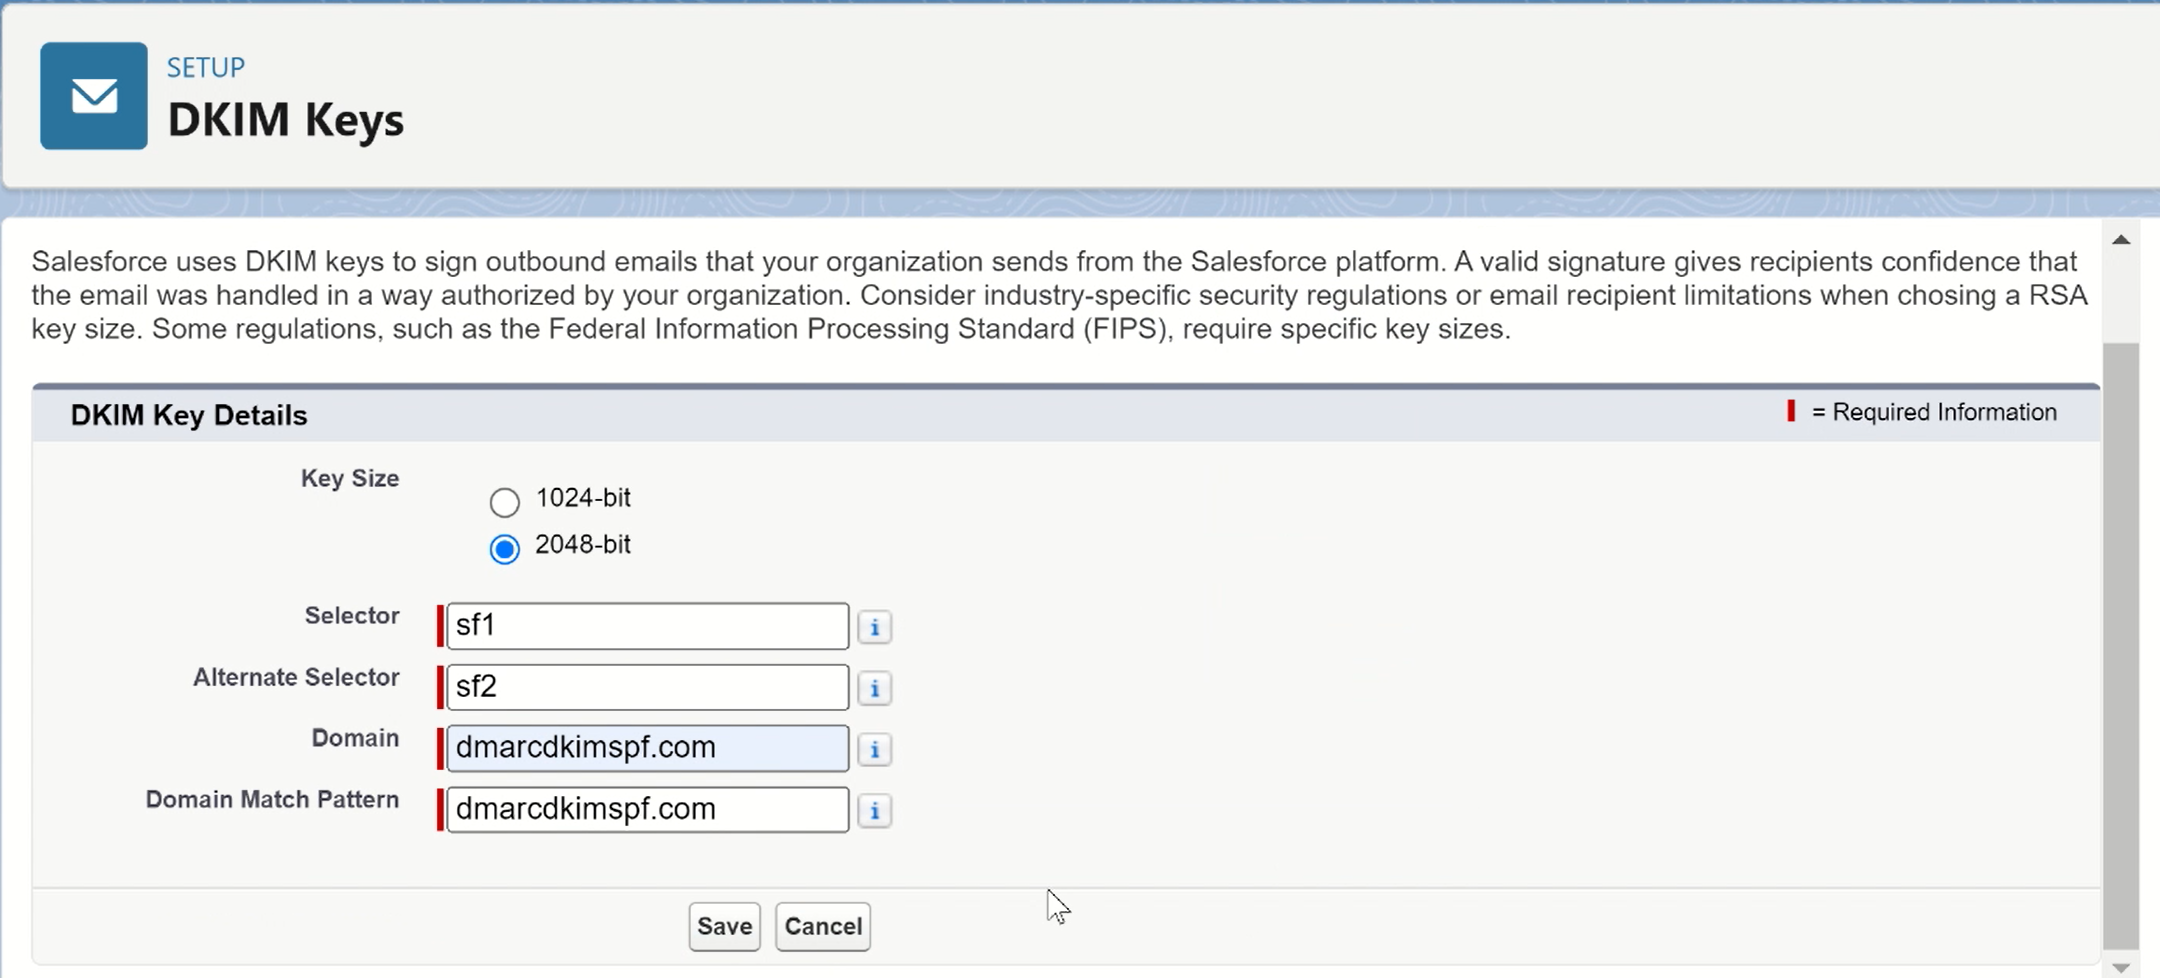
Expand the Email option in the left navigation menu and go to the DKIM Keys tab.
-
Click Create New Key.

-
Select key size 2048-bit. Add the selector "sf1" and "sf2." Write your domain name. In the Domain Match Pattern field, write down your domain name again. Click Save.
-
Next, you will see two CNAME DKIM records, add them to your DNS provider.

-
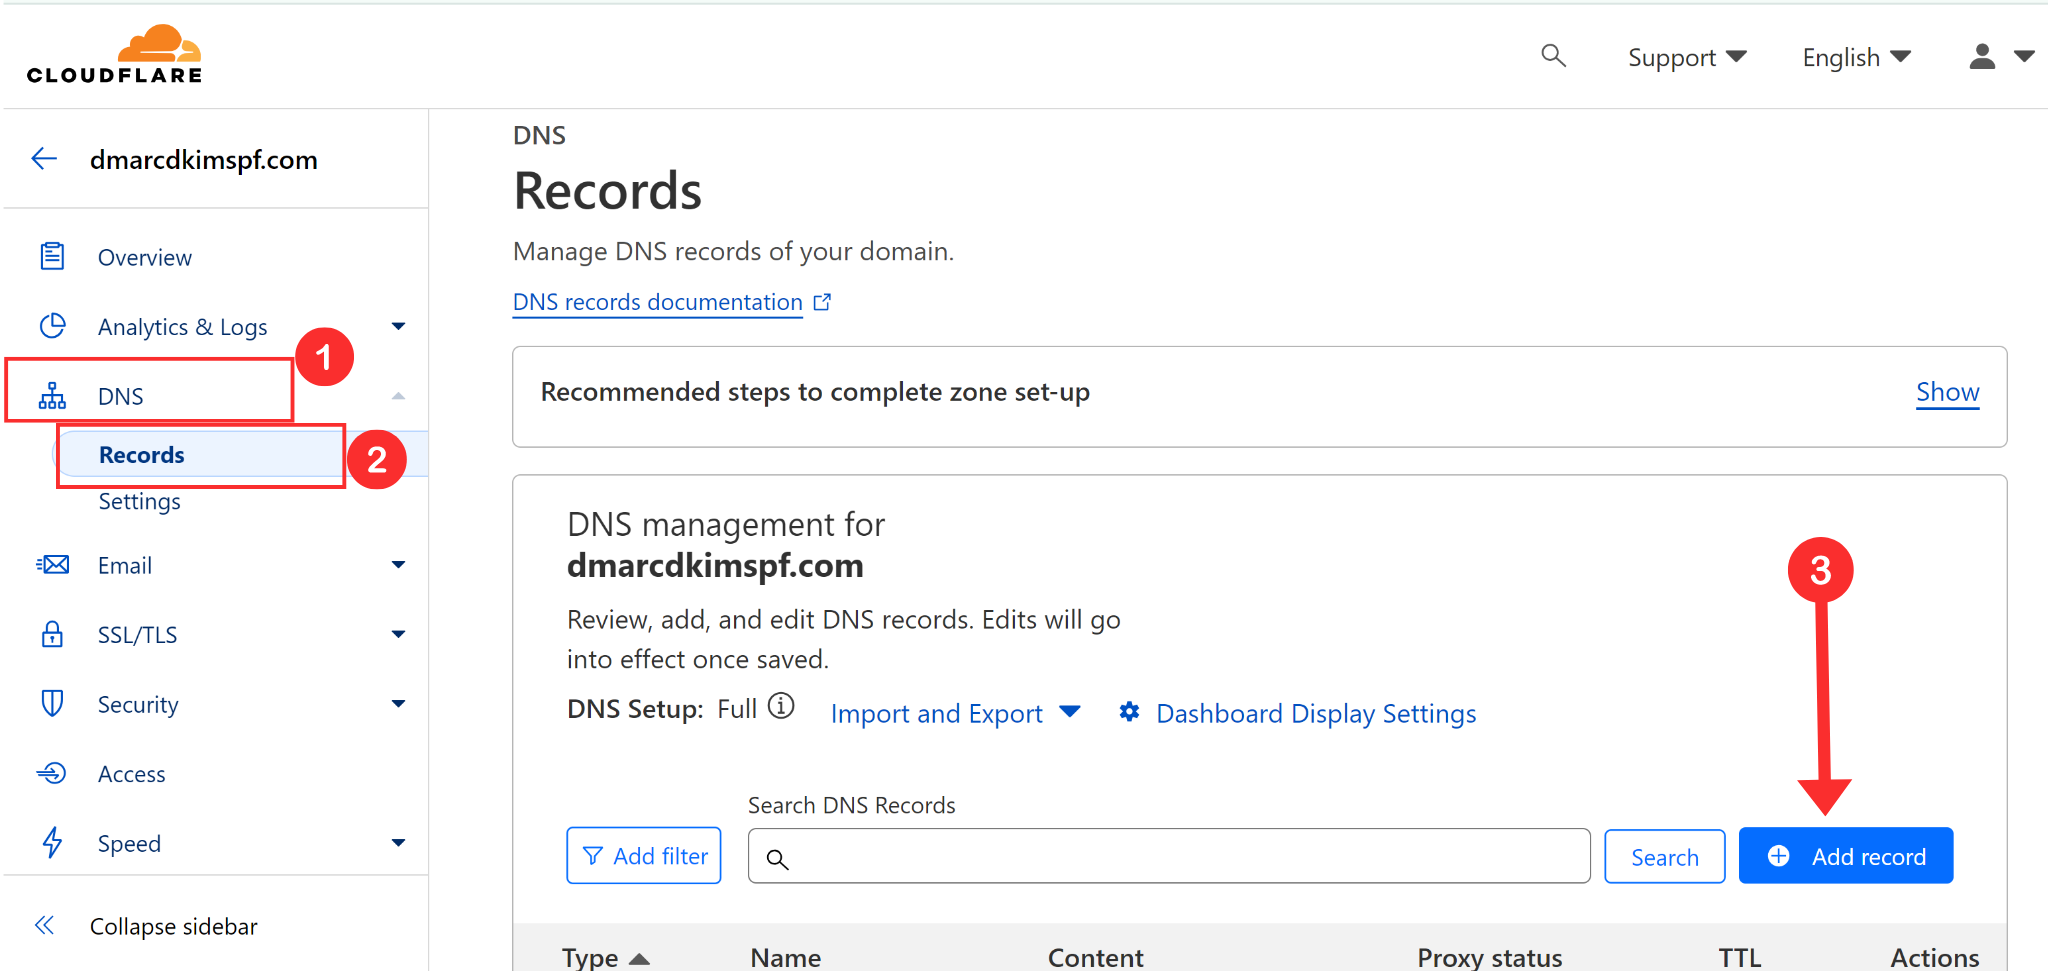
Login to your DNS provider and select your domain.
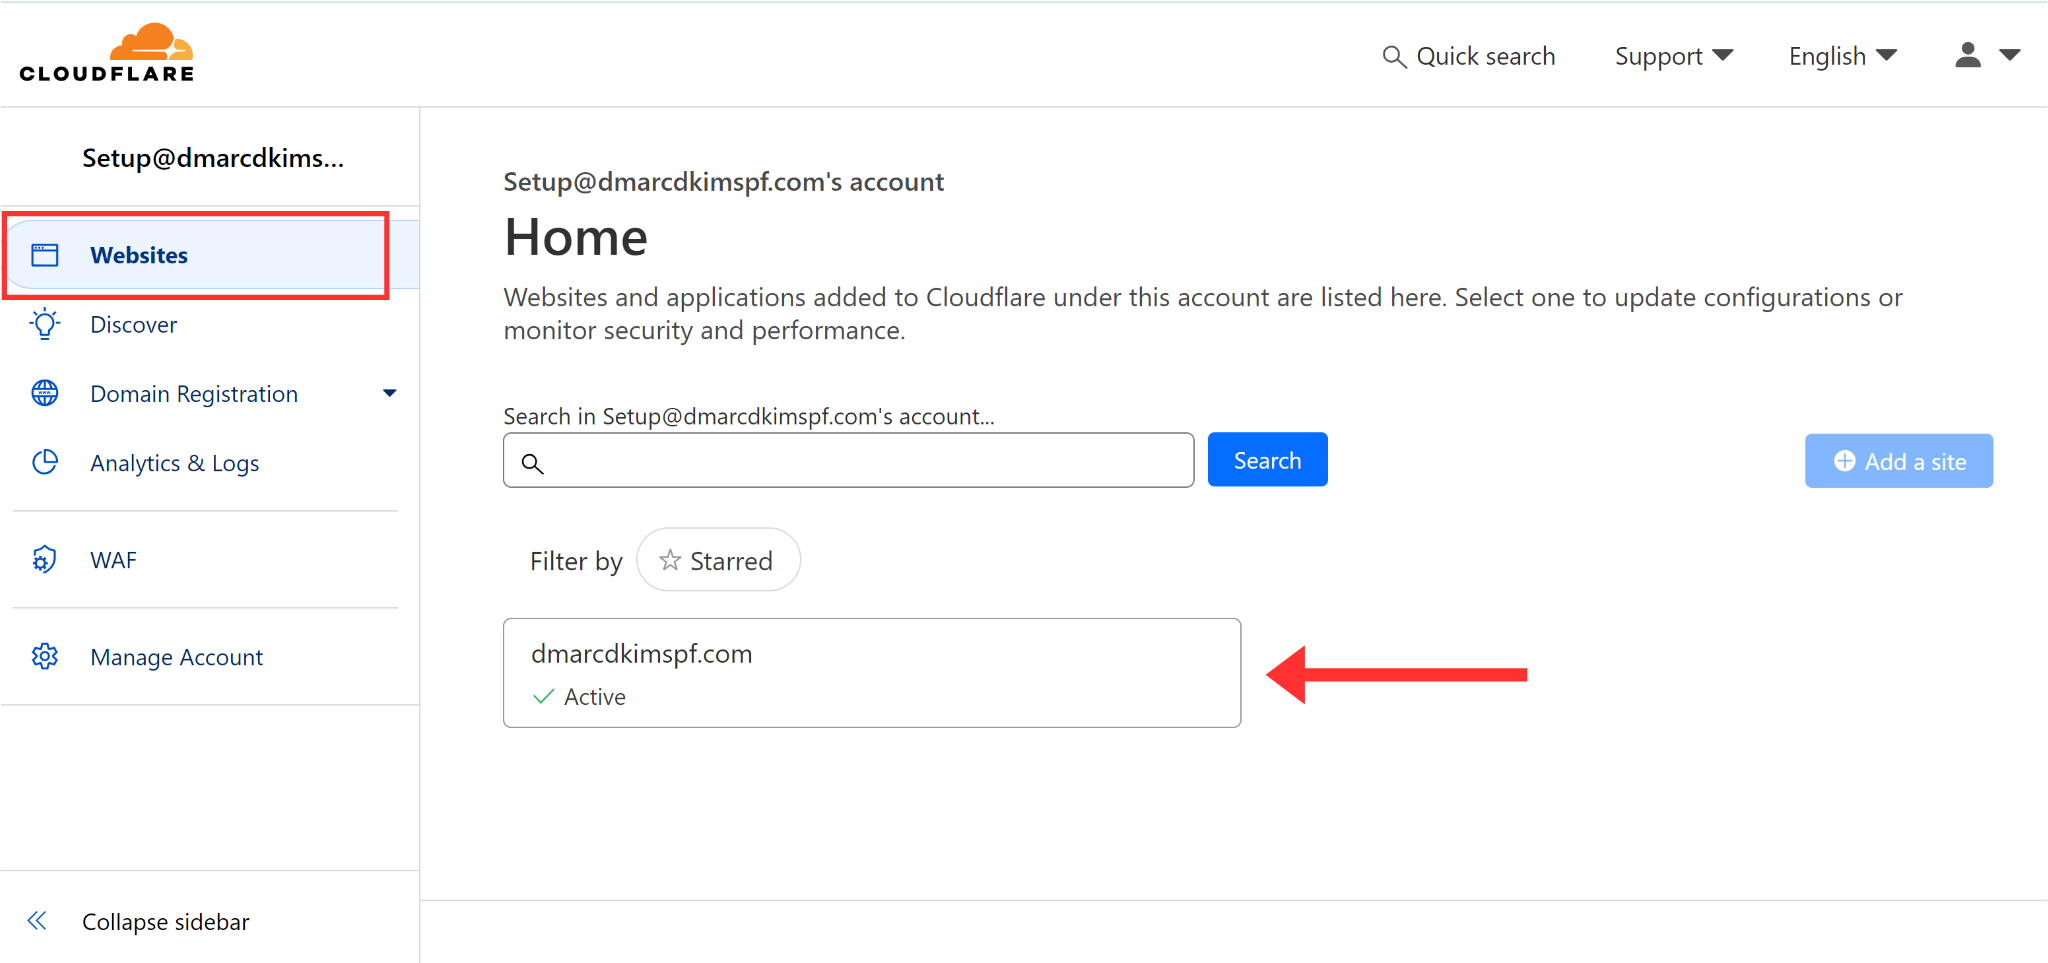
-
Go to the DNS tab and click Add Record.
Select type CNAME.
Add the DKIM hostname in the Name field.
Add the DKIM value in the Target field.
Turn off the proxy and click Save.
-
Now wait for the DKIM records to propagate. Refresh the Salesforce page and click Activate.


Setup Salesforce SPF:
In your DNS management zone, select type TXT.
In the record name field, write your domain name.
In the content field, add this Salesforce SPF value: v=spf1 include:_spf.salesforce.com ~all.
-
Lastly, hit the Save button.


What to do if there are multiple SPF records?
Having more than one SPF record for a single domain can cause conflicts, and one will stop working. If your domain already has SPF records from any other source, merge it with the Salesforce SPF record.
For merging, use the SPF merge tool.
Add your domain name and Salesforce SPF value.
Click Merge SPF Values.
The tool detects your current SPF value and merges it with the Salesforce SPF.
-
Copy the merged value and add it to your DNS provider.


Setup Salesforce DMARC Record:
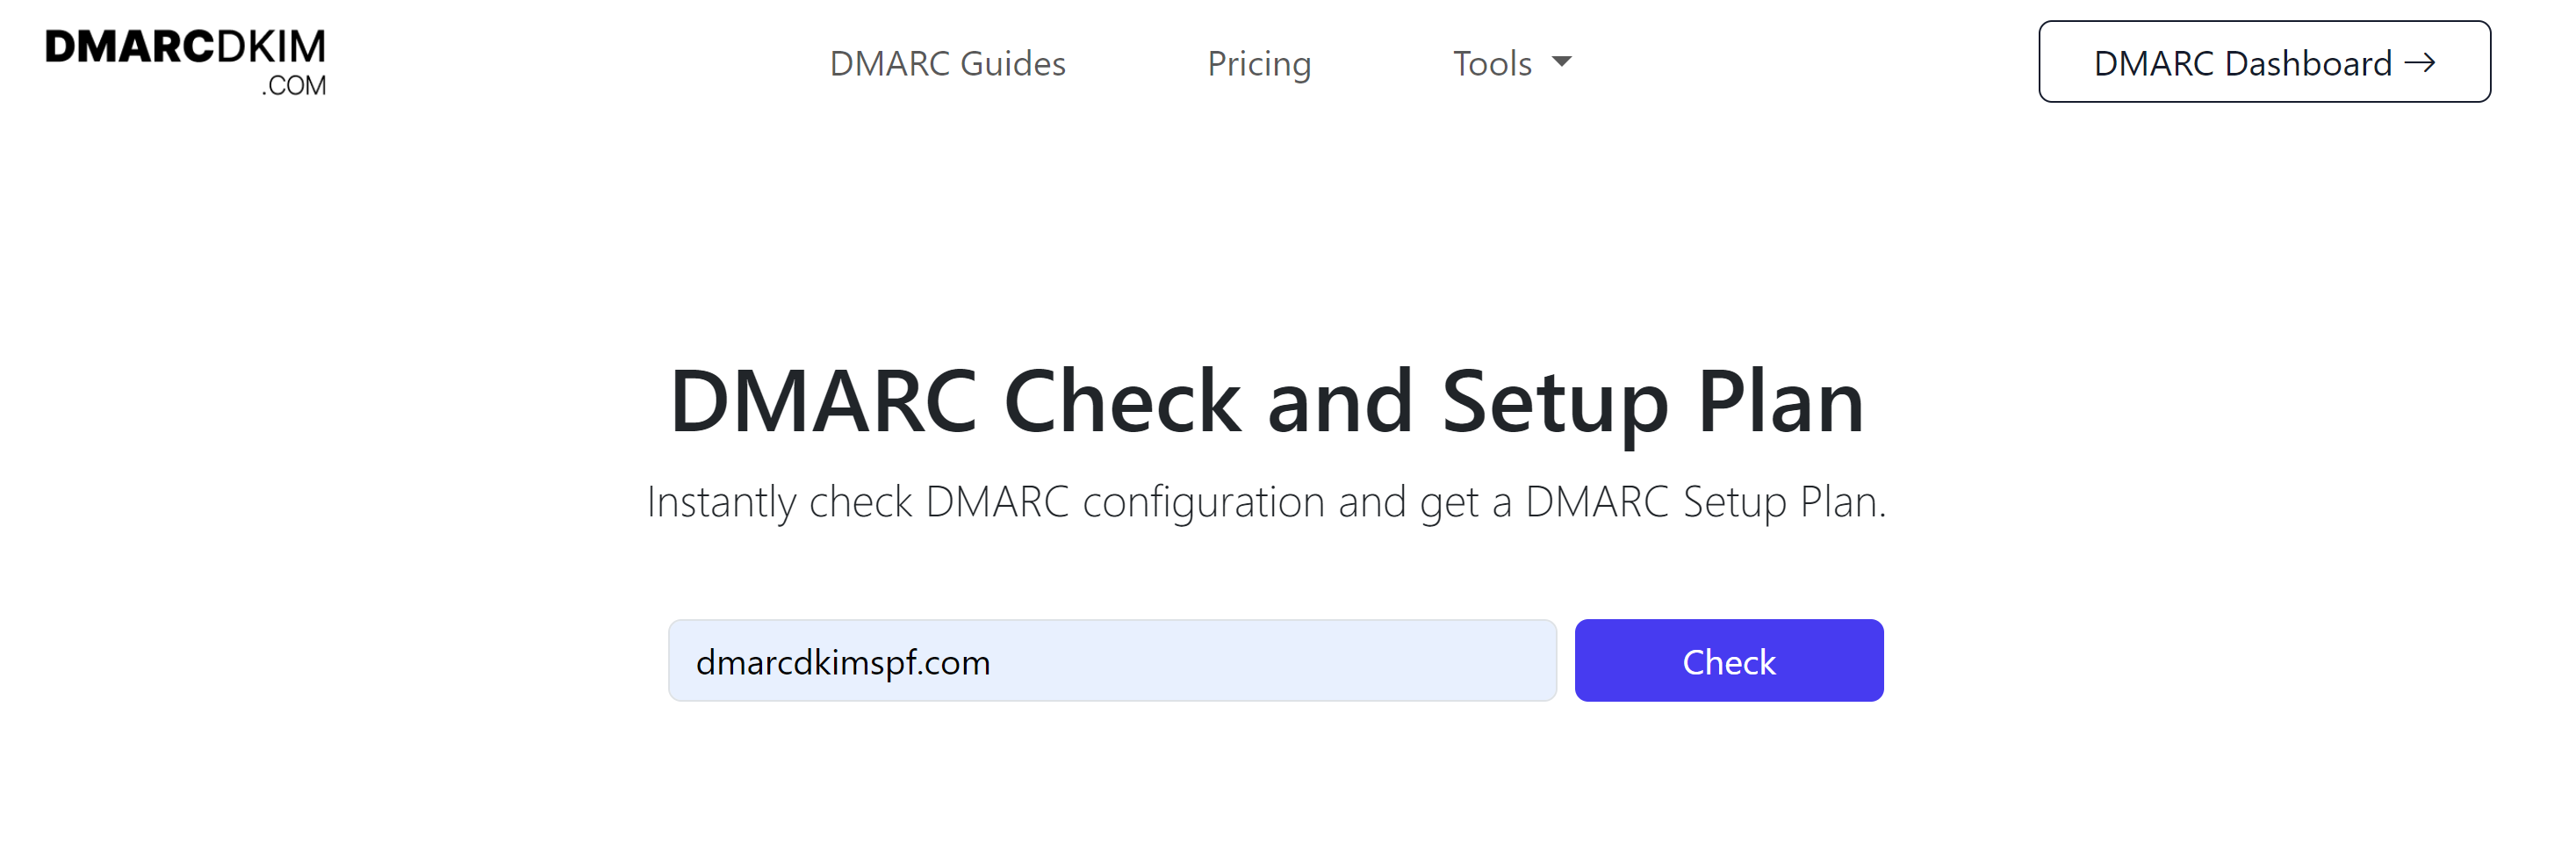
To implement a strict DMARC policy, go to the DmarcDkim.com DMARC check tool. It guides you step by step through the process and gives you actionable insights into your DMARC reports.
Open the DMARC check tool.
-
Add your domain name and click Check.
-
Copy the Suggested DMARC value and add it to your DNS provider.
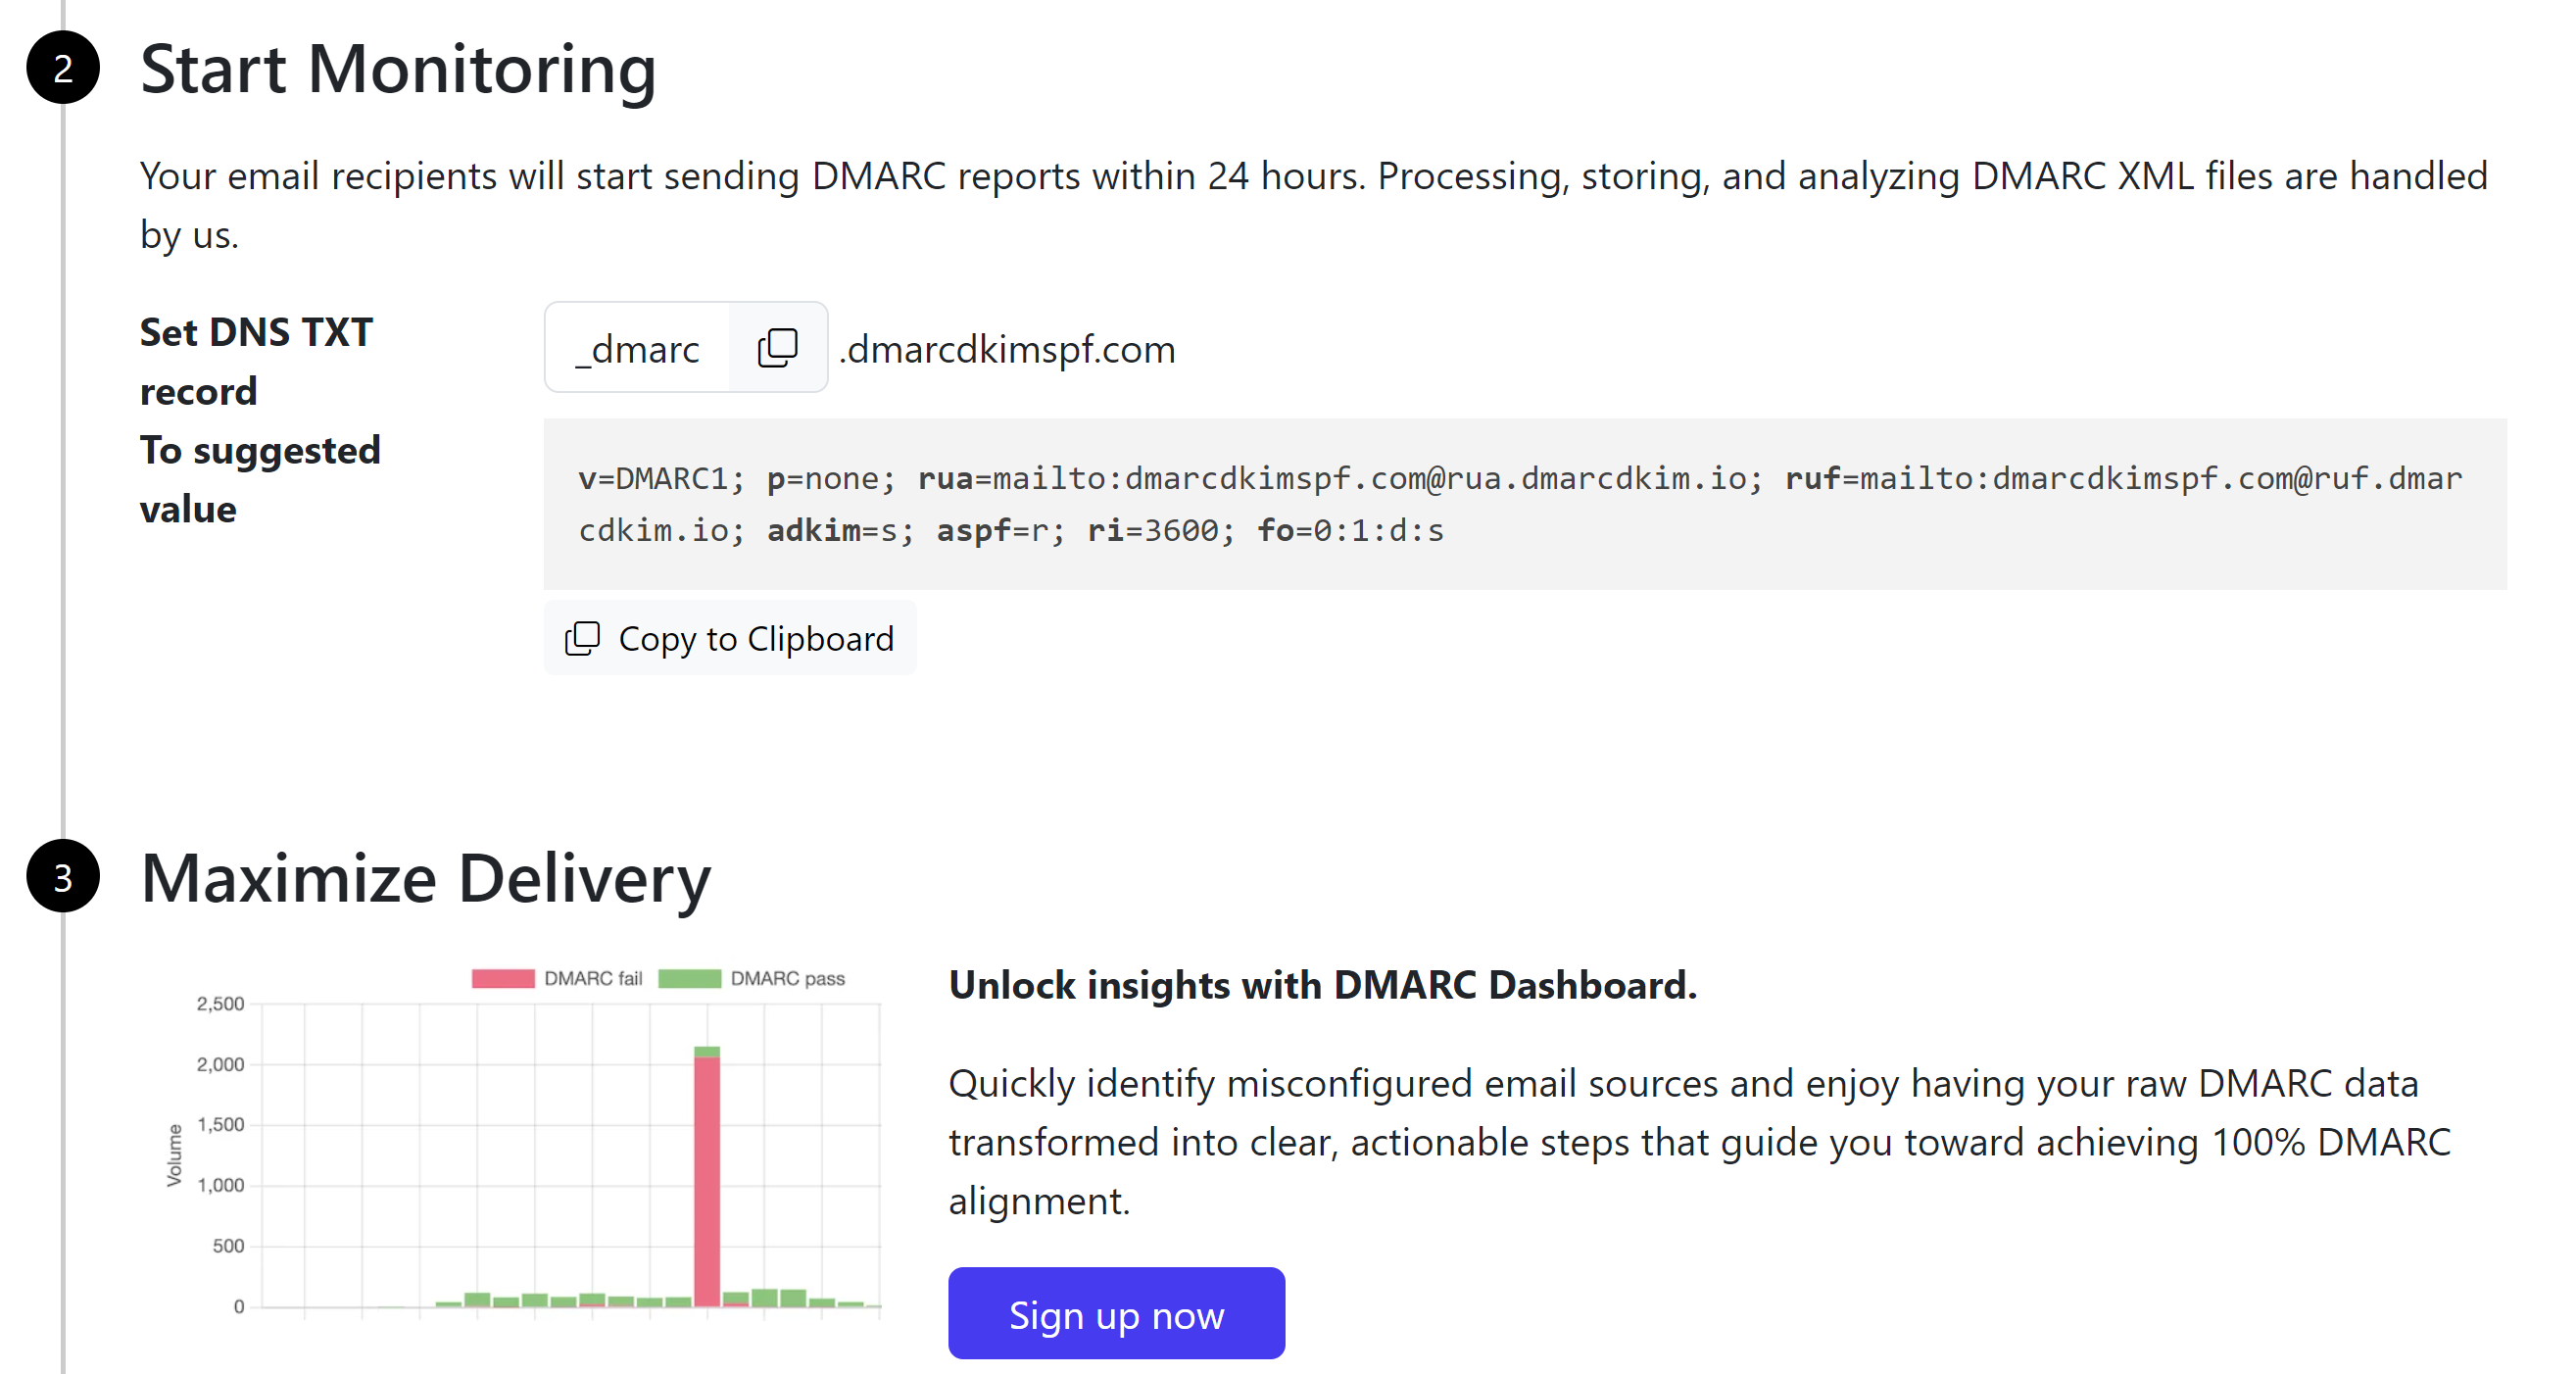
Sign up for the tool to get actionable insights into DMARC reports.


After adding all records, wait 24 hours for the records to get verified. If DNS authentication doesn't happen after 24 hours, it points to a potential misconfiguration in your DNS setup.
For troubleshooting the domain authentication issues, contact the DmarcDkim.com expert.
Check your domain for DMARC, DKIM, SPF and MX records. Get a free report.