Setup Help Scout SPF, DKIM, and DMARC Records for Domain Authentication
Check your domain for DMARC, DKIM, SPF and MX records. Get a free report.
- The impact of Business Email Compromise
- A quiet Google update just made SPF more forgiving
- Cyber Insurance and DMARC Enforcement
- Email impersonation scams explained
- TLS-RPT Record
- SMTP Smuggling
- 🇩🇪 Welche Hosting Anbieter unterstützen DMARC
- Reverse Engineering Phishing
- DMARC Enforcement in 2026
- DMARC for non sending domains
How to Configure and Setup HelpScout SPF, DKIM, and DMARC Records?
Authenticating and securing email communication is crucial for businesses to prevent spoofing and improve deliverability. There are three commonly used protocols to authenticate emails - SPF (Sender Policy Framework), DKIM (DomainKey Identified Mail), and DMARC (Domain-based Message Authentication, Reporting & Conformance ).
You can get these DNS records from Help Scout and add them to the domain hosting server to authenticate your webmail.
In this article, you'll learn how to setup these records in the DNS provider for verification to protect your domain against scams and frauds.
Setup Help Scout SPF:
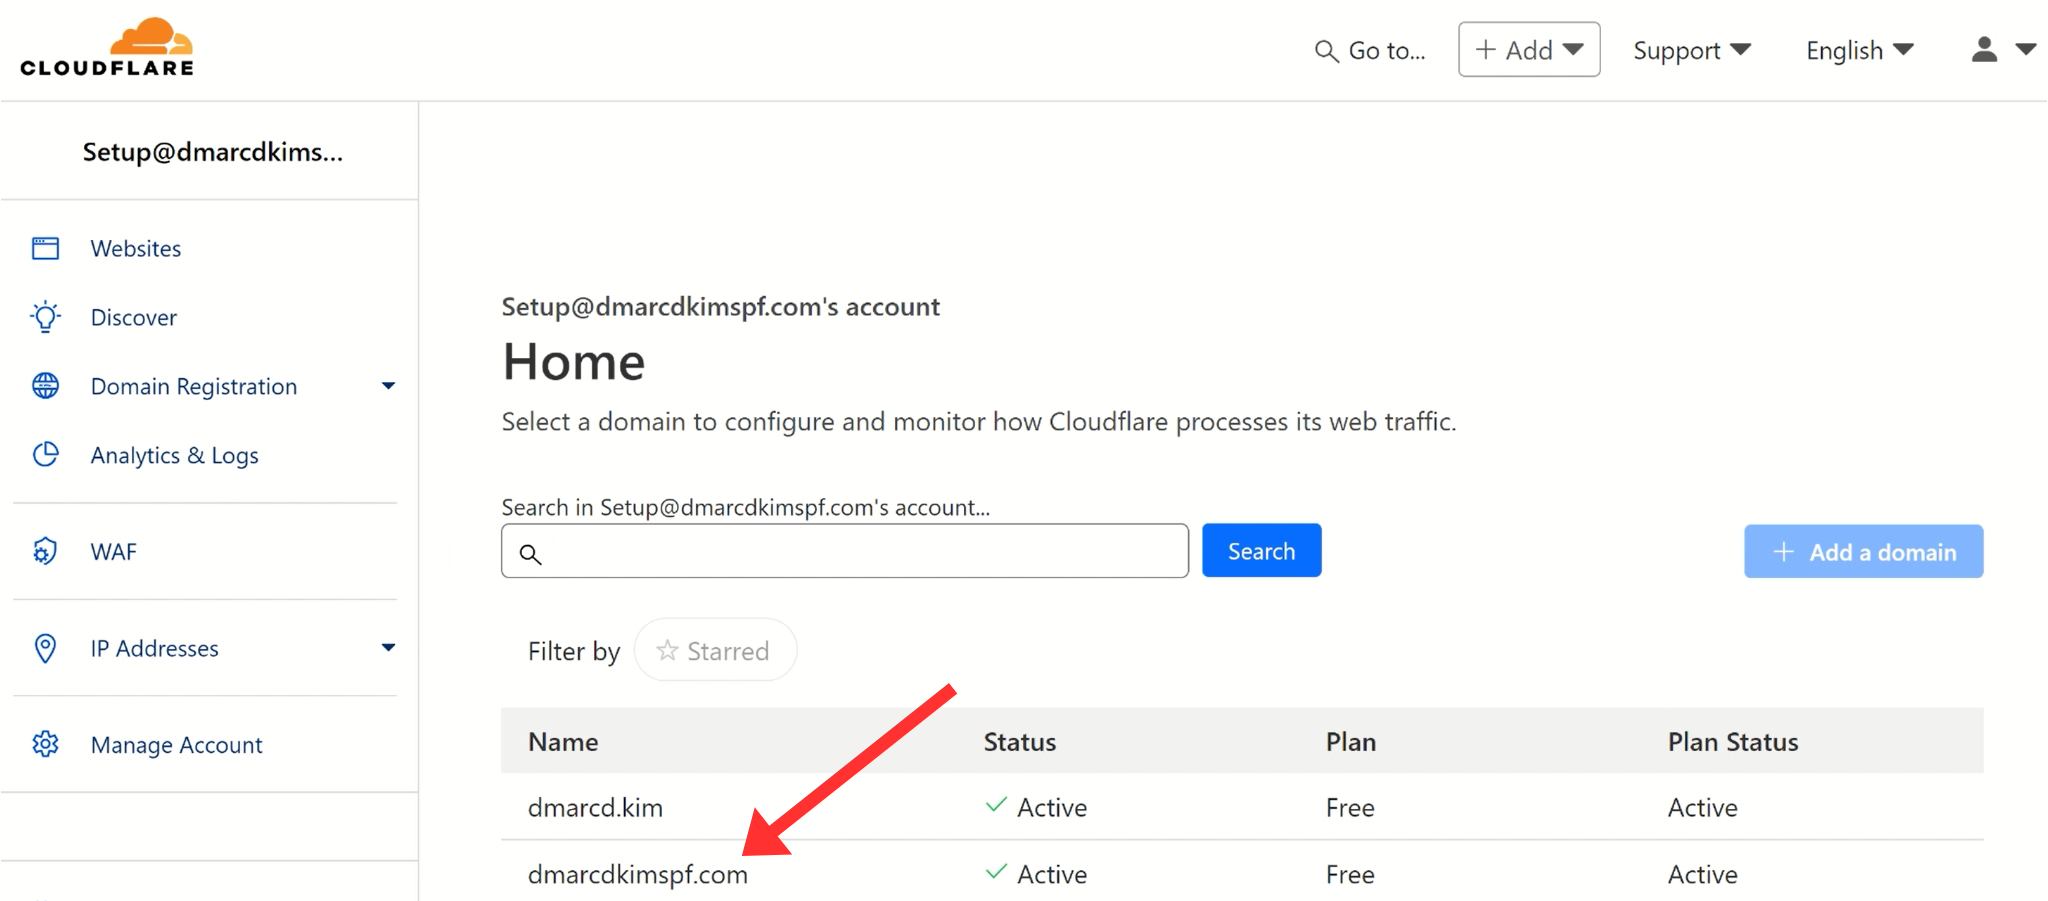
Login to your DNS provider. We are using Cloudflare for this guide.
-
Select your domain and go to DNS.
-
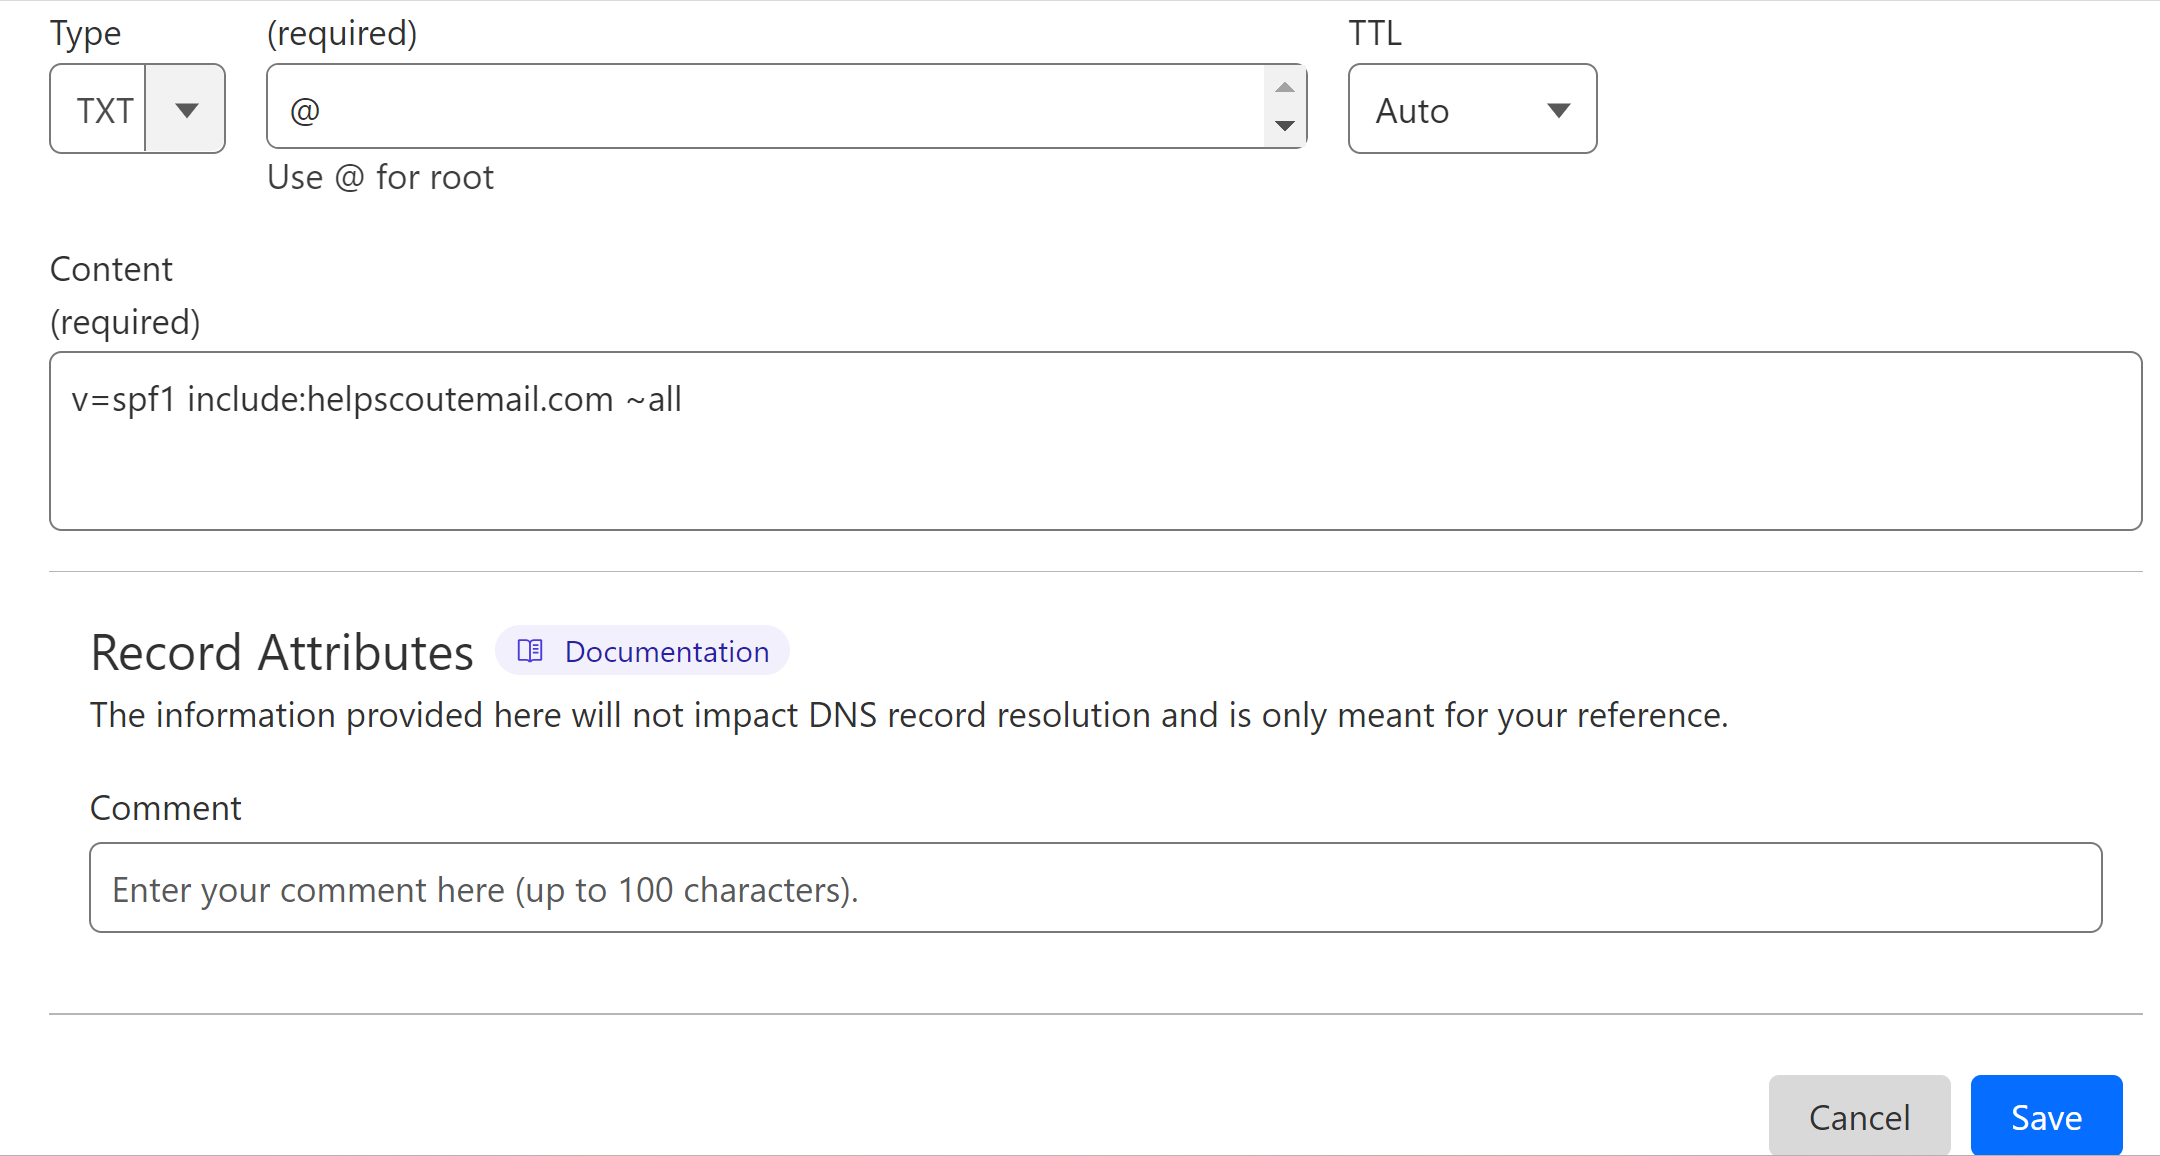
Click Add Record.

Select record type TXT.
In the Name or Hostname field, write
@In the Content or Value field, add the SPF value:
v=spf1 include:helpscoutemail.com ~all-
Click Save.
Merge Multiple SPF Records:
Adding more than one SPF record for a domain can cause conflicts and result in one of them to stop working. If your domain has an SPF value from any other source, you need to merge the existing SPF value with Help Scout SPF.
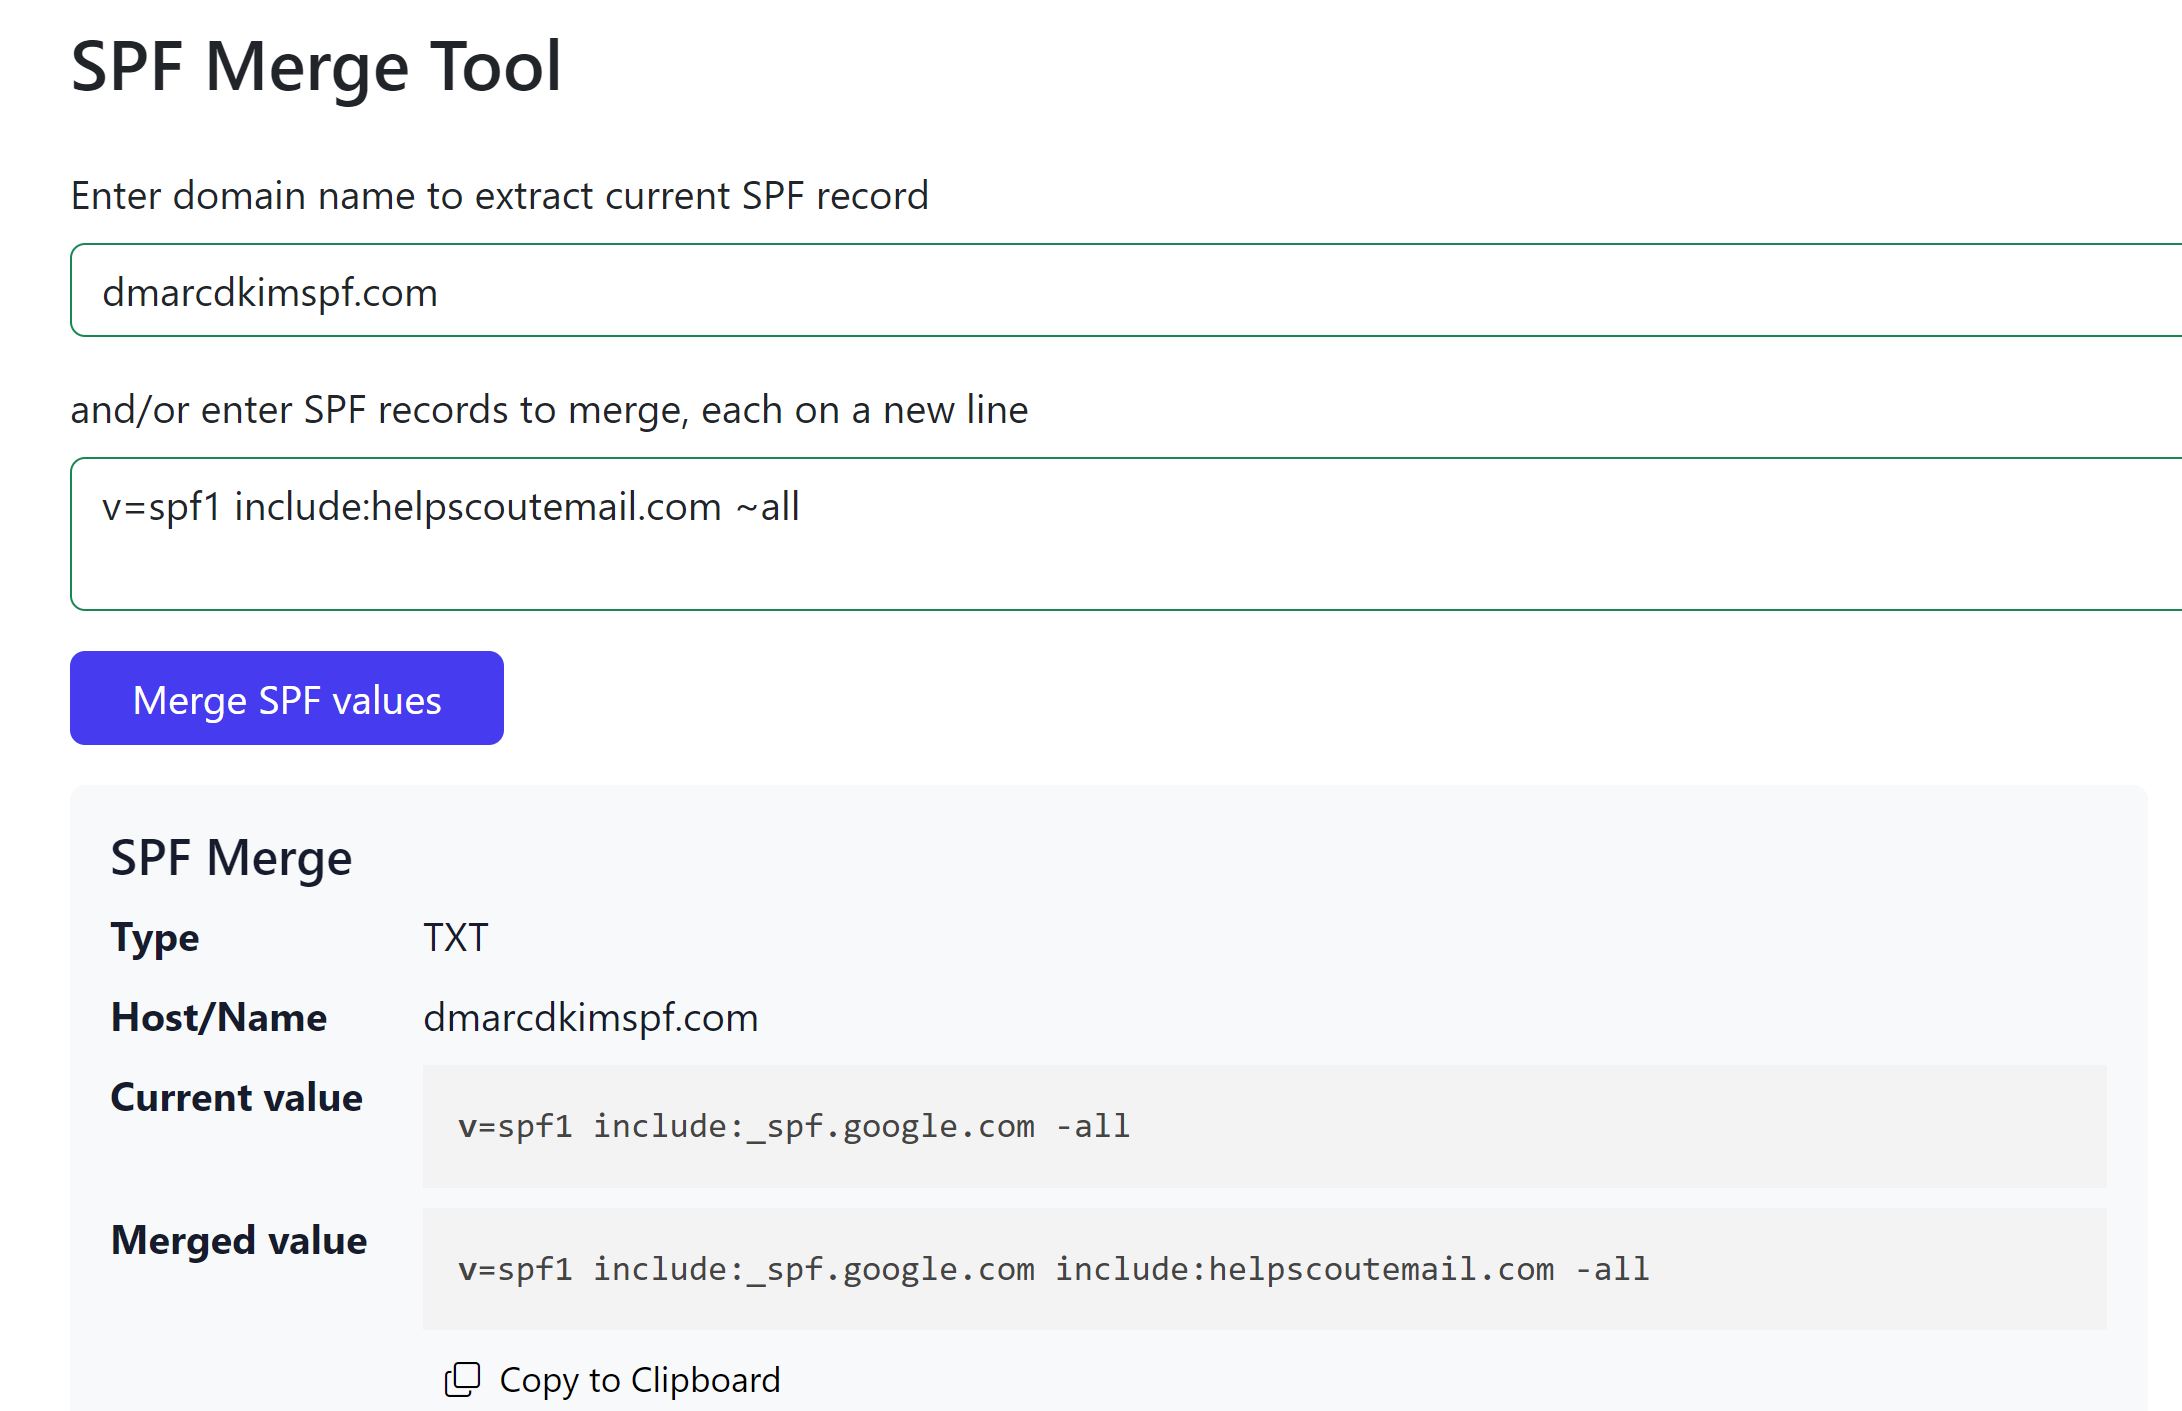
You can use the DmarcDkim.com SPF merge tool to combine multiple SPF records.
Open the SPF Merge Tool.
Add your domain name and Help Scout SPF value.
Click the Merge SPF Values button.
The tool detects your existing SPF record and merges it with Help Scout SPF.
-
Copy the merged value and edit your existing SPF record.
Setup Help Scout DKIM Record:
Help Scout provides you with two DKIM records. Add both to your DNS provider.
| Type | Hostname | Value |
|---|---|---|
CNAME |
|
|
CNAME |
|
|
Ignore "yourdomain.com" as it will be added automatically by your DNS provider.
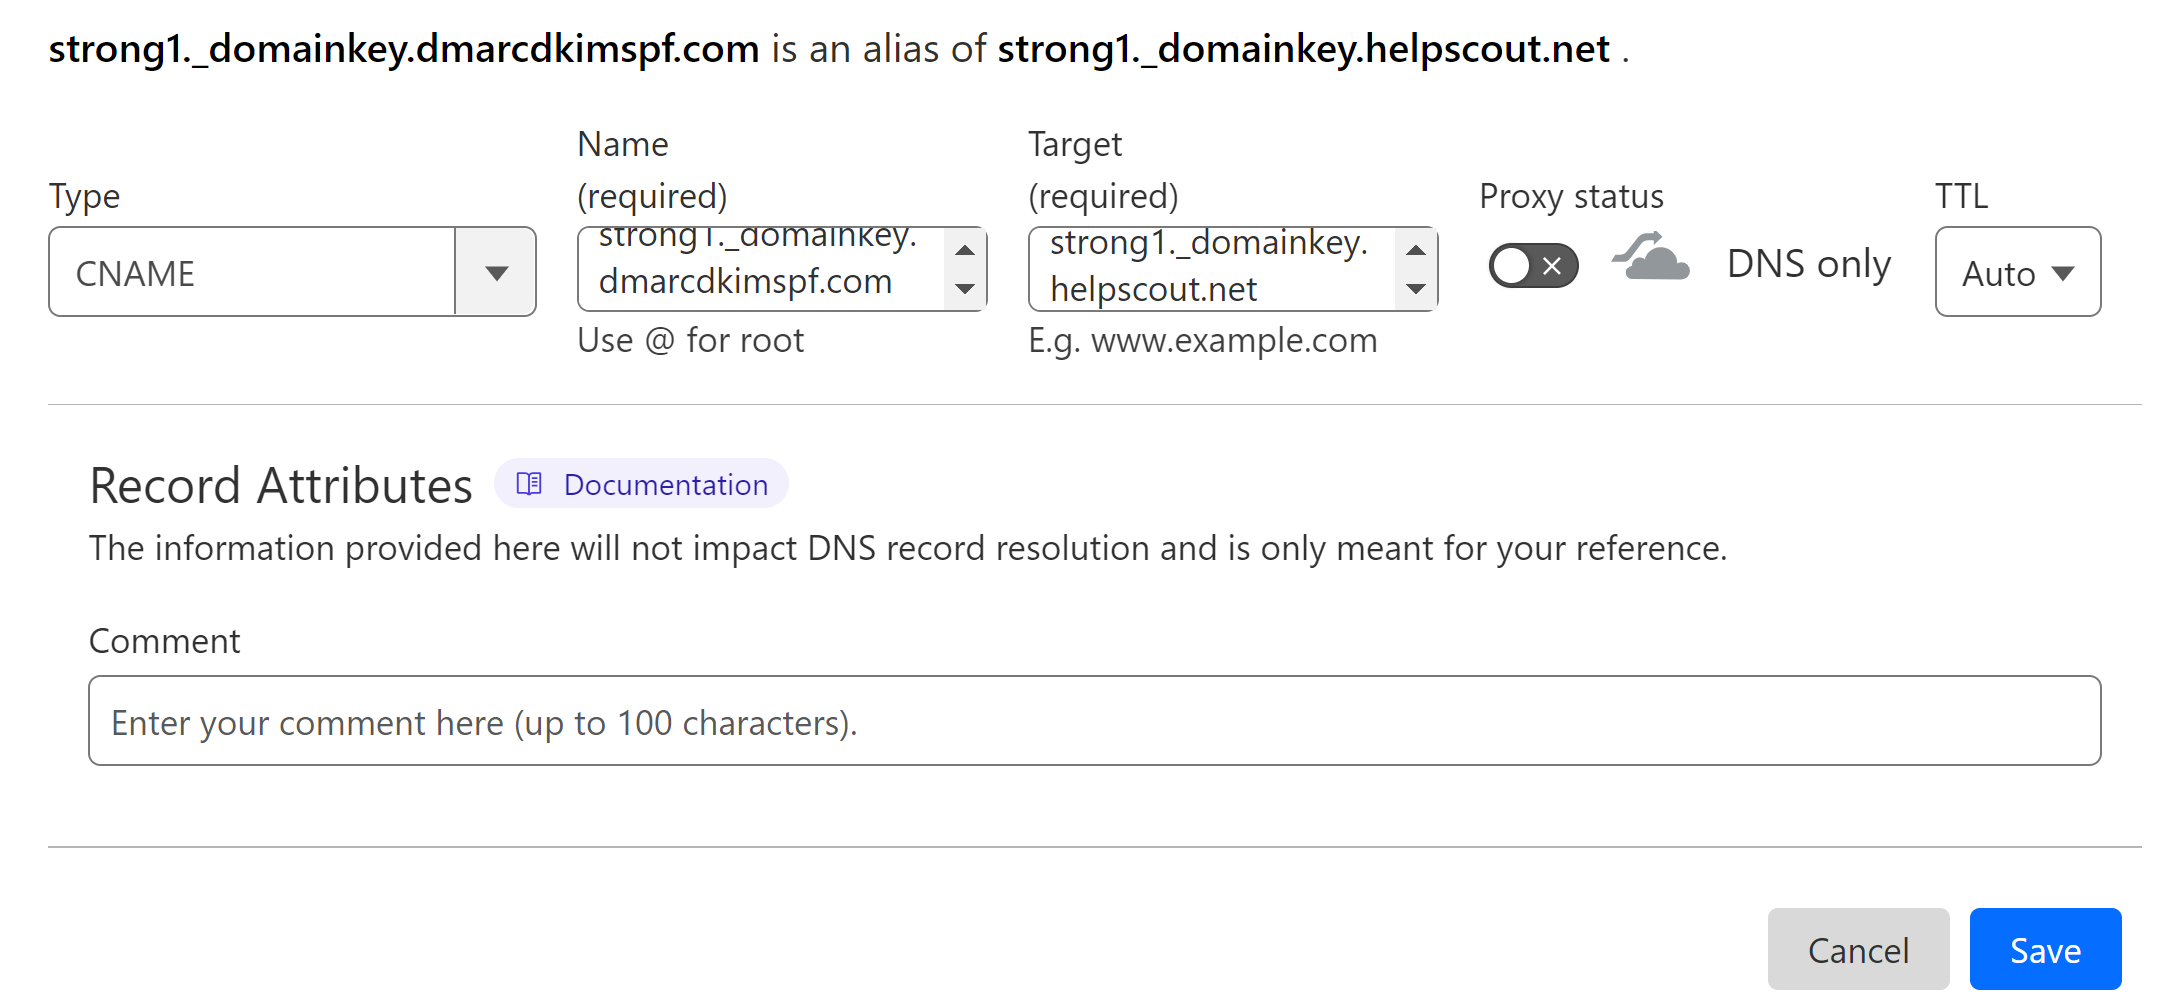
NOTE: If your DNS provider has a proxy option, turn it off for the CNAME record. When enabled, the proxy diverts traffic to the DNS server instead of the Help Scout server.
Setup Help Scout DMARC Record:
To generate an effective DMARC policy, you can use the DmarcDkim.com DMARC Check tool. It guides you through every step of setting up a strict policy and gives you actionable insights into DMARC reports.
Open the DMARC check tool.
-
Add your domain name and click Check.

-
The tool gives you a suggested value. Add it to your DNS provider.

-
Click Sign up now to get access to the DMARC reports dashboard.

After adding all the records, wait 24 hours for the servers to update DNS changes.
If the records do not authenticate after 24 hours, there might be a misconfiguration in your DNS setup.
For support and assistance, contact the DmarcDkim.com team.
Check domain and follow the instructions to nail down your DMARC configuration.
No expert knowledge needed!


