Nutshell DMARC, DKIM, SPF Records Configuration - Domain Authentication Guide
How to Setup SPF, DKIM, DMARC records for Nutshell?
Email spoofing has become a major threat to businesses these days, that's why email inbox providers like Google require you to comply with its security standards strictly.
SPF (Sender Policy Framework), DKIM (DomainKeys Identified Mail), and DMARC (Domain-based Message Authentication Reporting and Conformance) are the commonly used security standards for domain authentication and email verification.
There are some other verification records like bounce domain, return path, and click tracking records that add an extra layer of security to your email campaigns. Nutshell provides you all the necessary records to protect your email communication.
In this article, we will walk you through the sender authentication process. You will need to add the Nutshell DNS records to your domain provider and wait for them to get validated.
Configure Nutshell DNS Records:
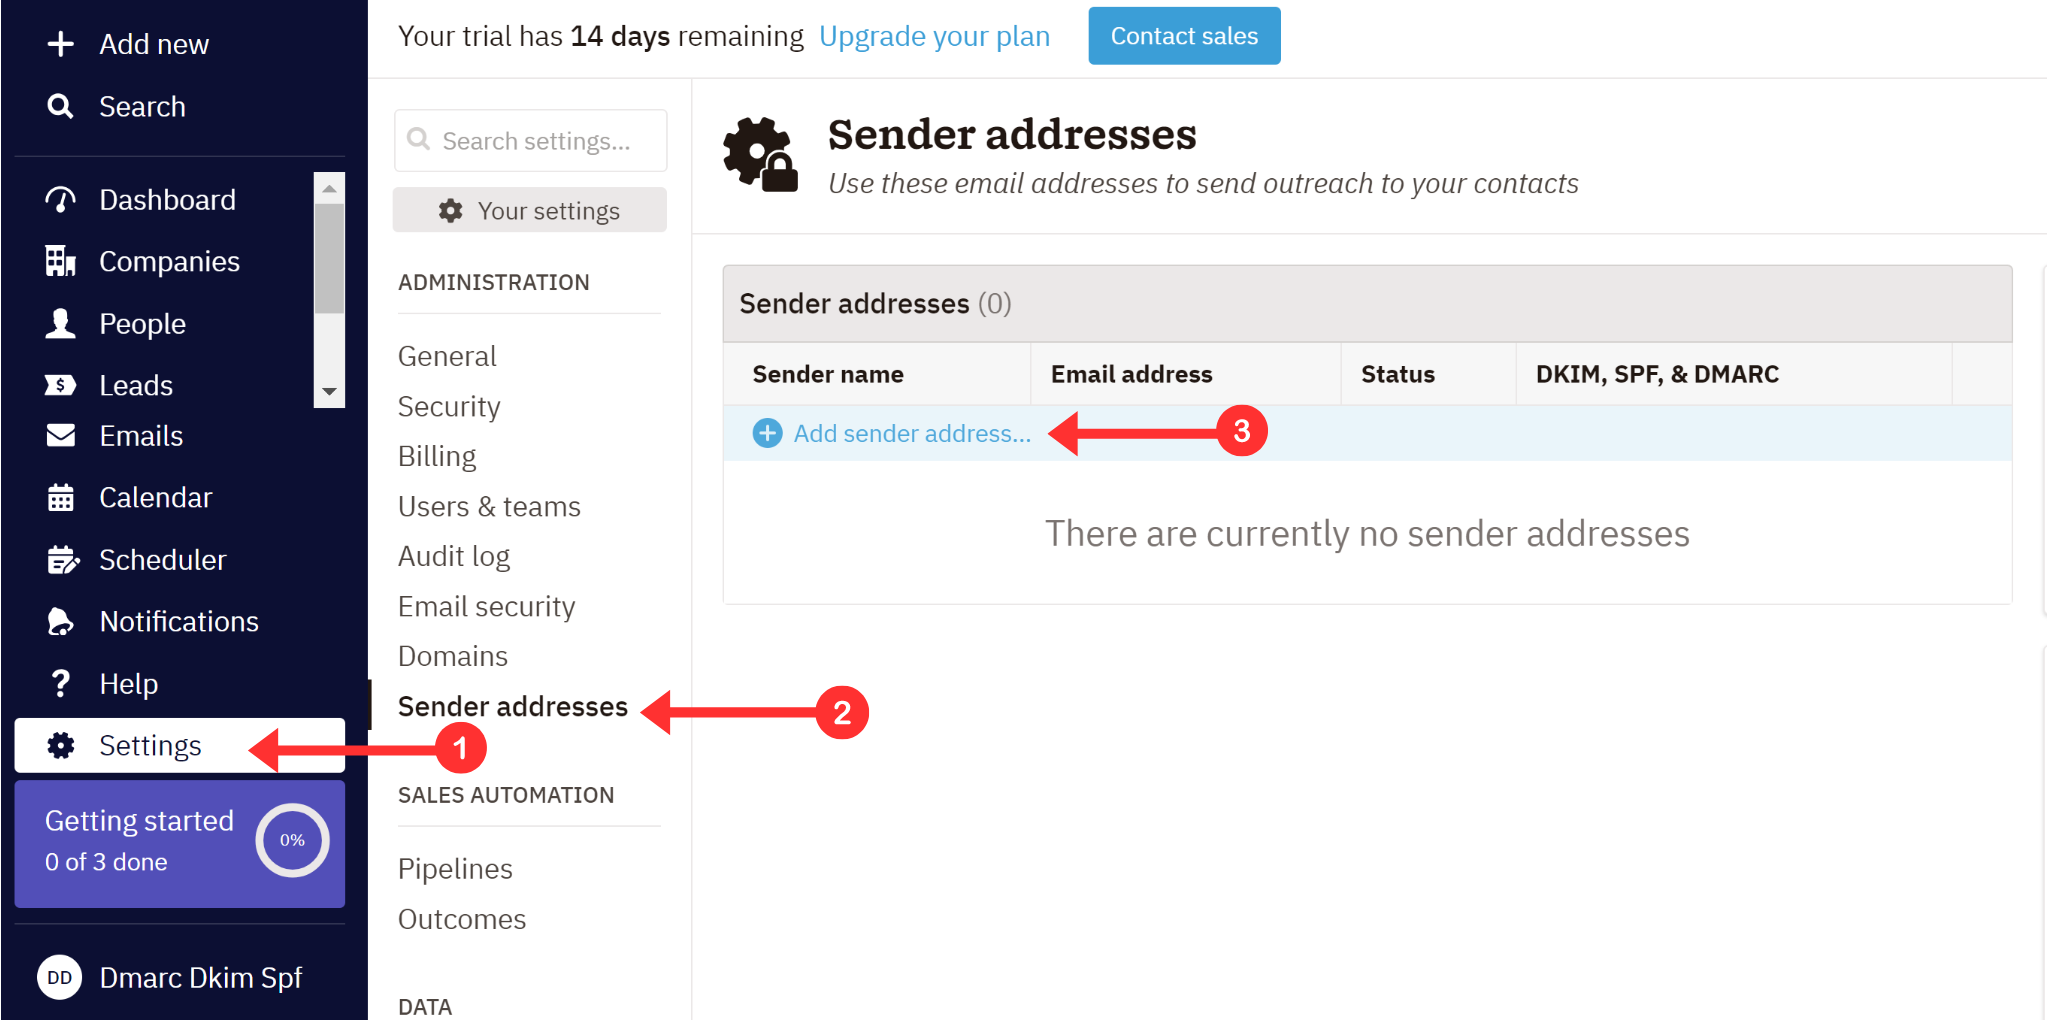
Login to your Nutshell account and head to the Settings.
Go to Add Senders and click the "+" icon to add a new sender.
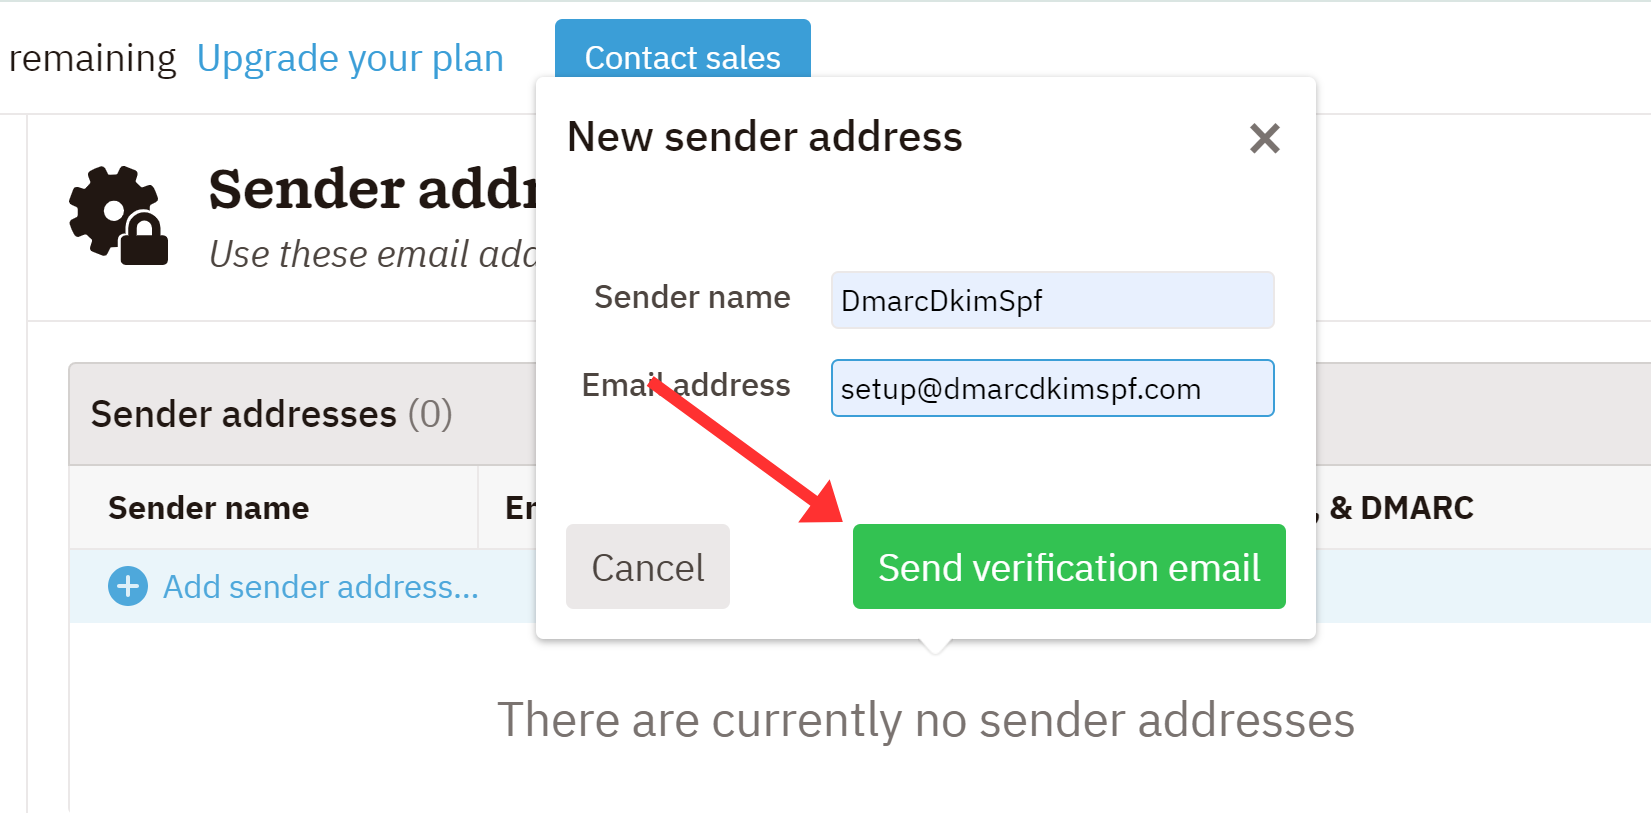
Write down your Sender Name, Email Address, and click Send Verification Email.
Open your email inbox and click the Nutshell email verification link.
Now go to the Domains tab and click "Details" next to your email.
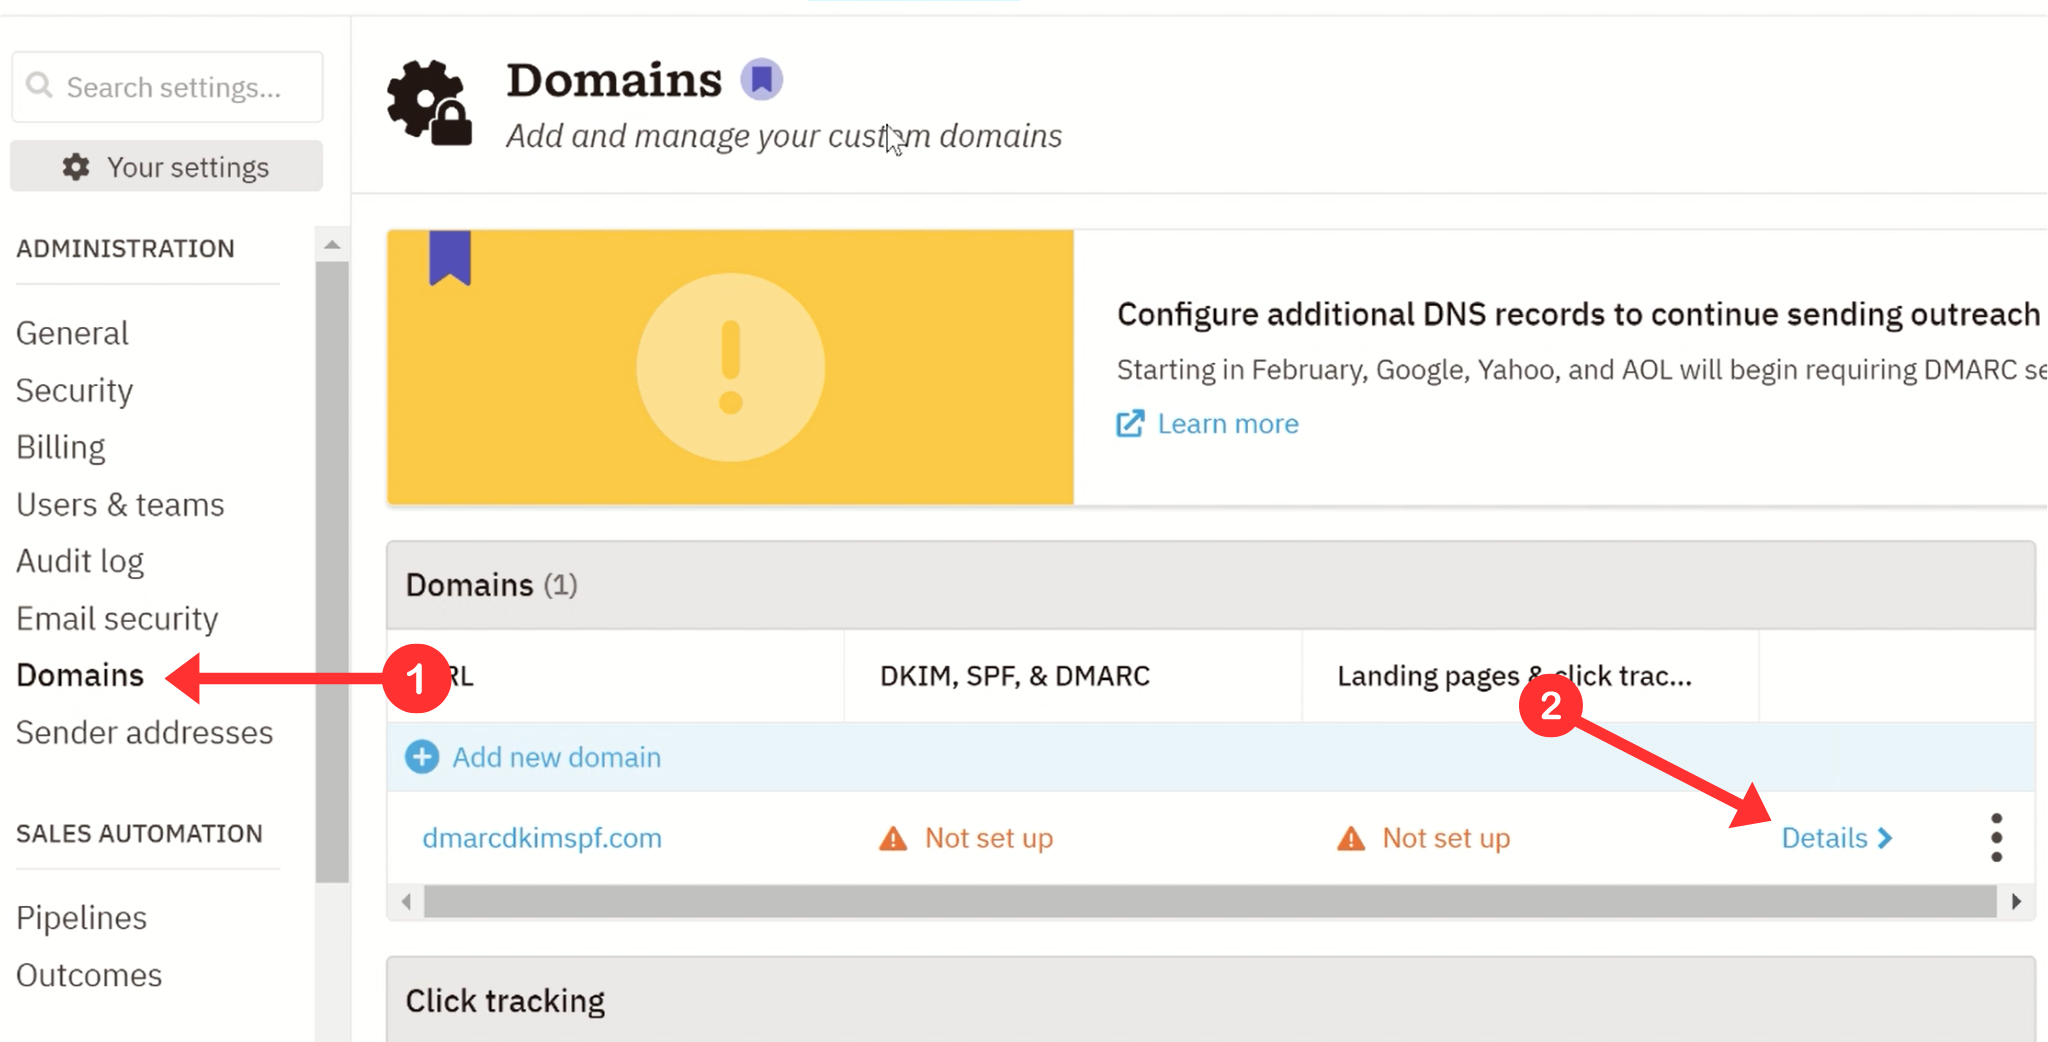
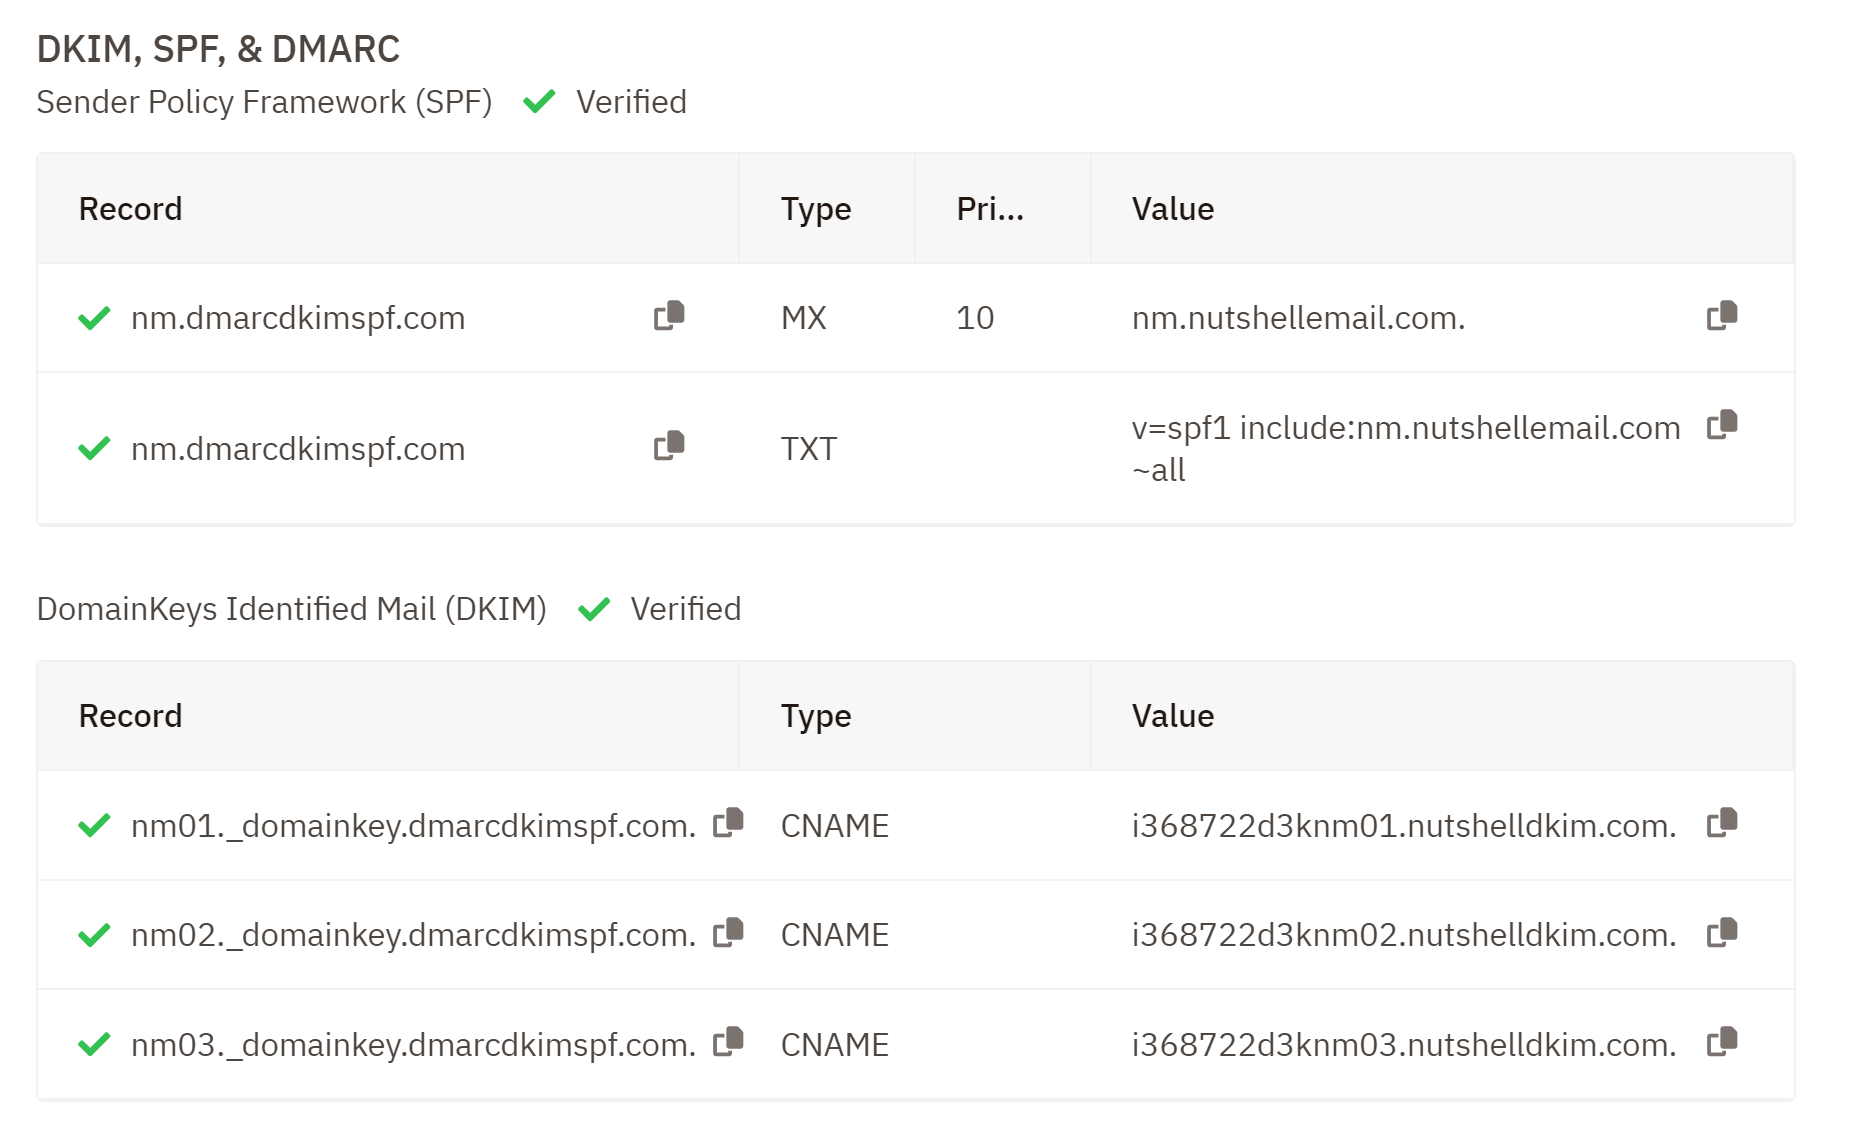
It will take you to the DNS records page where you will see the SPF, DKIM, DMARC, Return path, and Tracking records.


Add Nutshell SPF to DNS Provider:
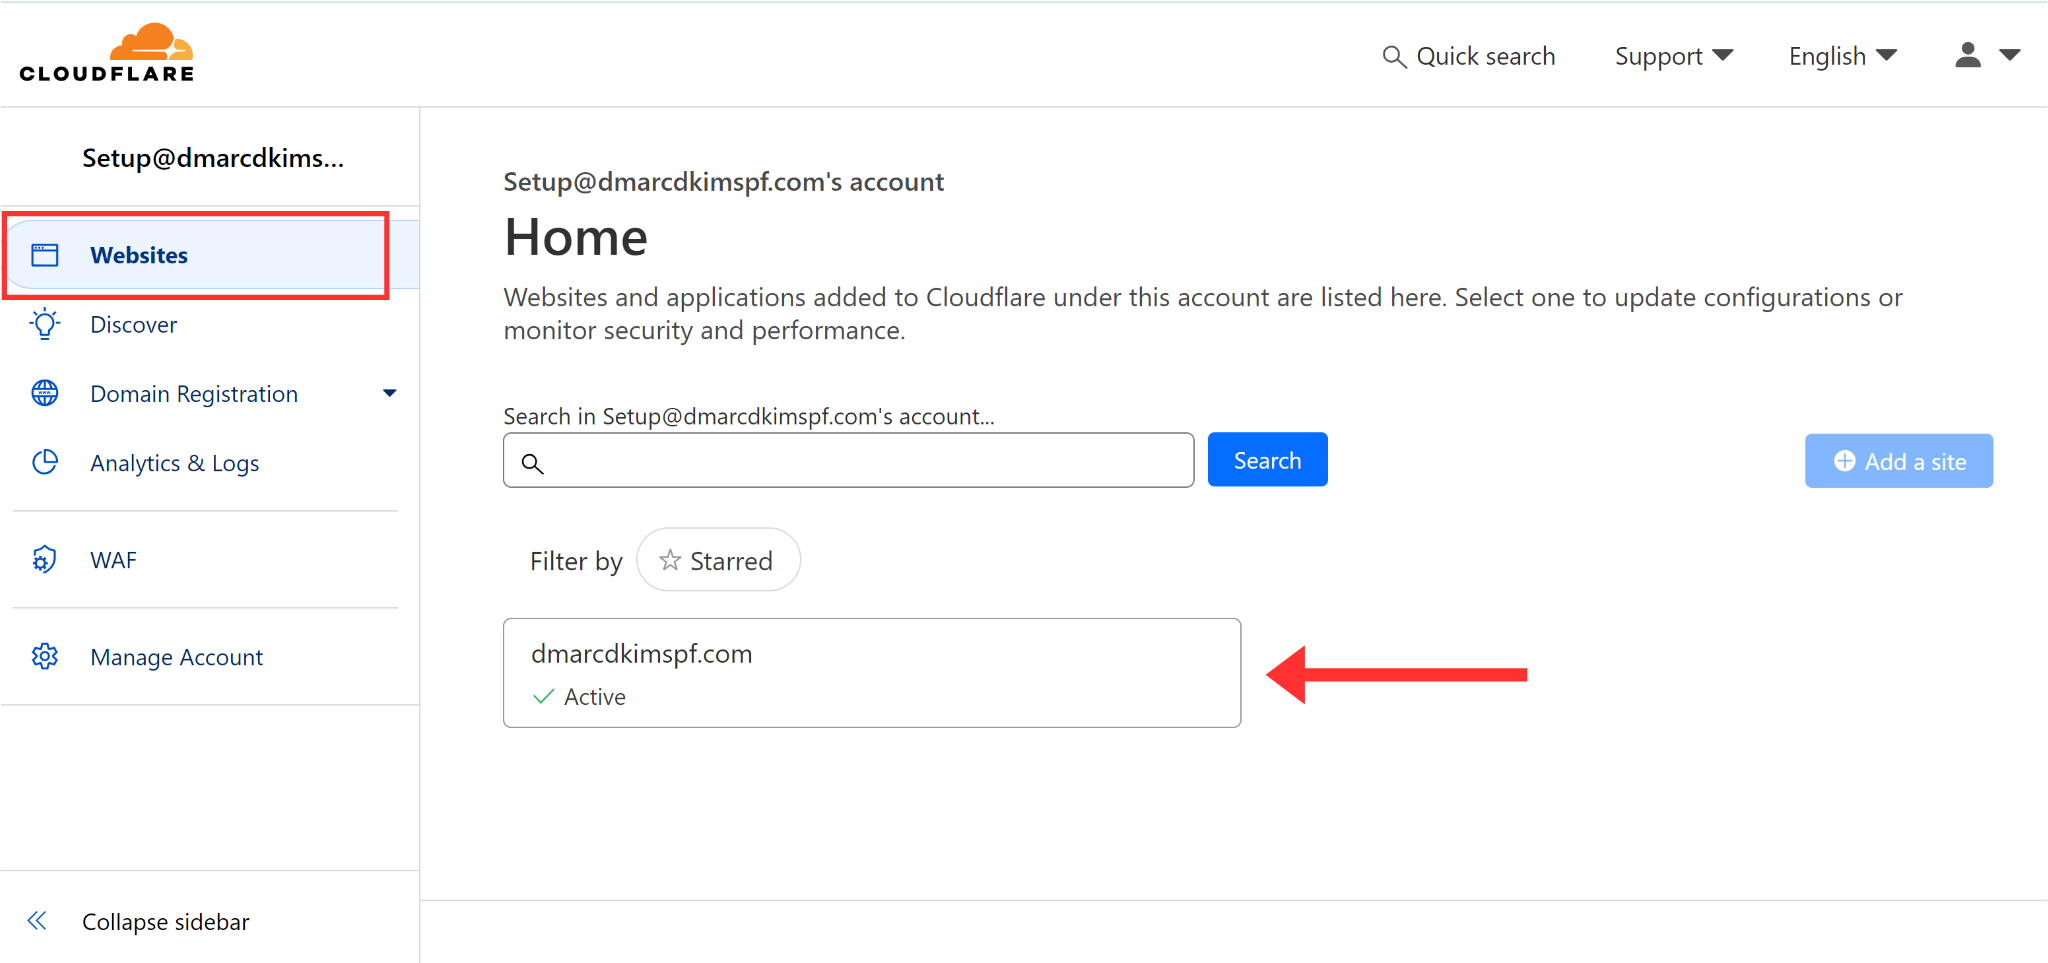
Login to your DNS provider and click your domain. (We are using Cloudflare for this guide).
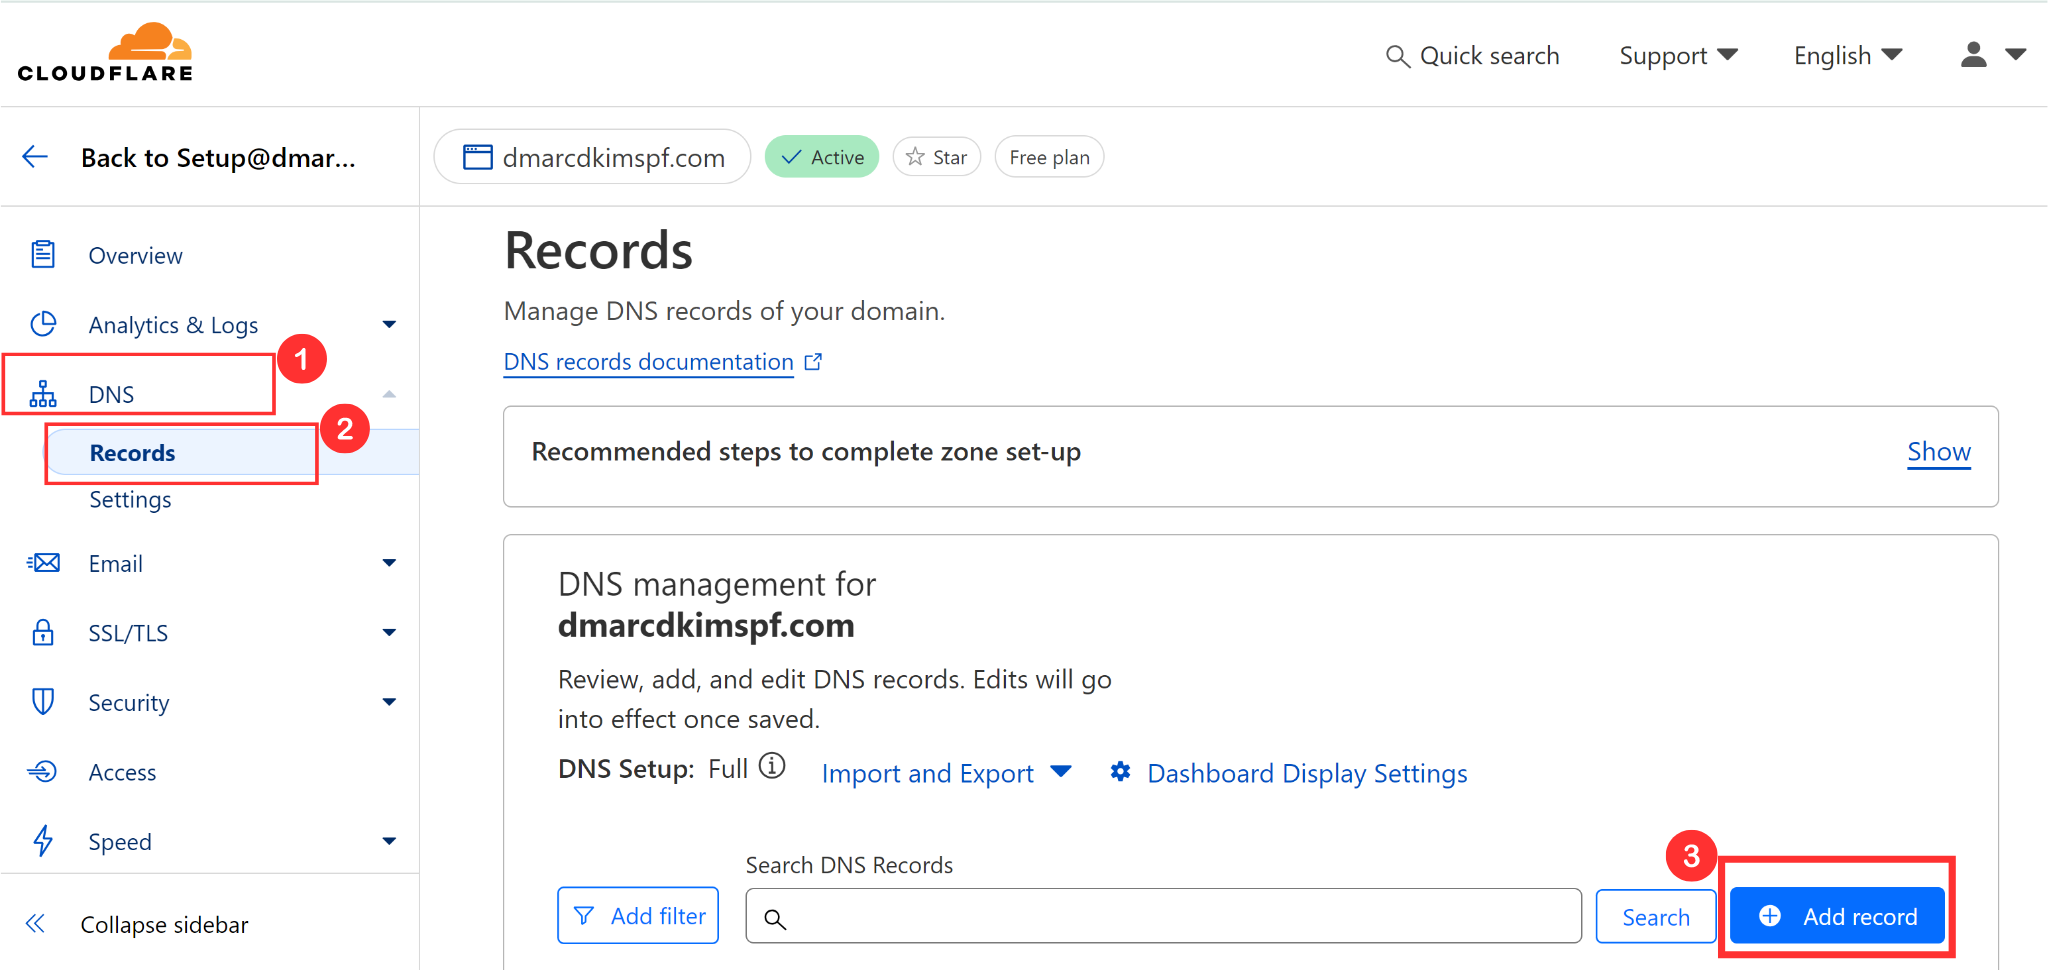
In the DNS tab, go to Records and click Add Record.
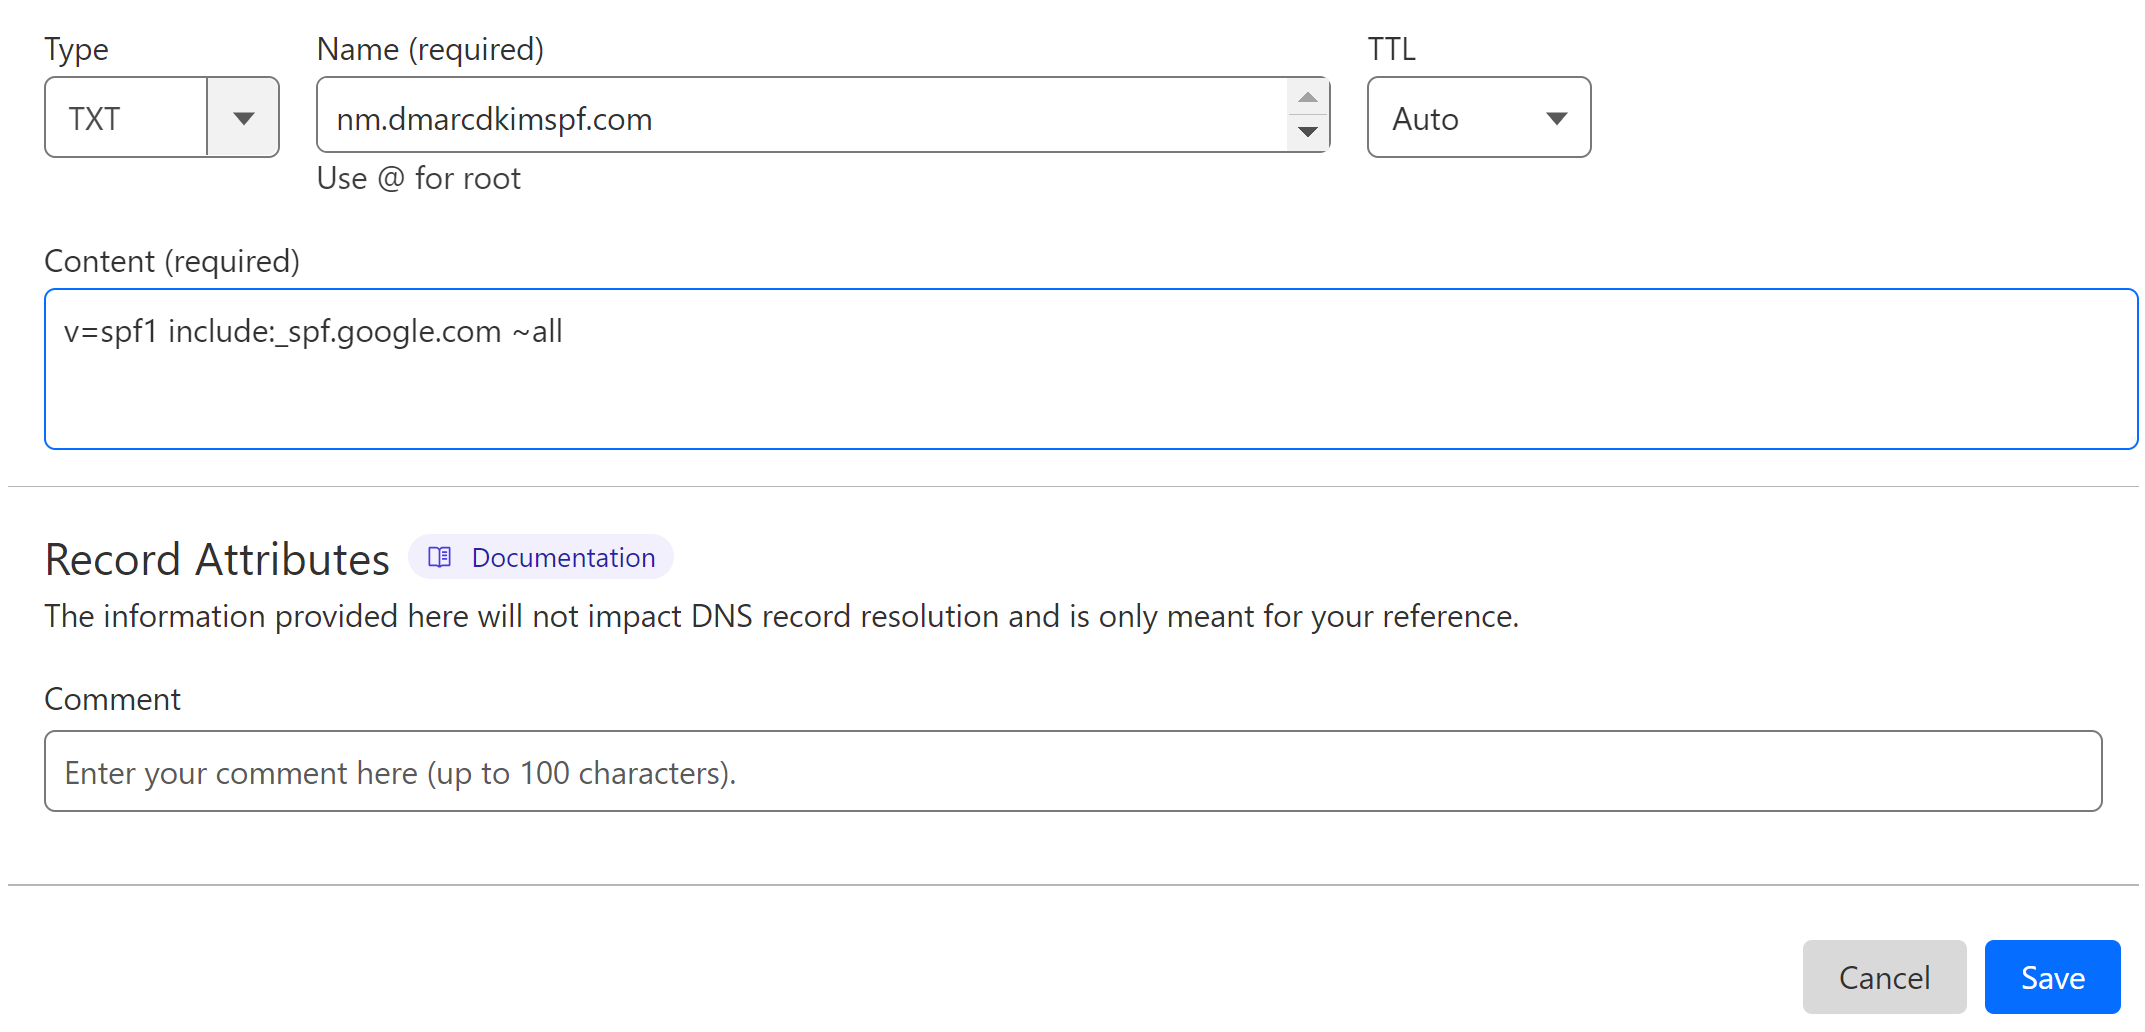
Select record type TXT.
In the Name field, write down the record name: nm.dmarcdkimspf.com.
In the Content field, add the SPF value: v=spf1 include:nm.nutshellemail.com ~all.
Finally, click Save.


NOTE: You can only add one SPF record to a domain. If your domain has an existing SPF, delete it to add the new one.
Add Nutshell Return-Path Record:
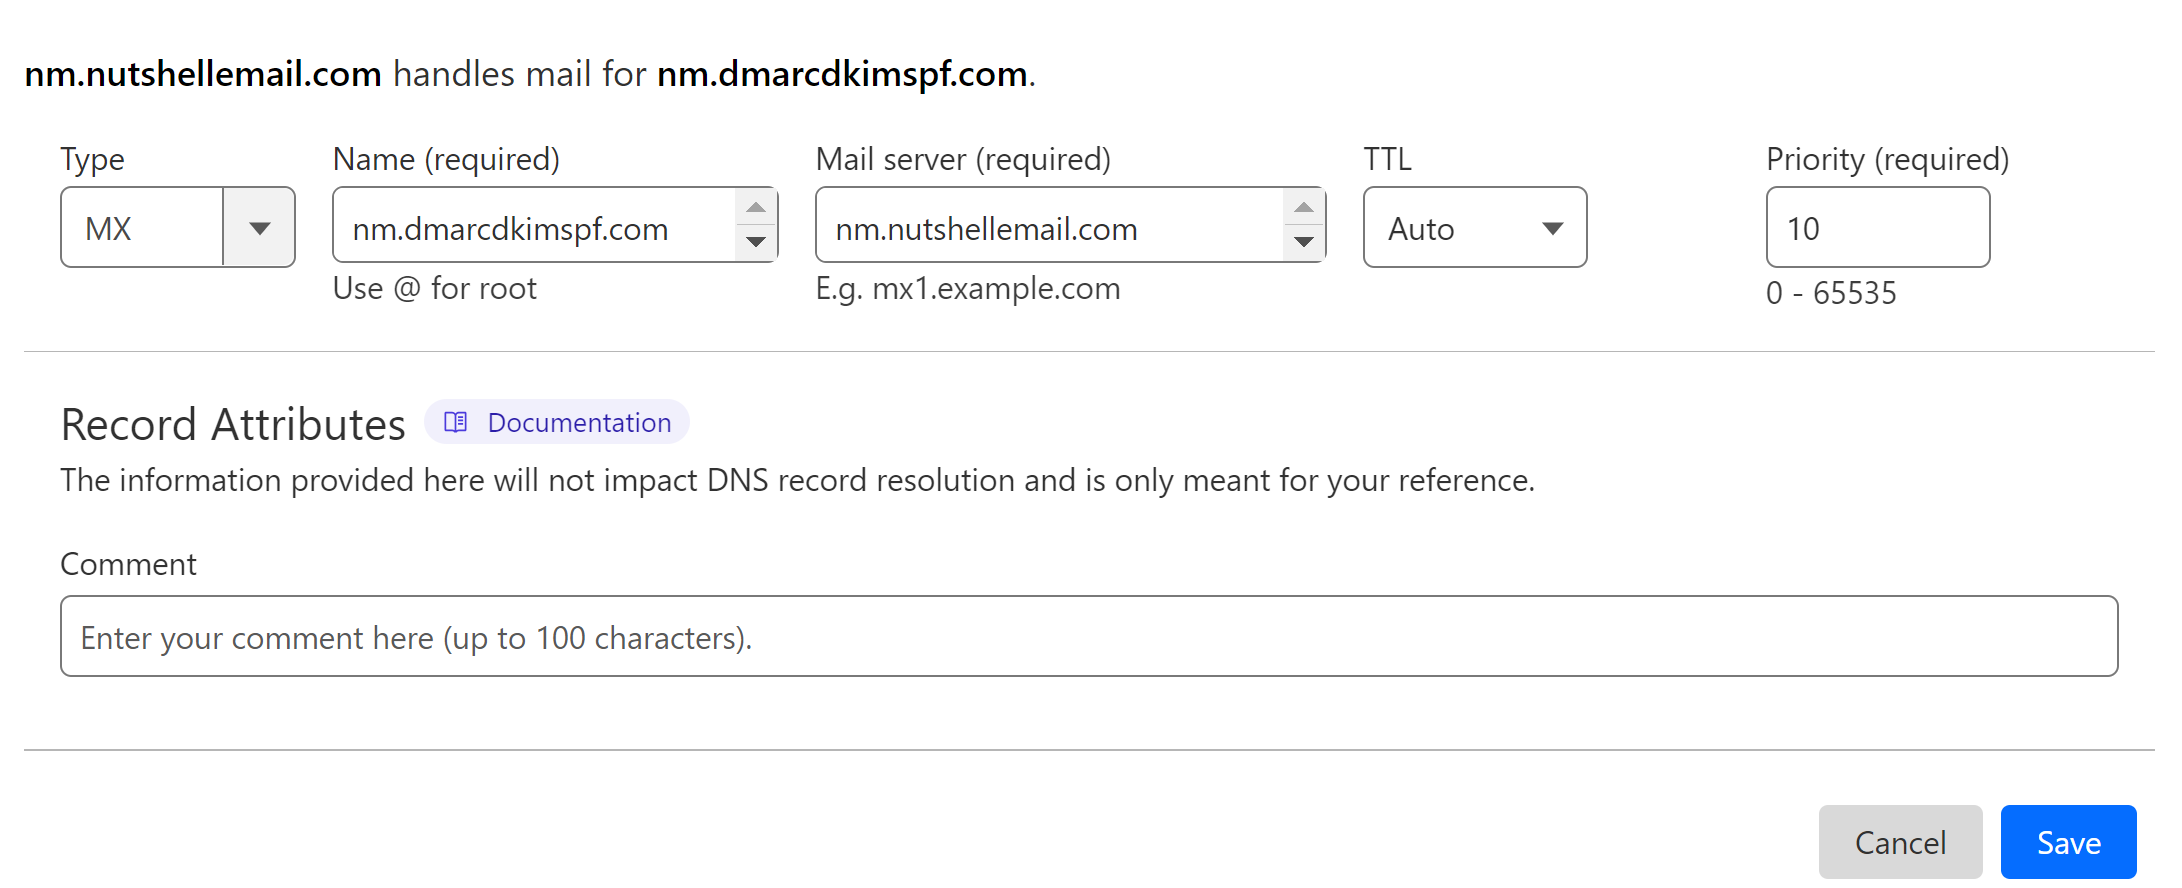
Click Add Record and select type MX.
Add the record name: nm.dmarcdkimspf.com.
Add the record value: nm.nutshellemail.com.
Select priority 10 and click Save.

Add Nutshell DKIM Record:
Select type CNAME.
Copy the record name and value from Nutshell.
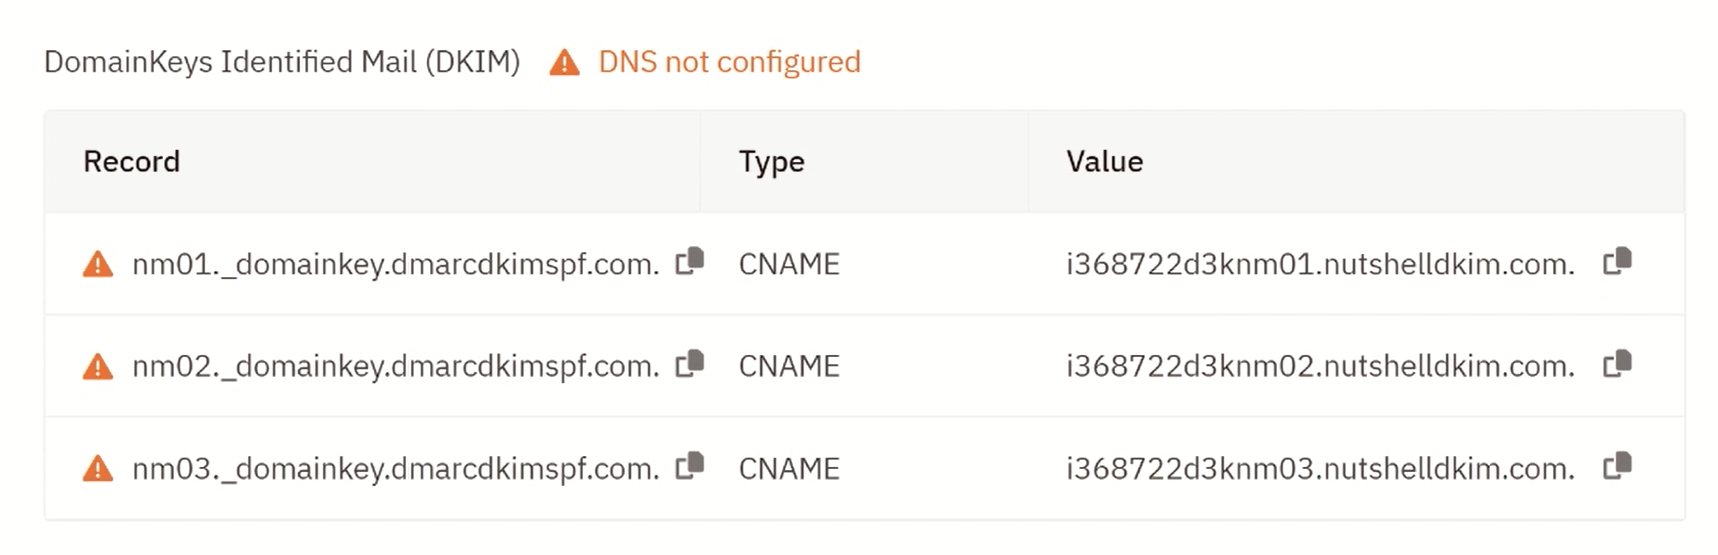
Paste them into the Name and Target fields respectively.
Turn off the proxy and Save.
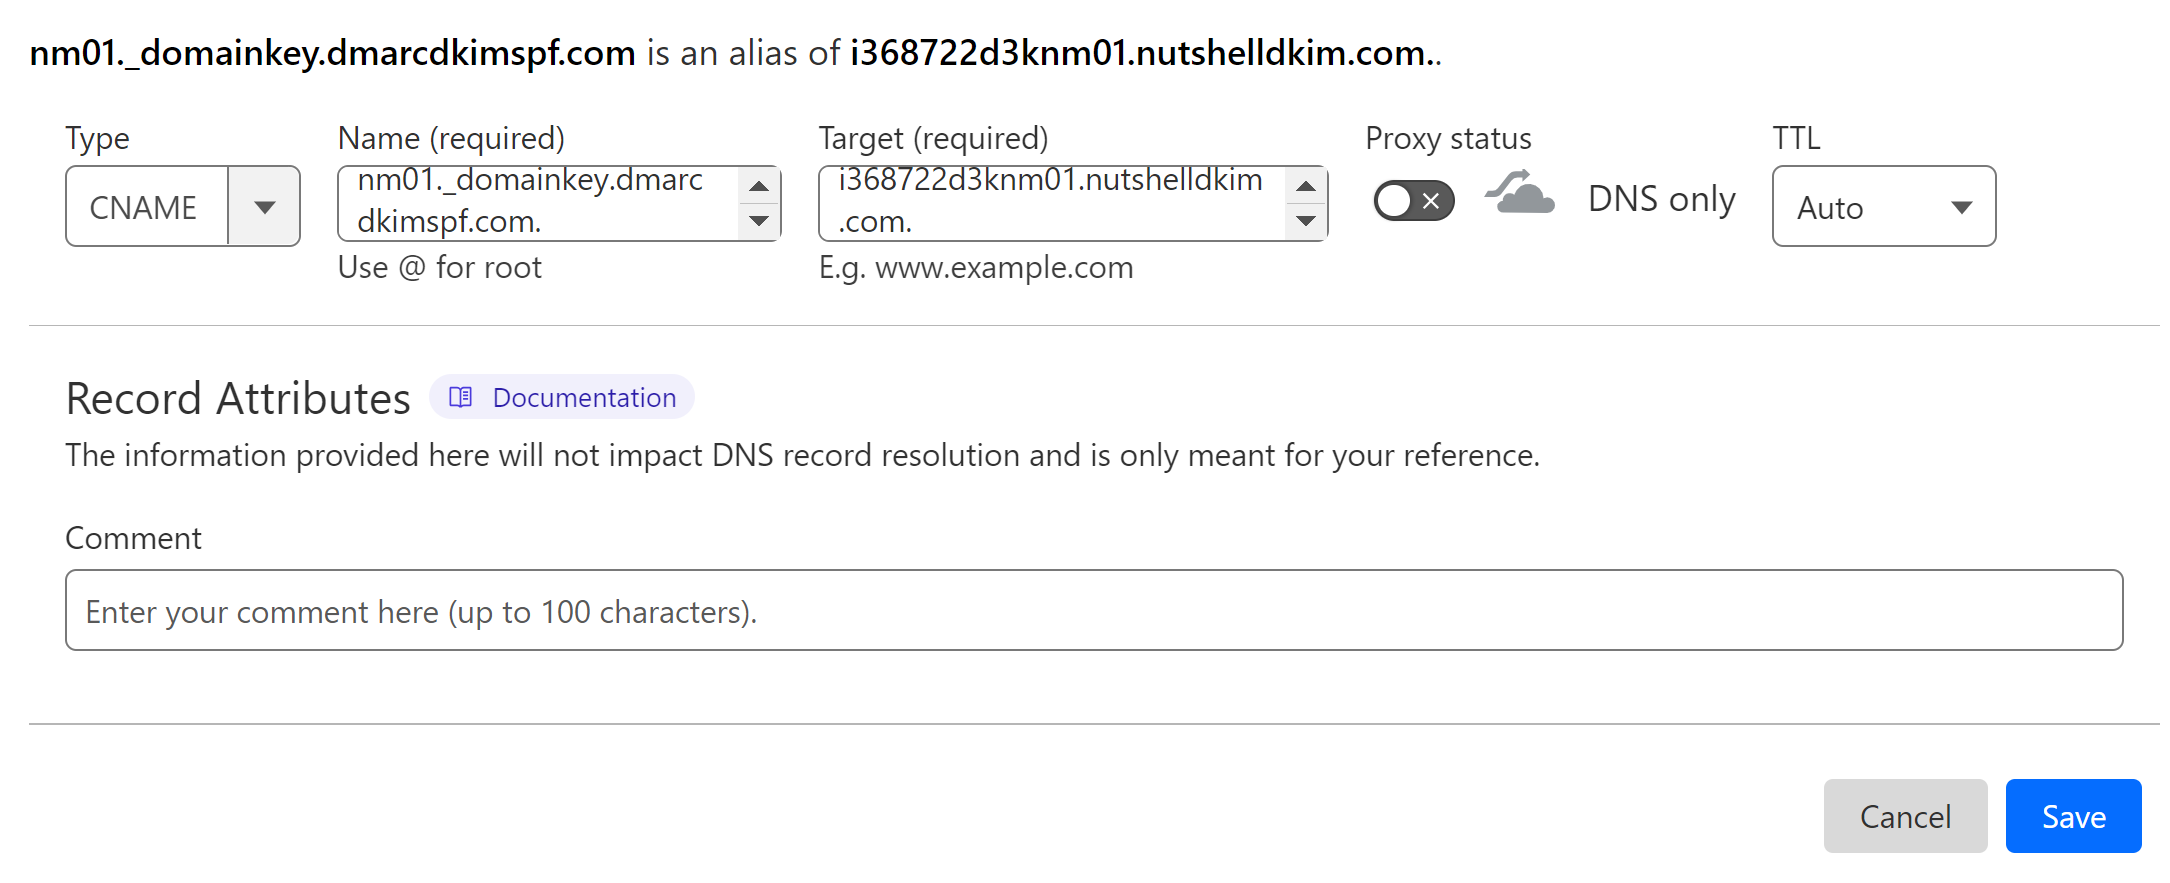
Repeat the same process to add all three DKIM records.


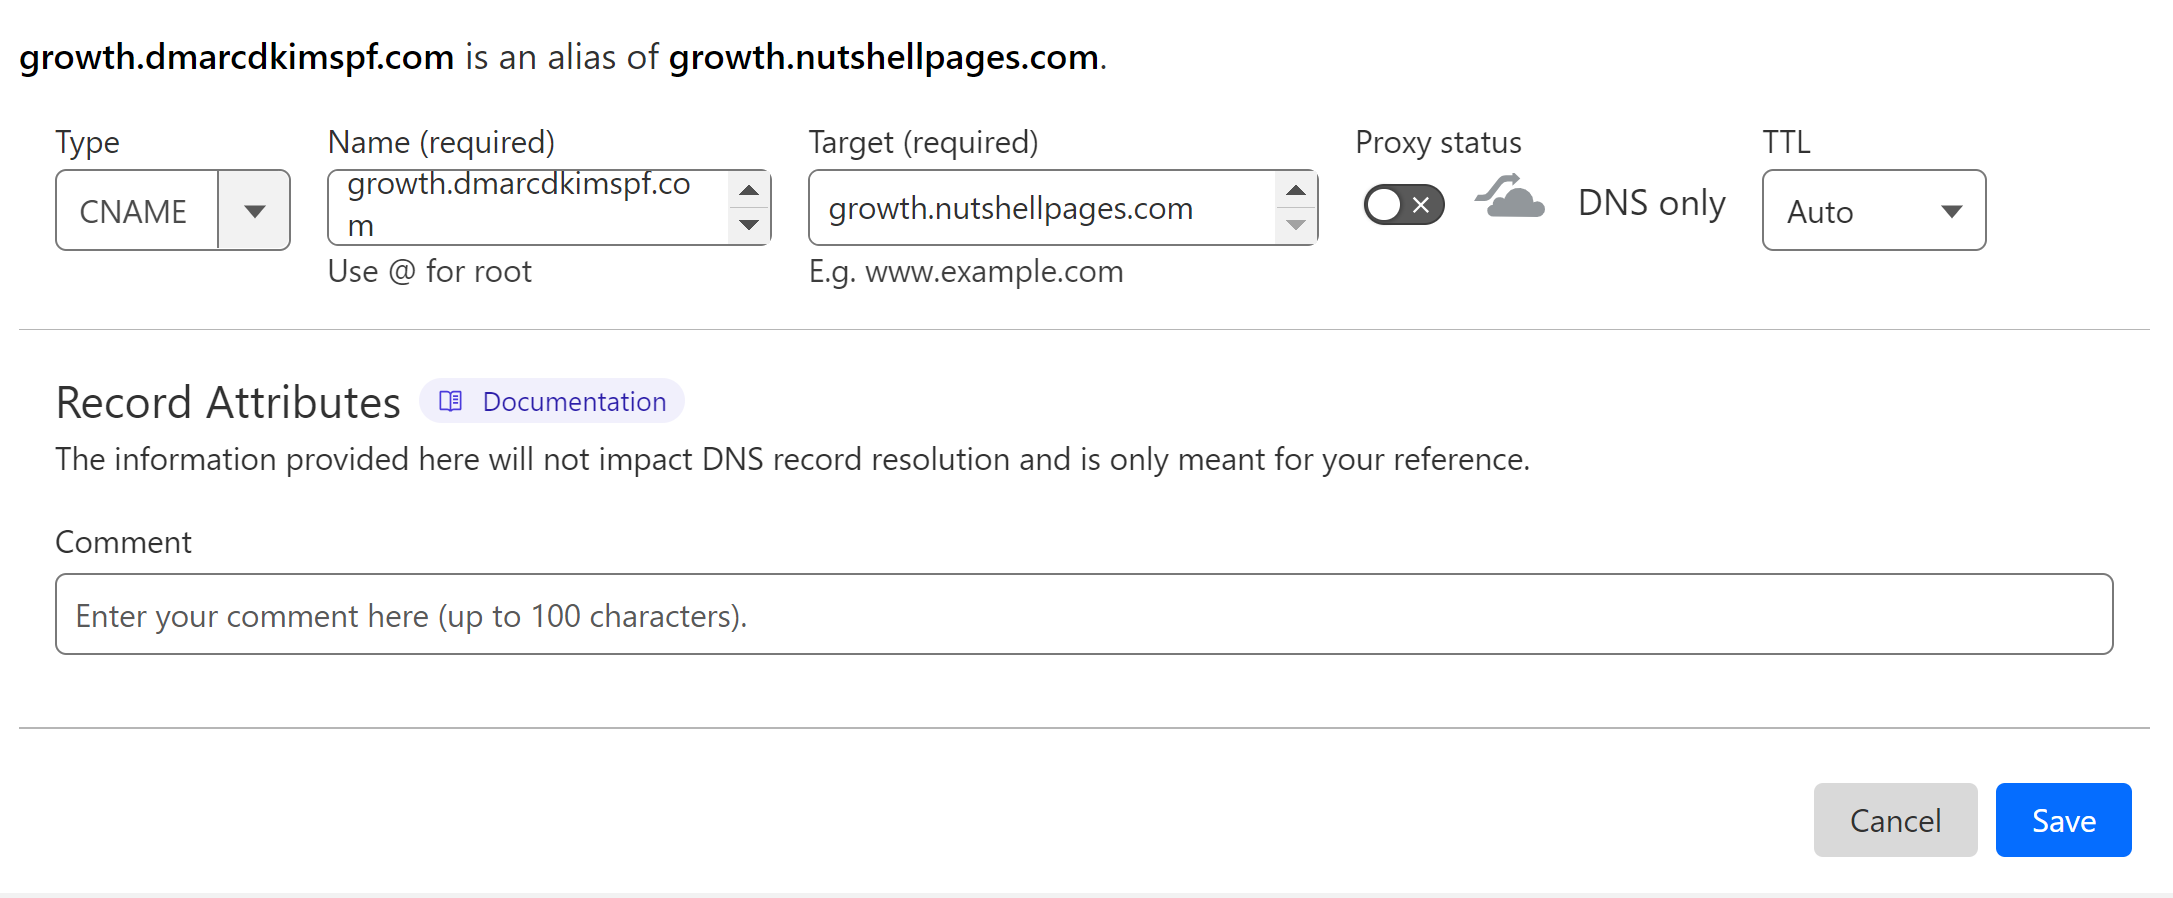
Add Nutshell Tracking Record:
Select type CNAME.
Add the record name: growth.dmarcdkimspf.com
Add the record value: growth.nutshellpages.com
Turn off the proxy and click Save.
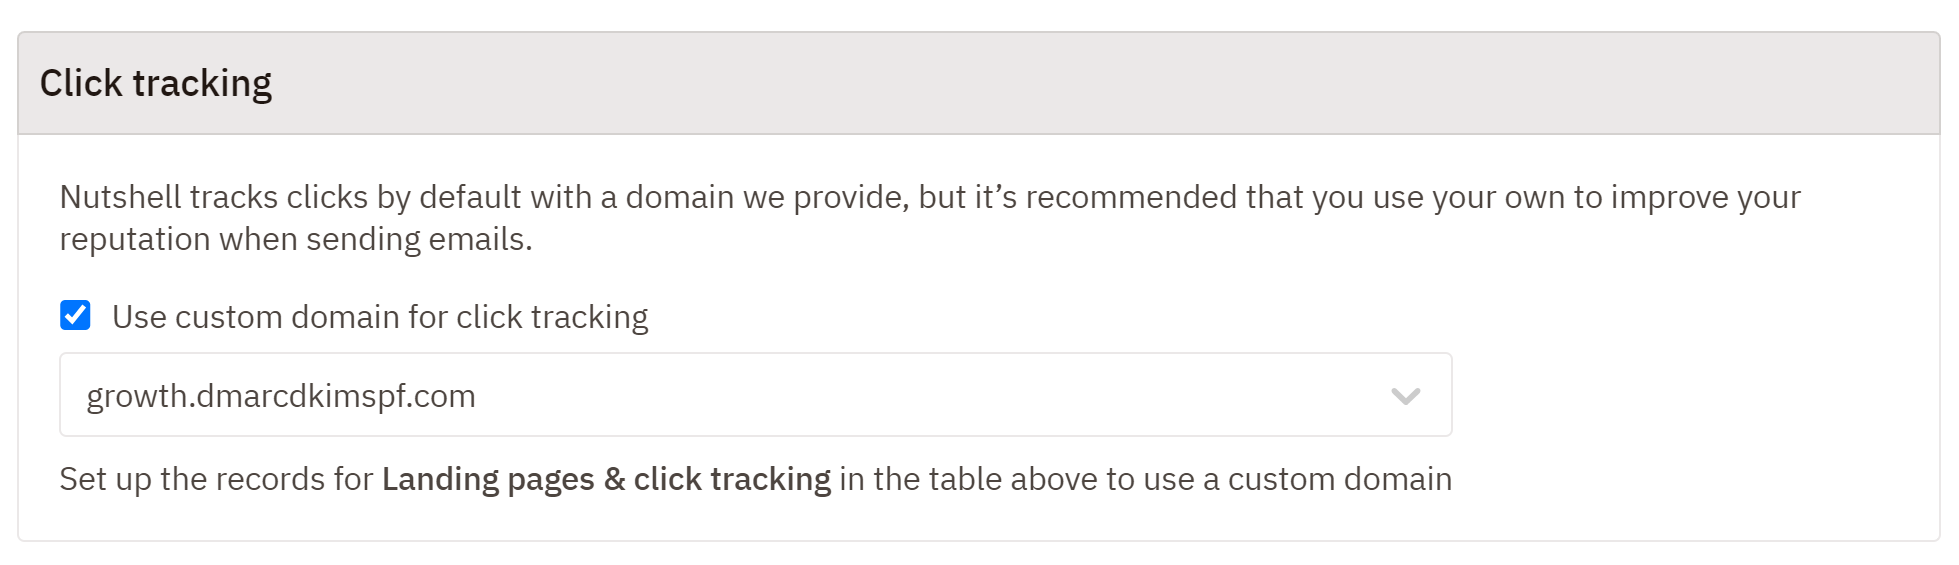
Once the record is verified, check the box for "Use the custom domain for tracking."


Add Nutshell DMARC Record:
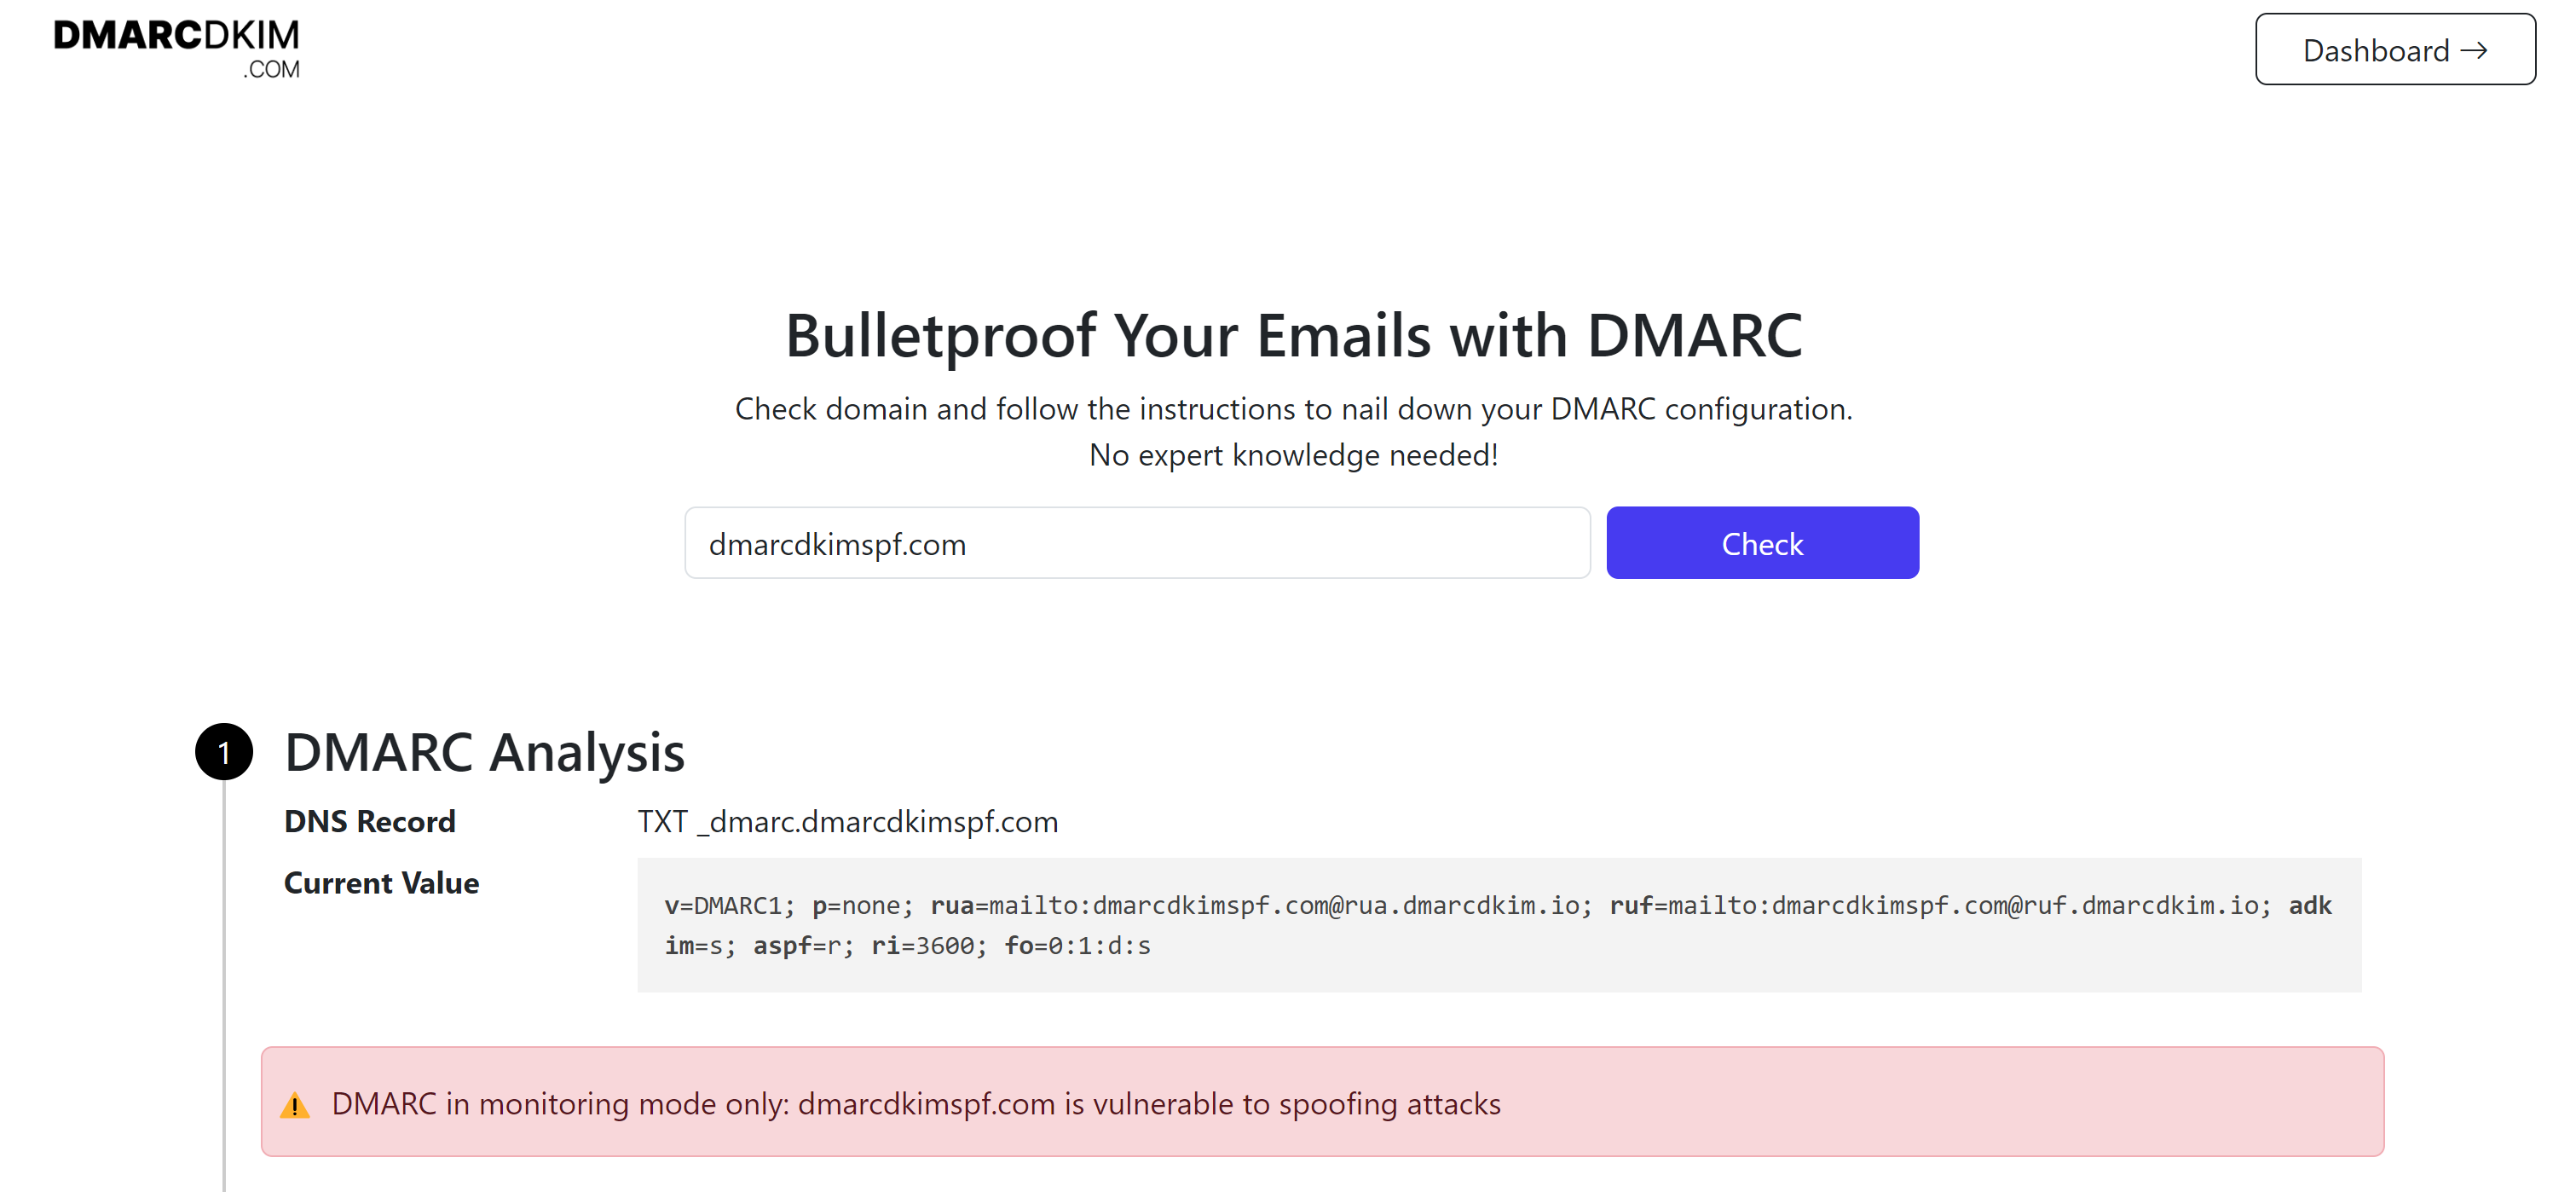
To generate an effective DMARC policy that actually protects your domain and gives you actionable insights into your DMARC reports, use the DmarcDkim.com DMARC Check tool.
Go to the DMARC Check Tool.
Add your domain name and click Check.
Copy the Record name and Suggested value and add them to your DNS provider.
Click Sign up now, and add your business email to access the reports dashboard.
Here, click the red badge and hit the Check DNS Records button.
The domain is now verified and it will start receiving DMARC reports after 24 hours.

Verify DNS Records:
After adding all the records, refresh the page to update the status. If the records are verified, you should see green tick marks with each record.
NOTE: Record verification may take up to 24 hours.
If the records are not verified after 24 hours, it points to a potential misconfiguration in your DNS setup. To troubleshoot the domain authentication issues, hire a DmarcDkim.com expert.
Check your domain for DMARC, DKIM, SPF and MX records. Get a free report.