Everlytic DMARC, DKIM and SPF Configuration - Domain Authentication
Is your domain really protected?
Enter your domain to run a live DMARC check and see how easy it for others to spoof your domain.
No sign-up required. Safe to try on any domain.
Articles
- DMARC for non sending domains
- ARC Is Being Retired
- Manual DMARC Monitoring vs Automated Monitoring
- Reverse Engineering Phishing
- ARC - Authenticated Received Chain
- Email impersonation scams explained
- Click/Link Tracking
- DMARC Enforcement in 2026
- Cyber Insurance and DMARC Enforcement
- TLS-RPT Record
- SMTP Smuggling
- DMARC record
- DNS and NS
- 🇩🇪 Welche Hosting Anbieter unterstützen DMARC
- MX records
- Domain Authentication
- The impact of Business Email Compromise
- CEO Scam
- DNS records
- Email Verification
- DMARC2 vs DMARC1
- DNS Leak
- DNS Check
- Return-path record
- CNAME record
- What Is MTA-STS and Why It Matters Now
- A quiet Google update just made SPF more forgiving
- DMARC Dashboard now available on Azure Marketplace
- DARA Records
- DKIM2 vs DKIM
- DMARC-Überwachung: Anbieter im Vergleich
- Understanding DMARC Reports
- DMARC Built for Europe. Hosted in Germany.
- SOA records
- CNAME vs. A Records
- Beste DMARC-Lösungen für kleine Unternehmen
- Die erste deutsche dedizierte DMARC-Plattform
- Cracking a 1024-bit DKIM Key
- Top 7 SPF Check Tools Compared 2026
- DNS Lookup
- Reverse DNS Lookup
- Der deutsche Bundestag hat ein Spoofing-Problem
How to Setup Everlytic DMARC, DKIM and SPF DNS Records?
SPF (Sender Policy Framework) helps prevent email spoofing by allowing domain owners to specify which mail servers are authorized to send email on behalf of their domain. DKIM (DomainKeys Identified Mail) adds a digital signature to your email headers, enabling the recipient's server to verify that the email has not been altered during transit and that it indeed comes from your domain. DMARC (Domain-based Message Authentication, Reporting, and Conformance) builds on SPF and DKIM. It allows domain owners to specify how receiving mail servers should deal with emails that fail SPF or DKIM checks.
You can configure these DNS records in the Everlytic help center. Add them to your DNS provider for verification. By doing this, you can prevent emails from going to the spam folder.
Setup Everlytic DKIM:
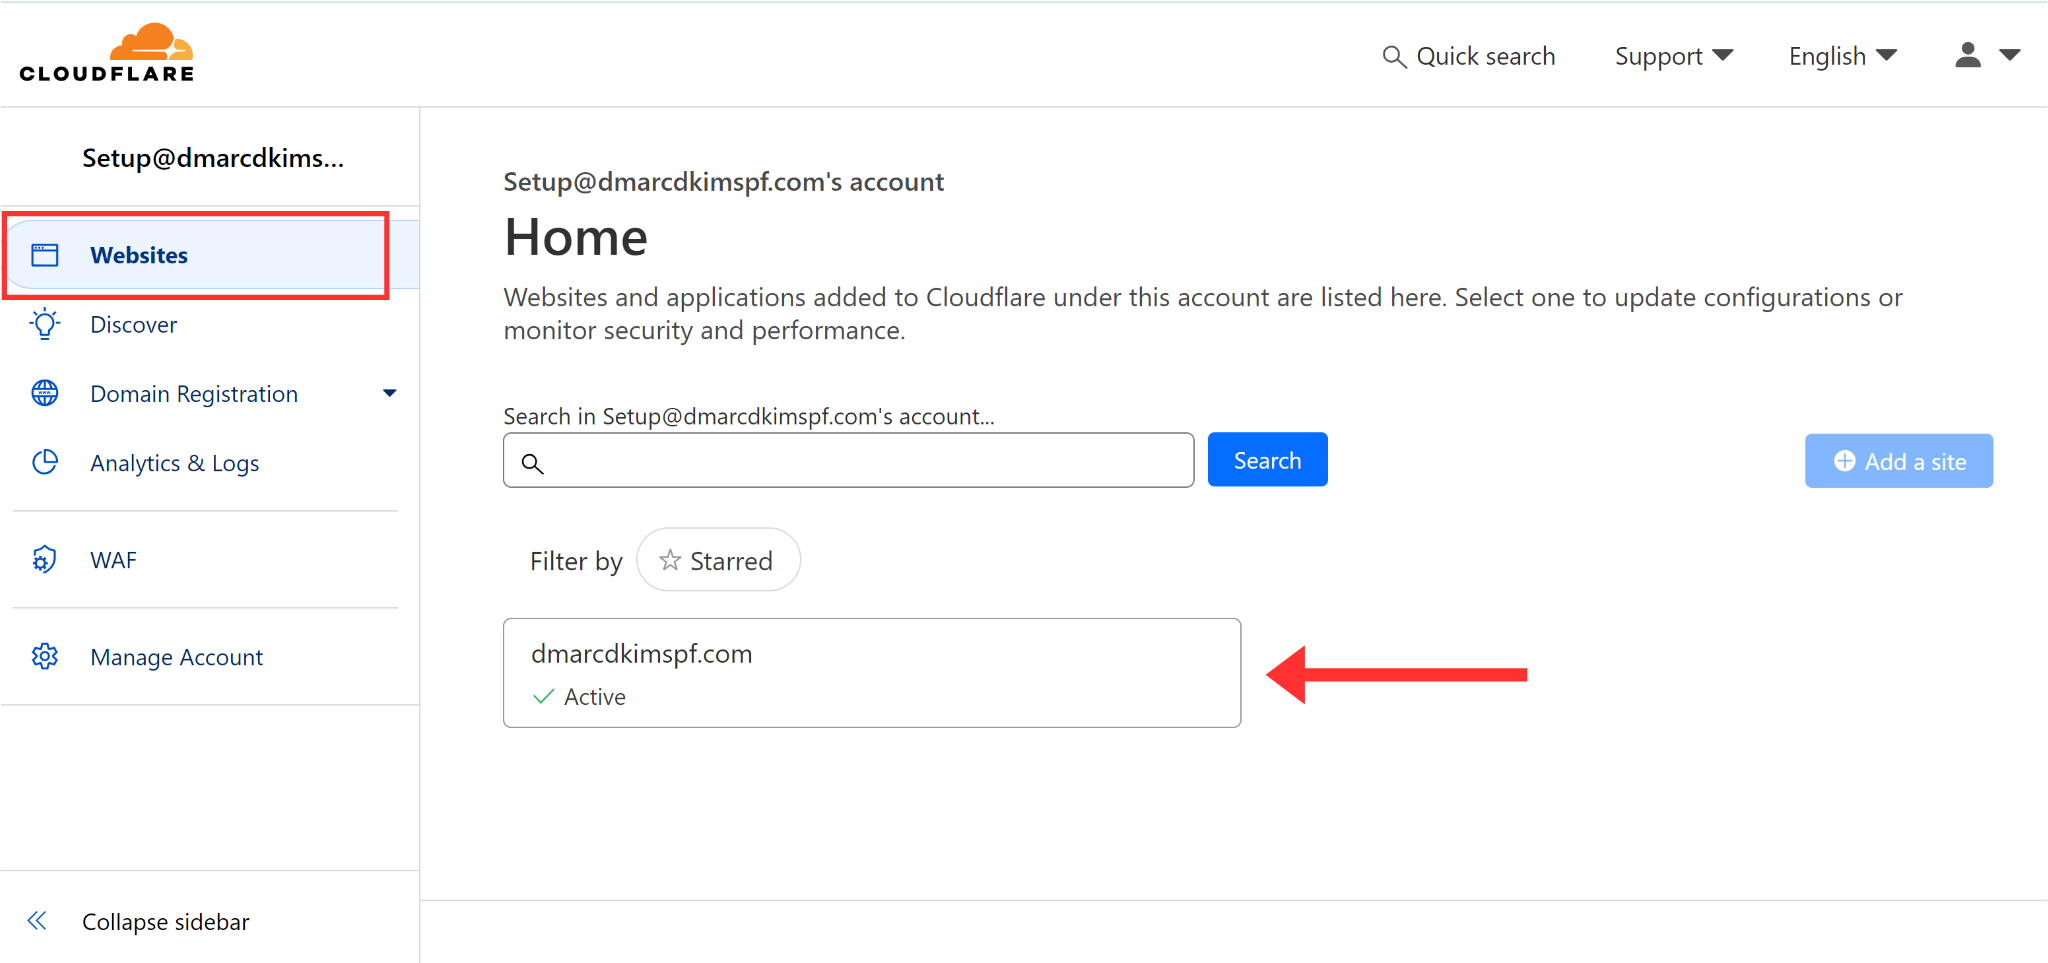
Login to your DNS provider. We are using Cloudflare for this guide.
-
Click on the domain you want to authenticate.
-
Go to the DNS tab and click Add Record.
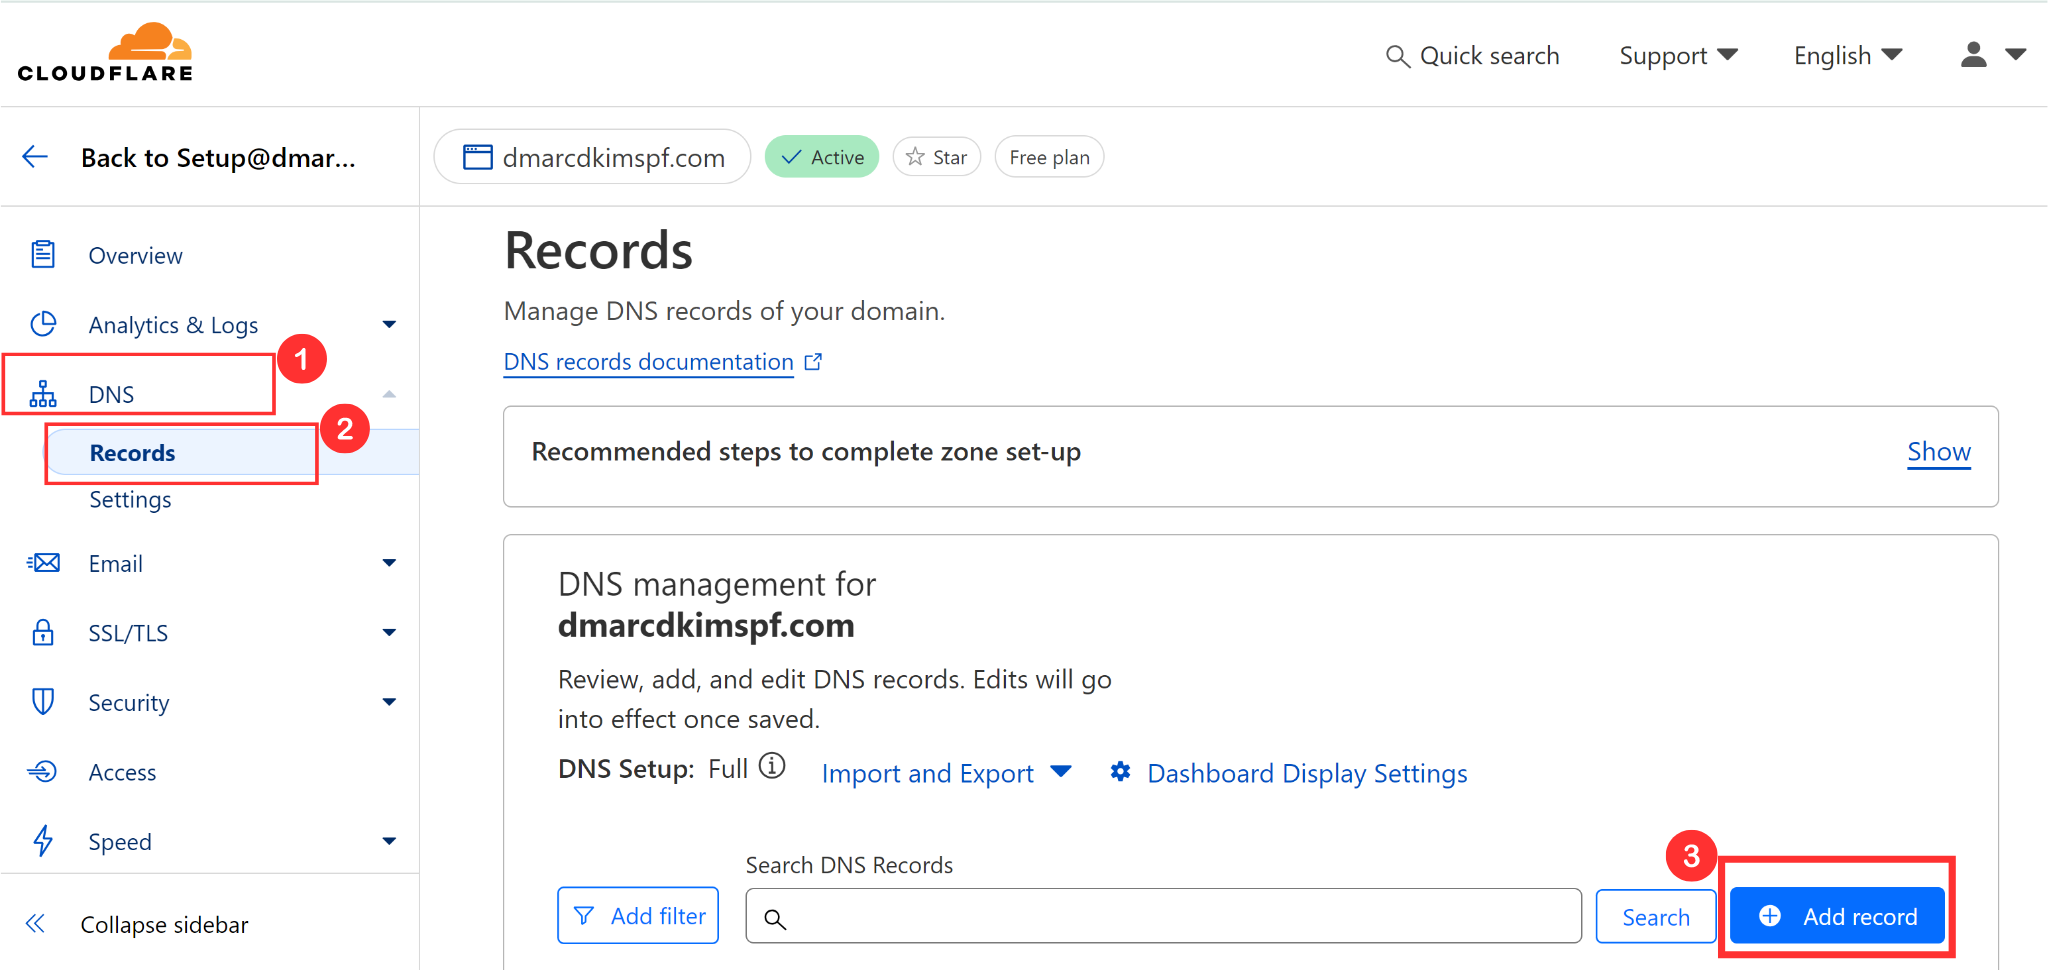
Add the following DKIM records. Replace "customerdomain" with your domain name.
Turn off the proxy status for each record before saving.


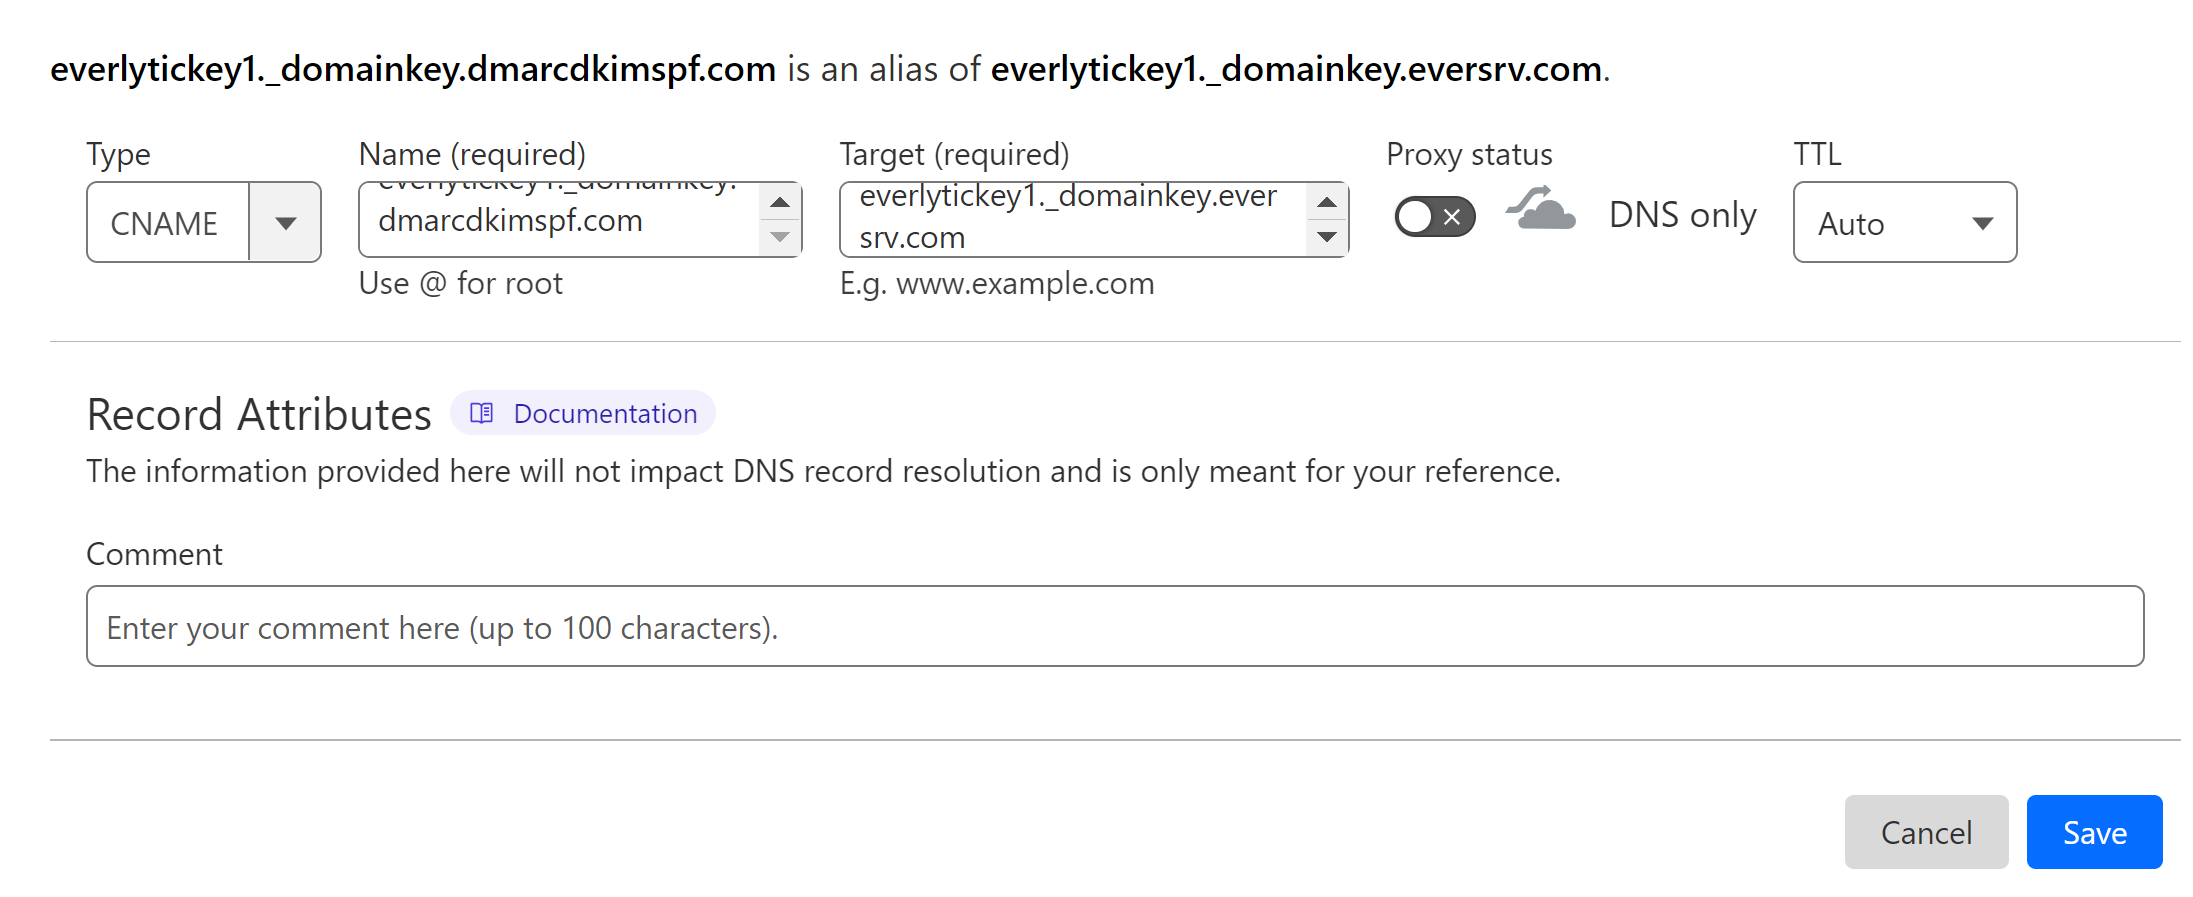
Everlytic DKIM 1
Type: CNAME Hostname: everlytickey1._domainkey.customerdomain.com Value: everlytickey1._domainkey.eversrv.com
Everlytic DKIM 2
Type: CNAME Hostname: everlytickey2._domainkey.customerdomain.com Value: everlytickey2._domainkey.eversrv.com
Setup Everlytic SPF:
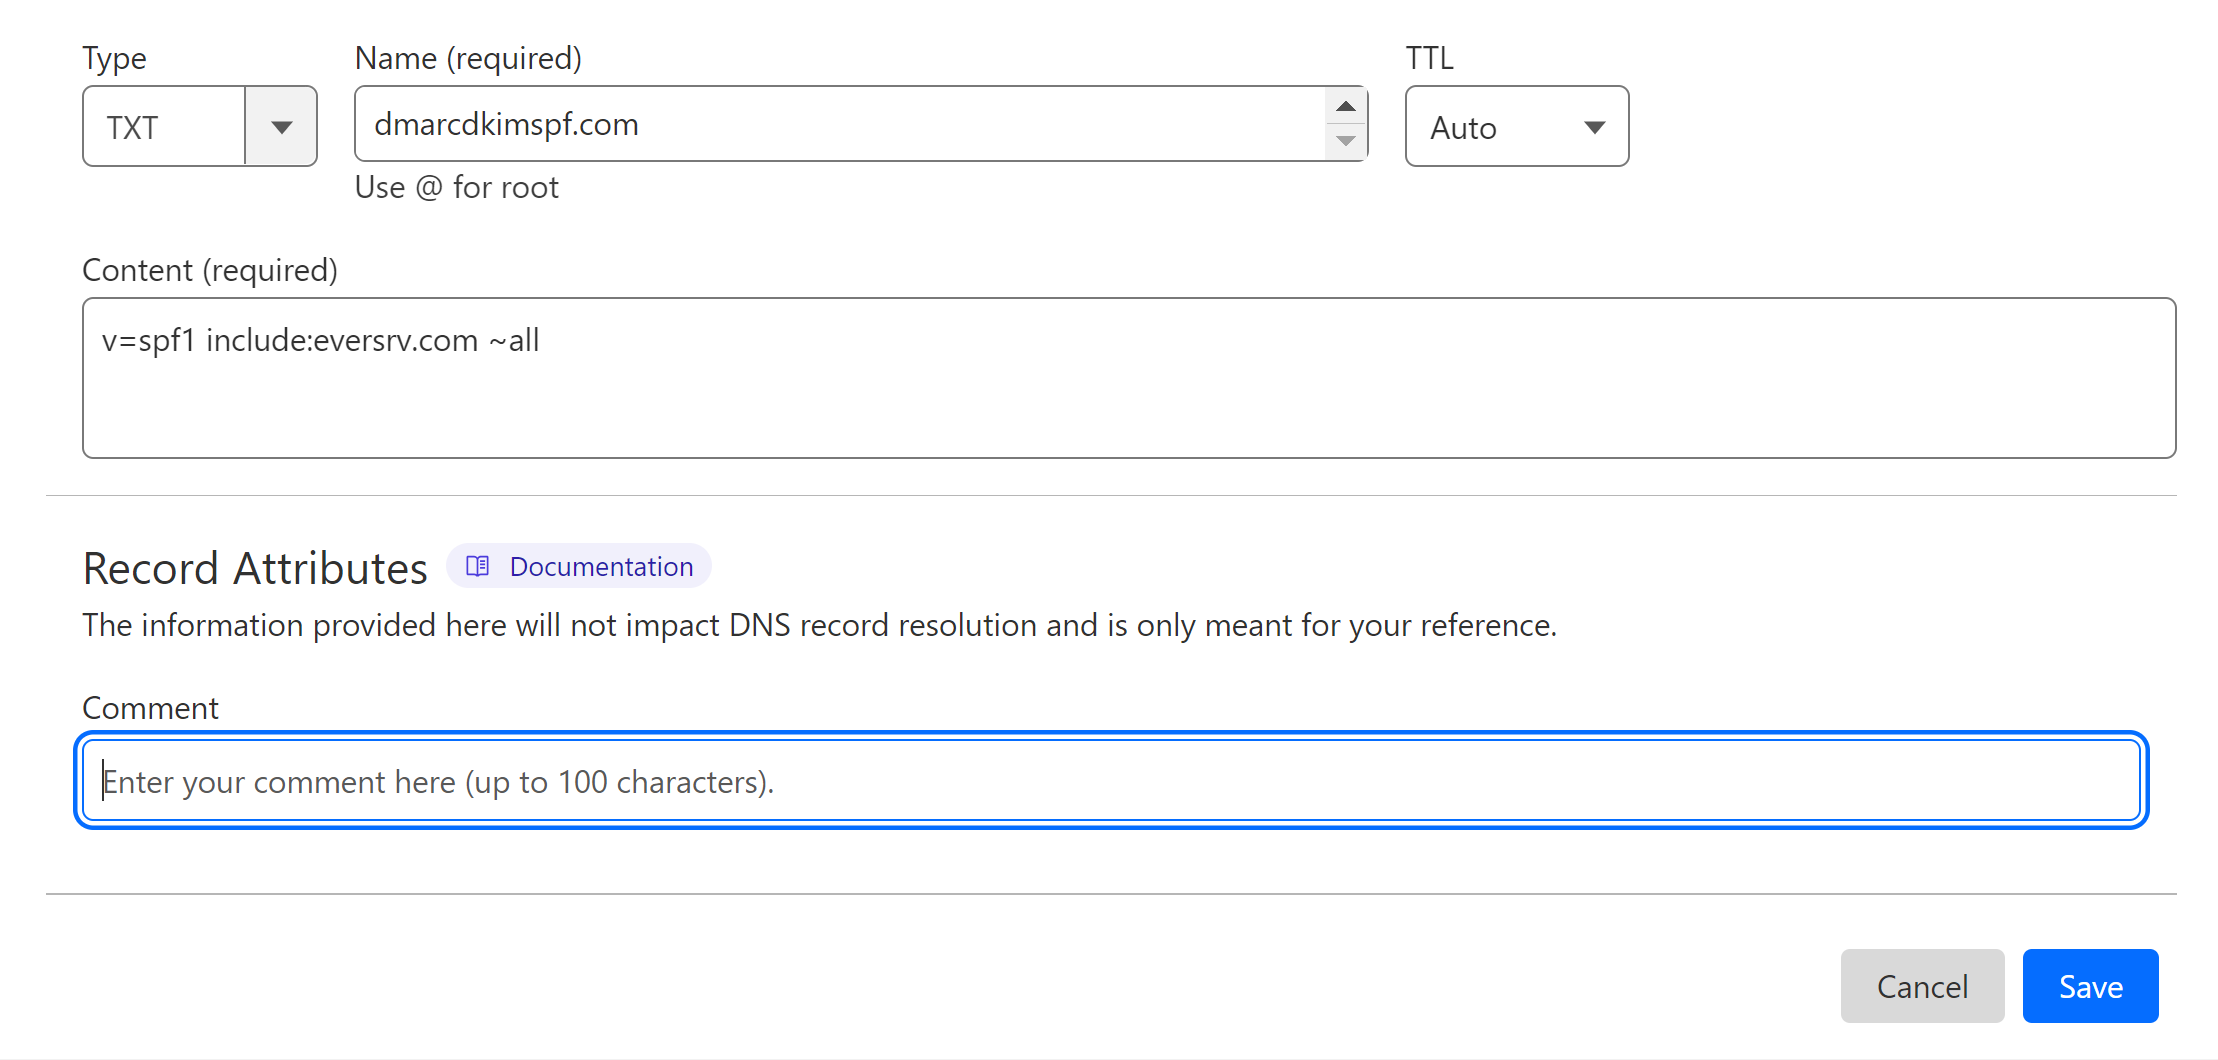
Click Add Record and select type TXT.
In the Name field, write your domain name.
In the content field, write the SPF value: v=spf1 include:eversrv.com ~all.
-
Click Save.

Merge Multiple SPF Records:
If your domain has an existing SPf record, merge it with the Everlytic SPF value to avoid conflicts.
Go to the SPF Merge Tool.
Add your domain name and Everlytic SPF value.
-
Click Merge SPF Values.
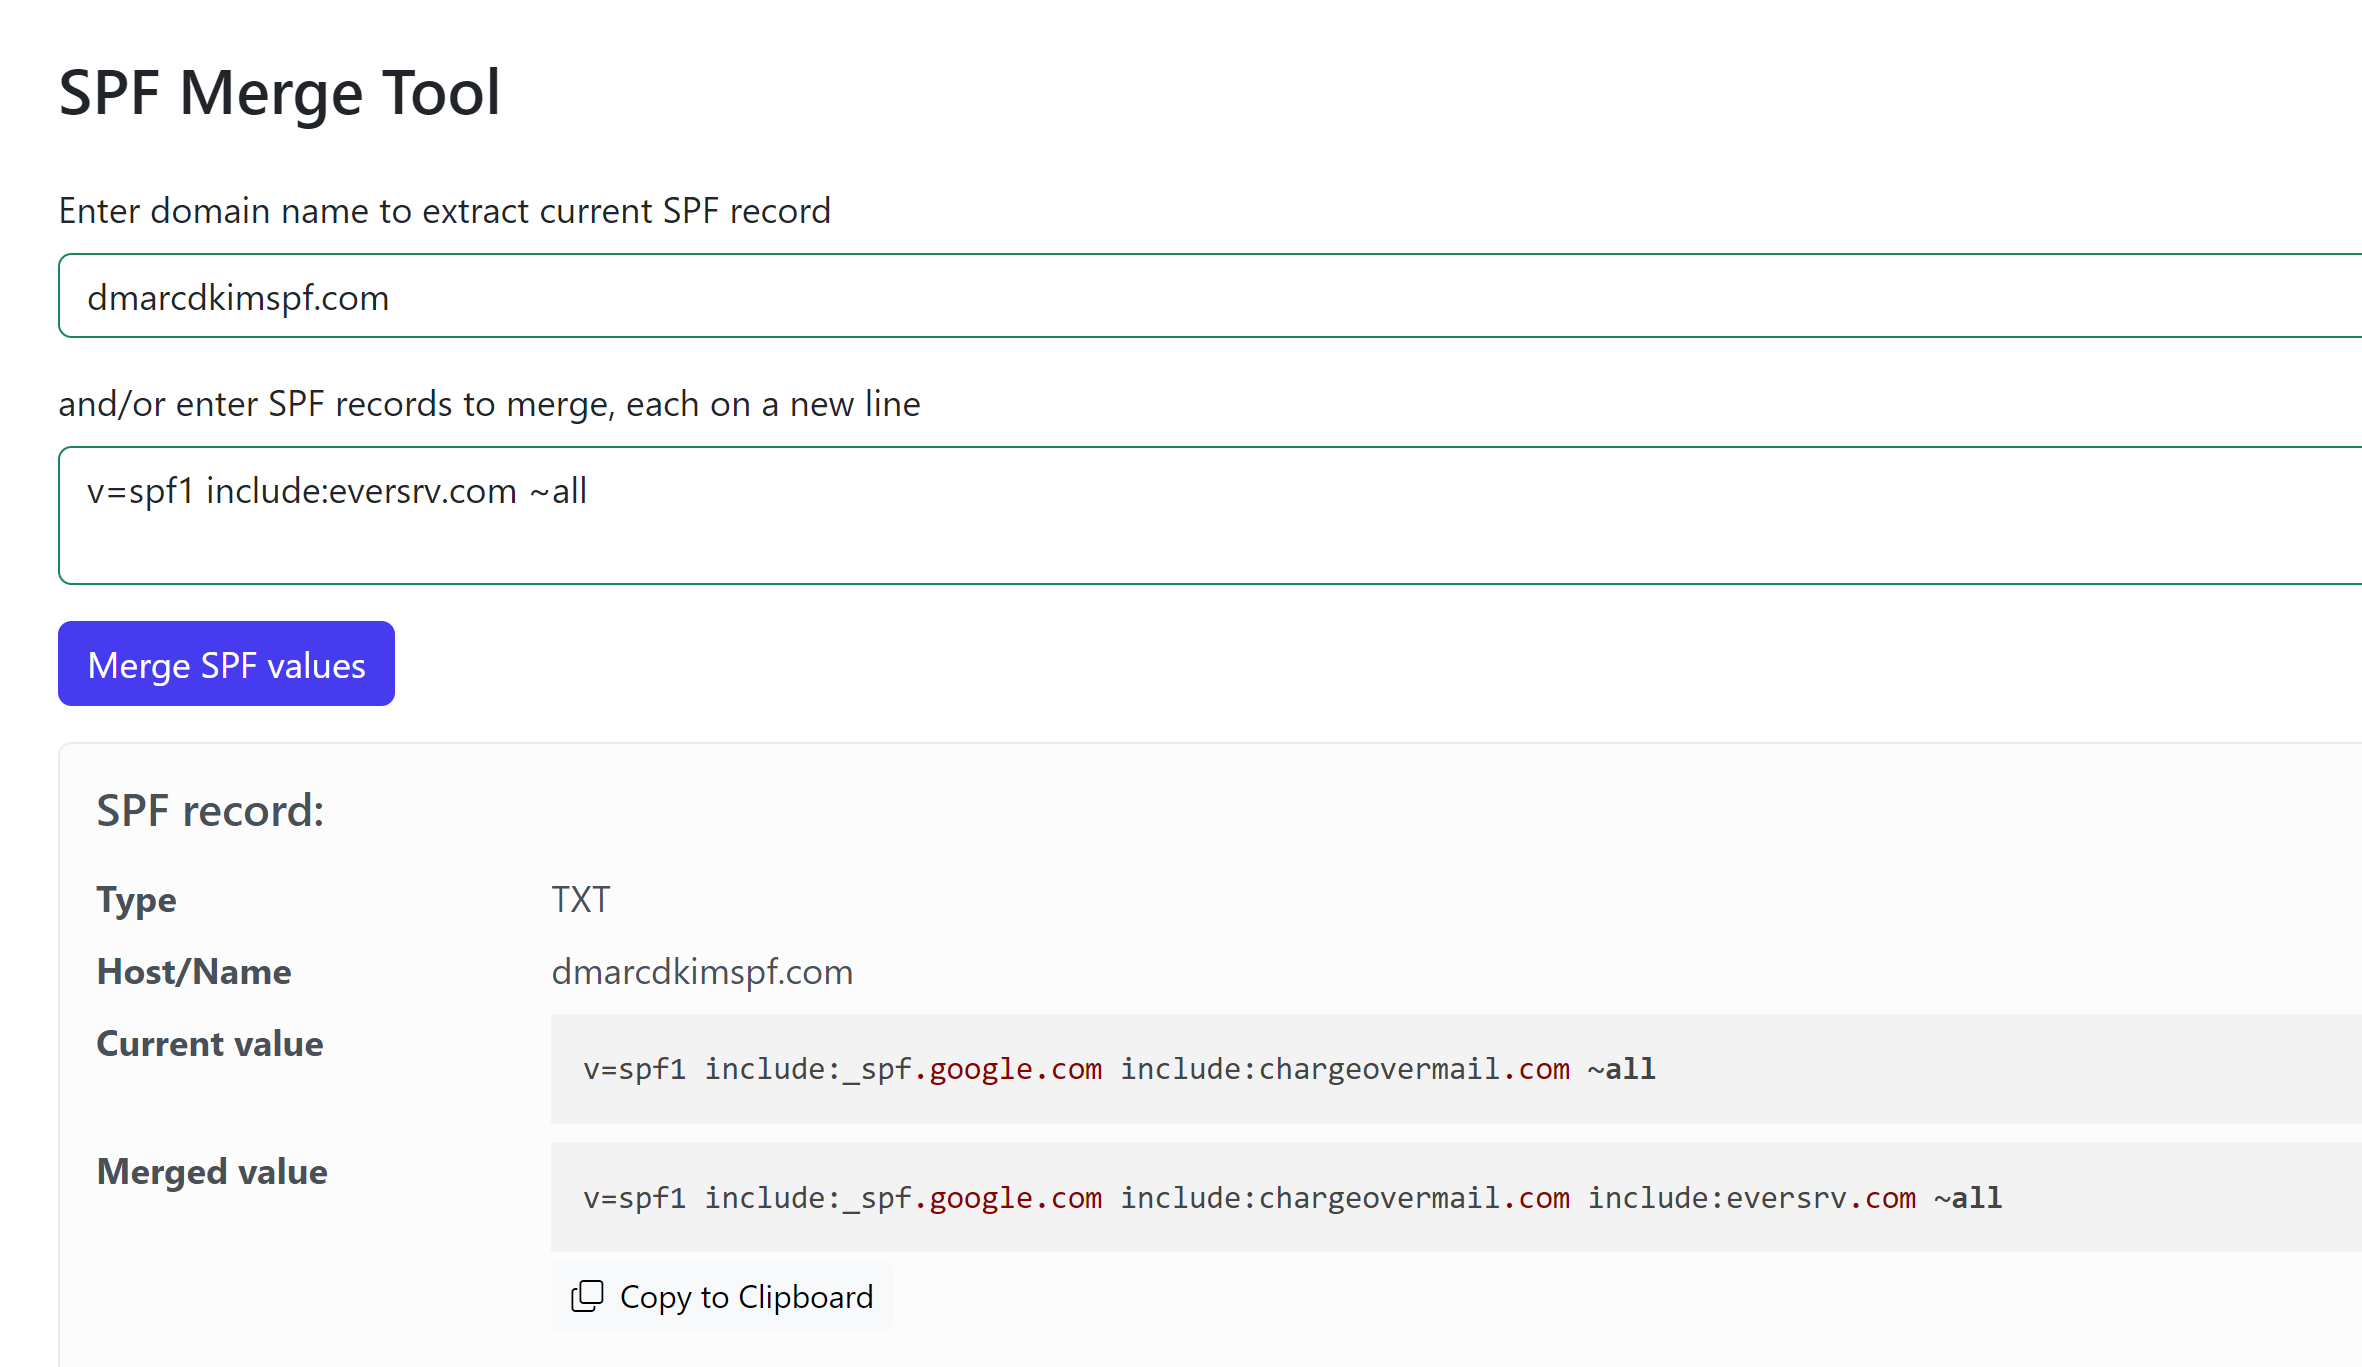
Replace your existing value with the Merged value.
Finally, click Save.

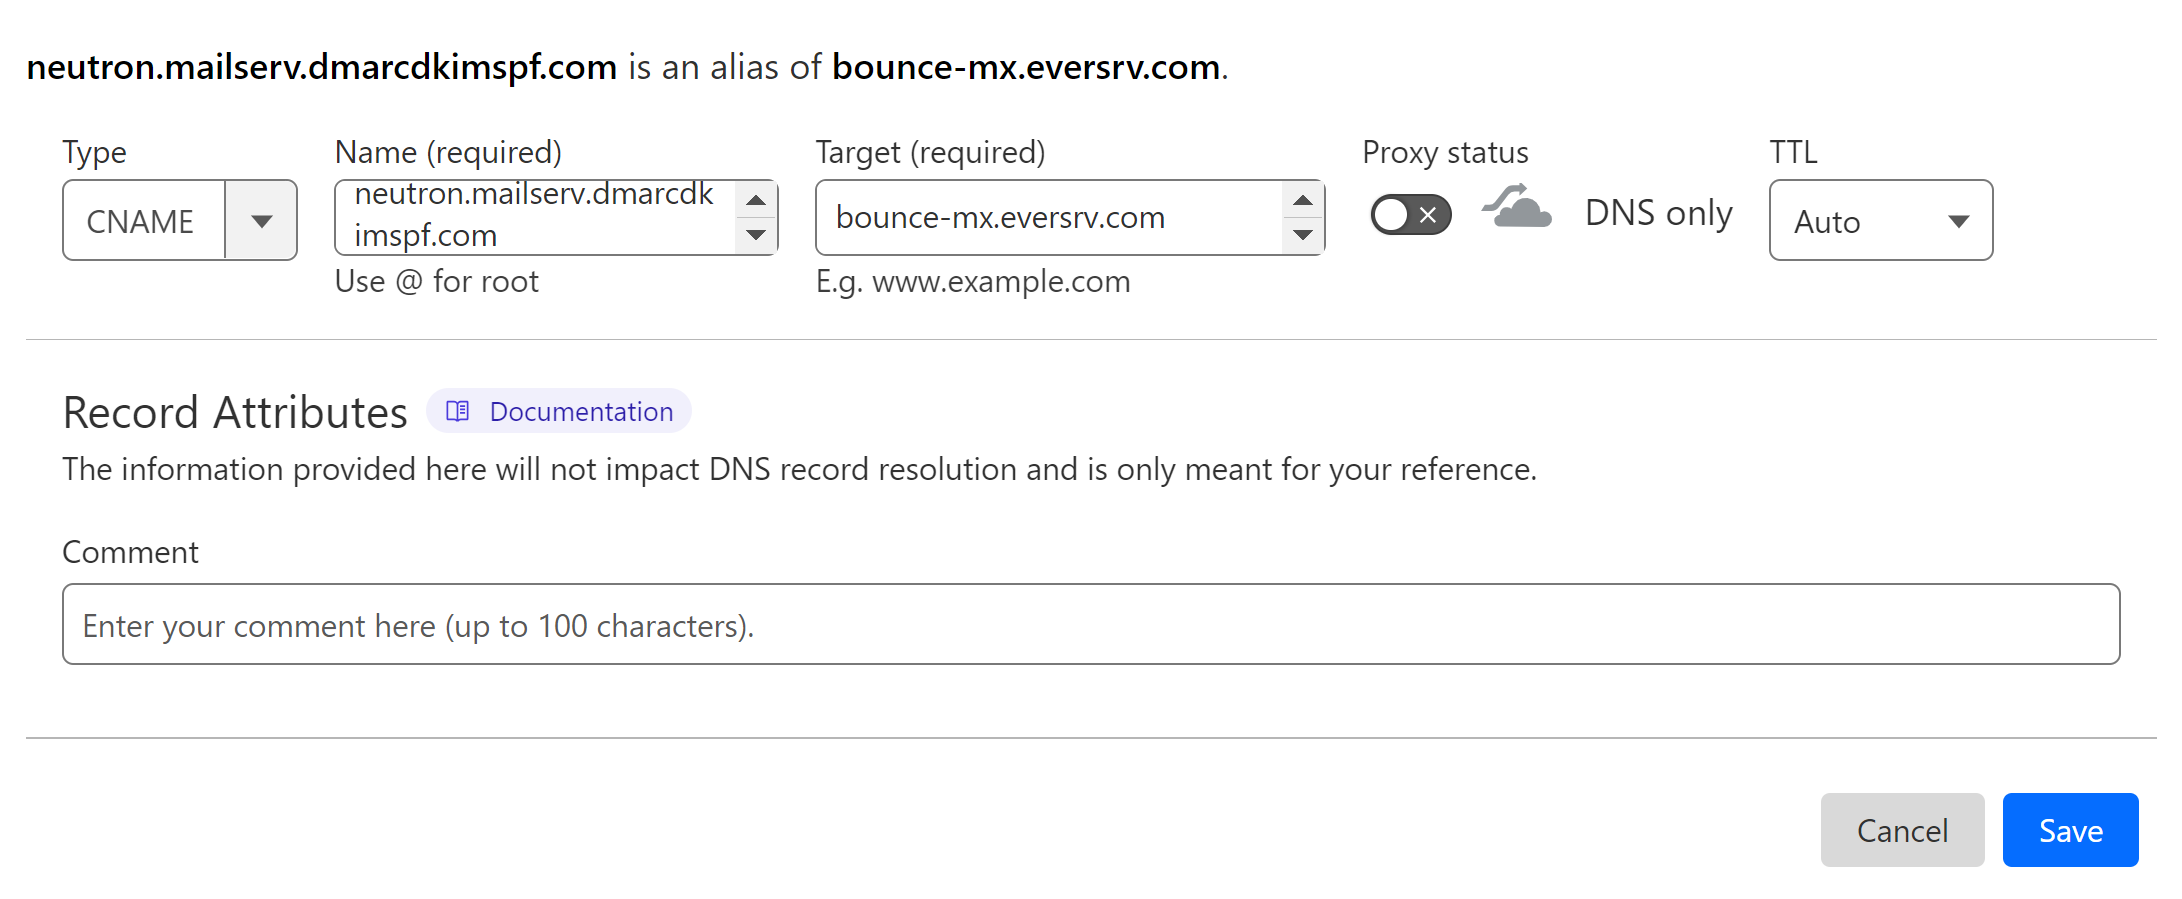
Setup Everlytic Bounce Records:
Setup the following bounce records in your DNS dashboard. Replace "customerdomain" with your domain name. Turn off the proxy status for each record.
Everlytic Bounce 1
Type: CNAME Hostname: eversrv.customerdomain.com Value: bounce-mx.eversrv.com
Everlytic Bounce 2
Type: CNAME Hostname: neutron.mailserv.customerdomain.com Value: bounce-mx.eversrv.com
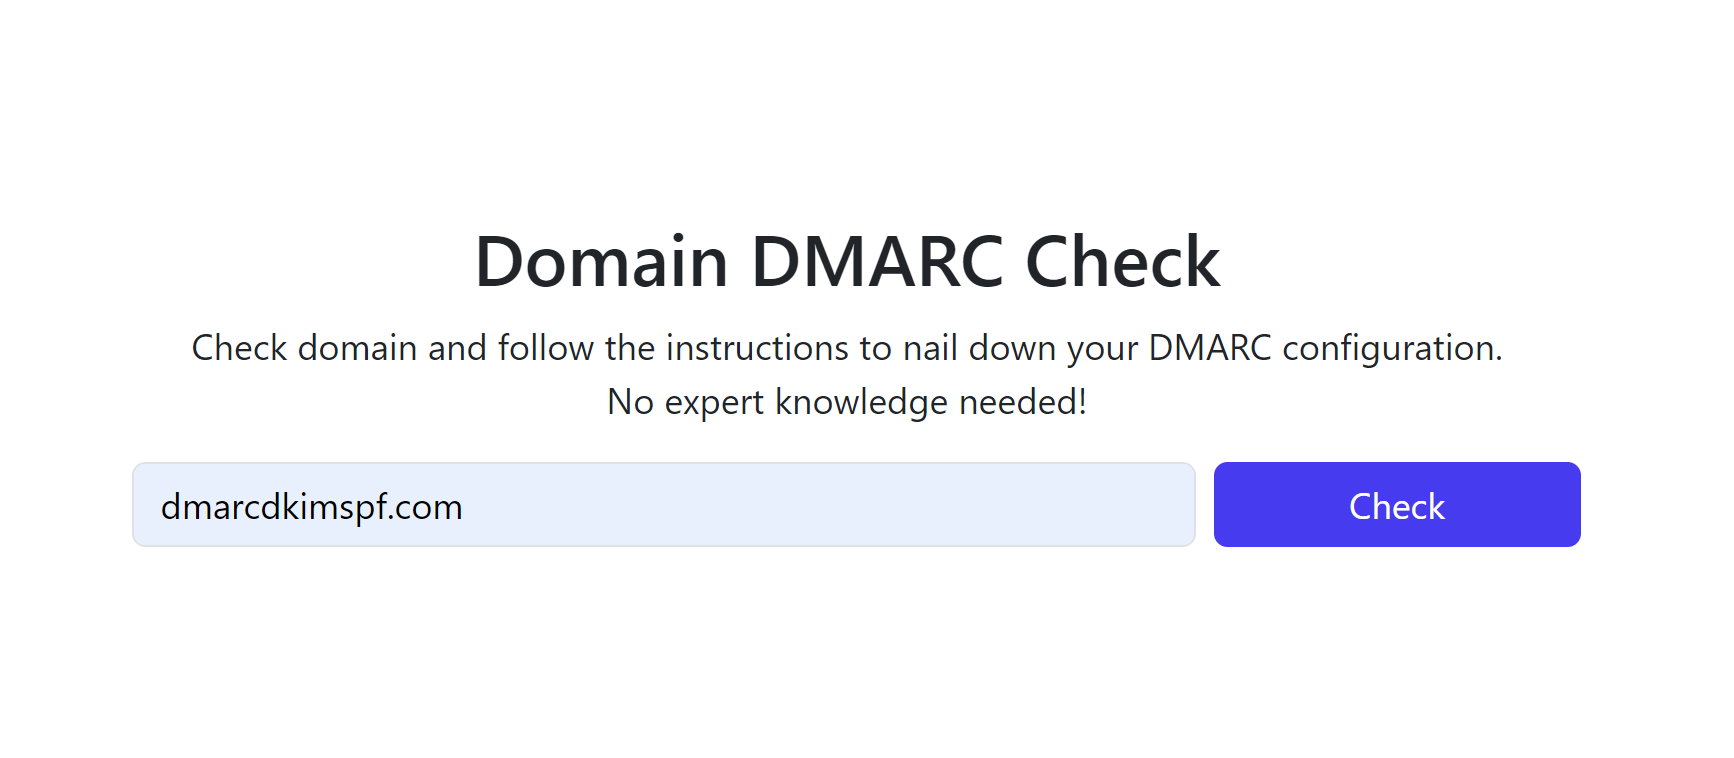
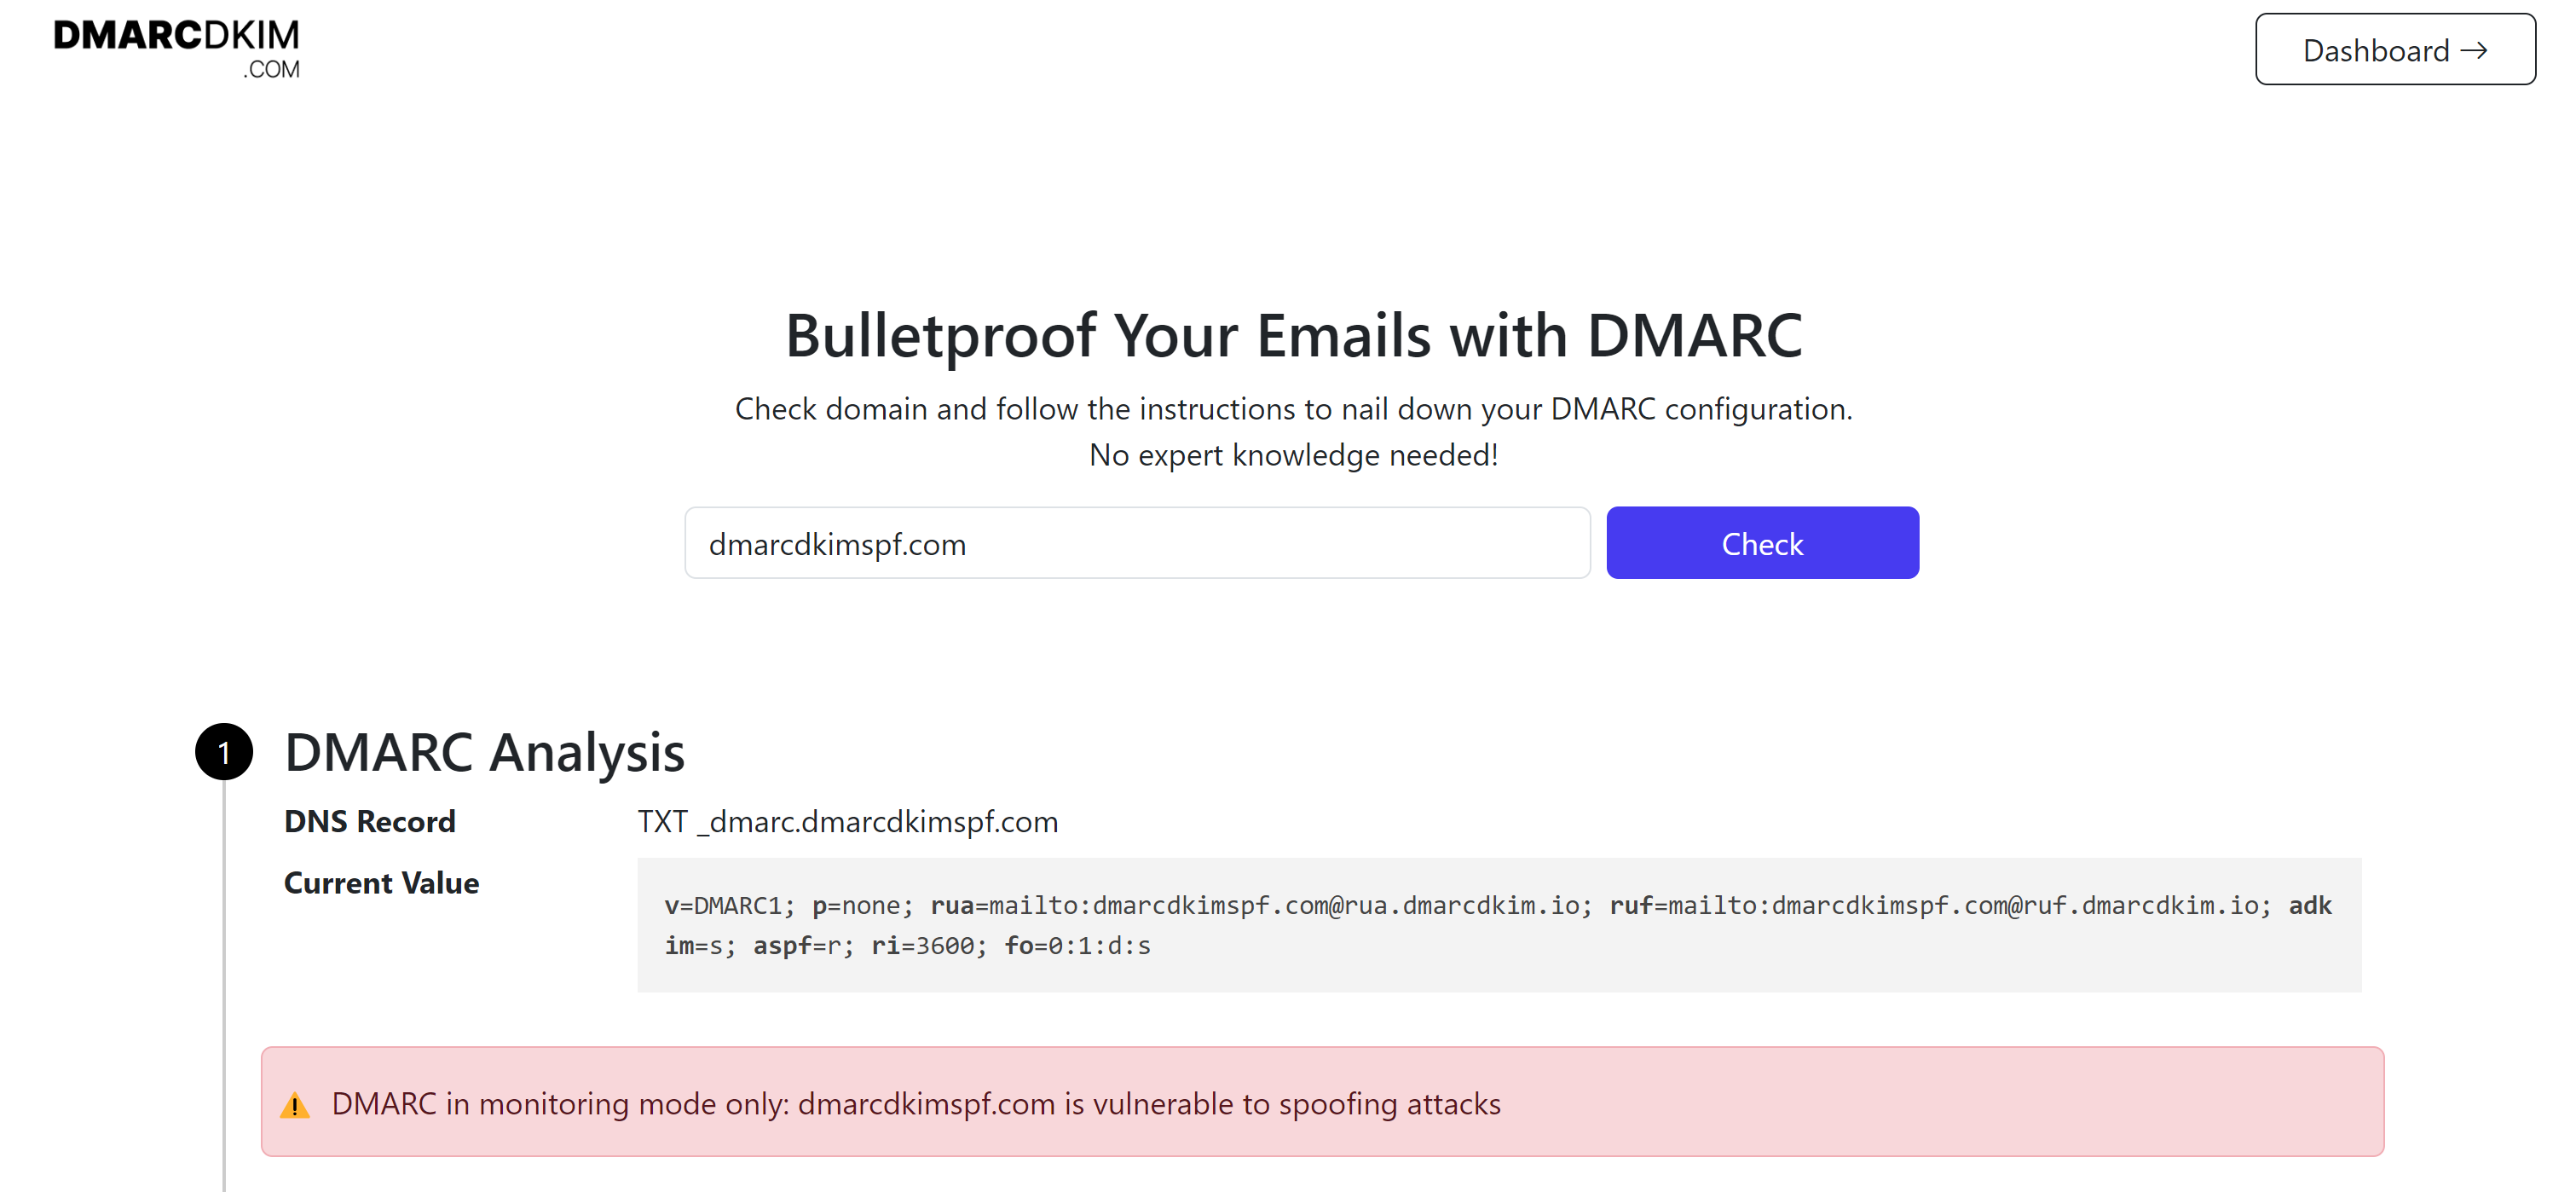
Setup Everlytic DMARC Record:
To generate a strict DMARC policy, use the DmarcDkim.com DMARC check tool. It also gives you insights into your DMARC reports so you can take measures to protect your domain.
Go to the DMARC Check Tool.
-
Add your domain name and click Check.
-
Copy the record name and Suggested value and add them to your DNS dashboard.
Click Sign up now to access the dashboard where you can see reports and DNS history.


For assistance and support, hire a DmarcDkim.com expert.
Check domain and follow the instructions to nail down your DMARC configuration.
No expert knowledge needed!